Official Airplanes and Rockets Observatory First Light on May
19, 2012
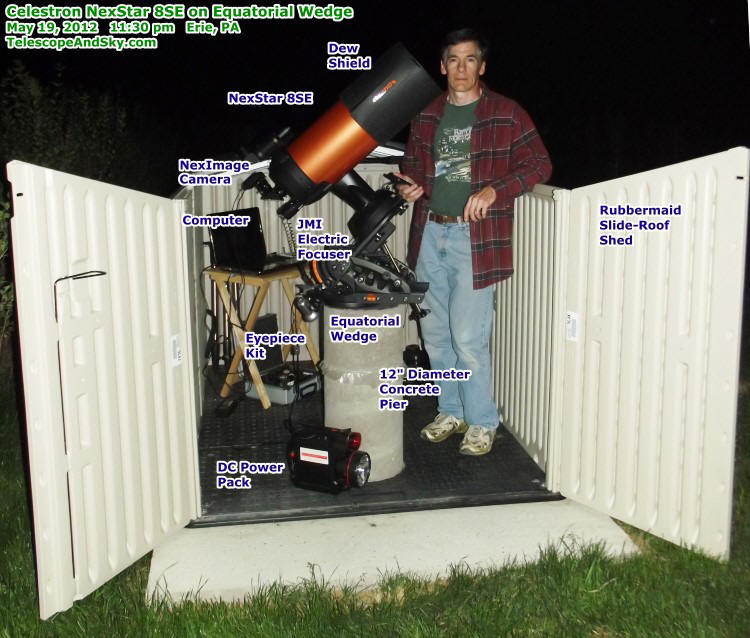
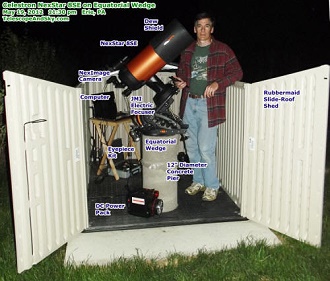
Voila! Here is the completed Airplanes and Rockets Observatory. Total investment:
~$2,500.
 The official Airplanes and Rockets
website observatory
is complete! First light for the entire setup was May 19, 2012. An alignment of
the equatorial was performed, and then a GoTo alignment was done. The result was
pretty good, but it's been better. I will need to take time to do a really precise
alignment of both. It was a clear night in Erie, with a few high, wispy clouds.
There was a lot of atmospheric unsteadiness, so image quality varied considerably.
The JMI electric focuser is extremely nice; not having to touch the telescope during
focusing makes a world of difference in how well the NexImage camera can be focused,
especially under conditions where the image is being randomly distorted by the unsteady
air. Maneuvering inside the shed is a bit tricky, but it is possible to get a comfortable
viewing position for everything so far - with some position more comfortable than
others. Total investment including telescope, building, and accessories (not including
computer) is around $2,500 - it ain't cheap, and that is with fairly low-end equipment
and buying used (eBay) where possible. (Note: We moved from this house in 2014). The official Airplanes and Rockets
website observatory
is complete! First light for the entire setup was May 19, 2012. An alignment of
the equatorial was performed, and then a GoTo alignment was done. The result was
pretty good, but it's been better. I will need to take time to do a really precise
alignment of both. It was a clear night in Erie, with a few high, wispy clouds.
There was a lot of atmospheric unsteadiness, so image quality varied considerably.
The JMI electric focuser is extremely nice; not having to touch the telescope during
focusing makes a world of difference in how well the NexImage camera can be focused,
especially under conditions where the image is being randomly distorted by the unsteady
air. Maneuvering inside the shed is a bit tricky, but it is possible to get a comfortable
viewing position for everything so far - with some position more comfortable than
others. Total investment including telescope, building, and accessories (not including
computer) is around $2,500 - it ain't cheap, and that is with fairly low-end equipment
and buying used (eBay) where possible. (Note: We moved from this house in 2014).
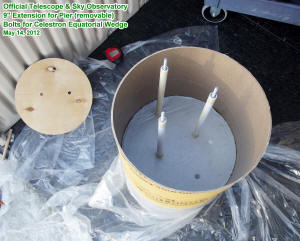
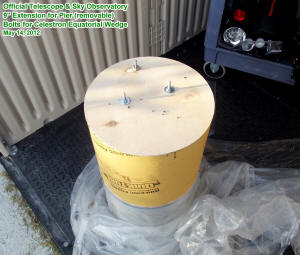
Removable 9"-High Extension
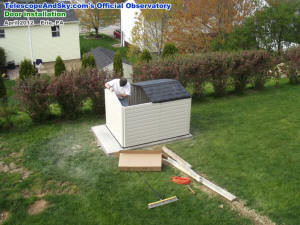
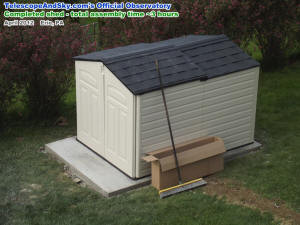
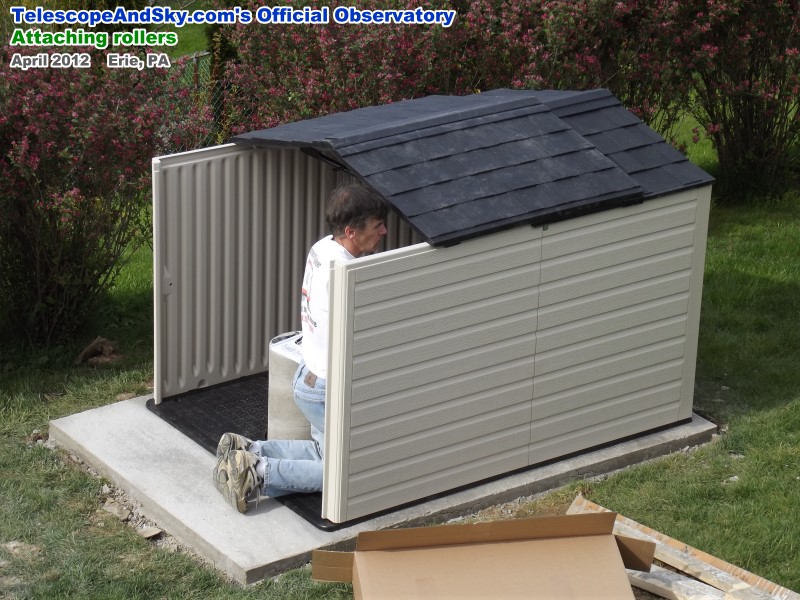
Rubbermaid Slide-Lid Shed Assembly - Door installation and completed
shed! Total assembly time: Around 3 hours.
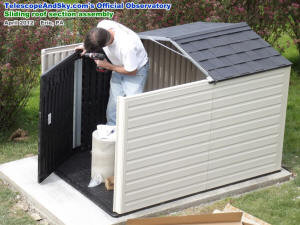

Rubbermaid Slide-Lid Shed Assembly - Sliding roof section assembly
and installation

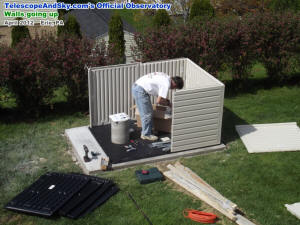
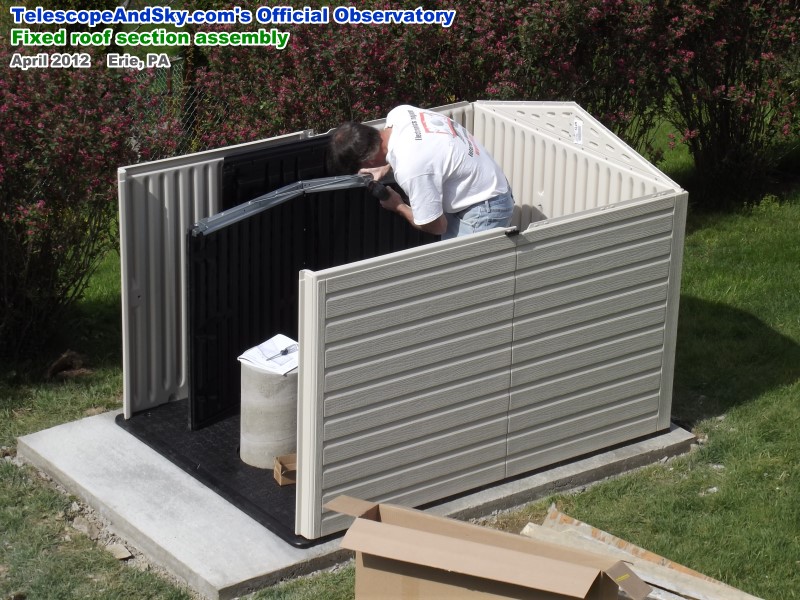
Rubbermaid Slide-Lid Shed Assembly - Wall and fixed roof section
assembly
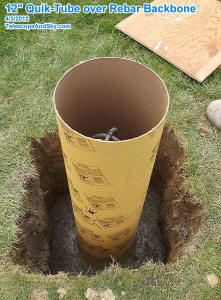
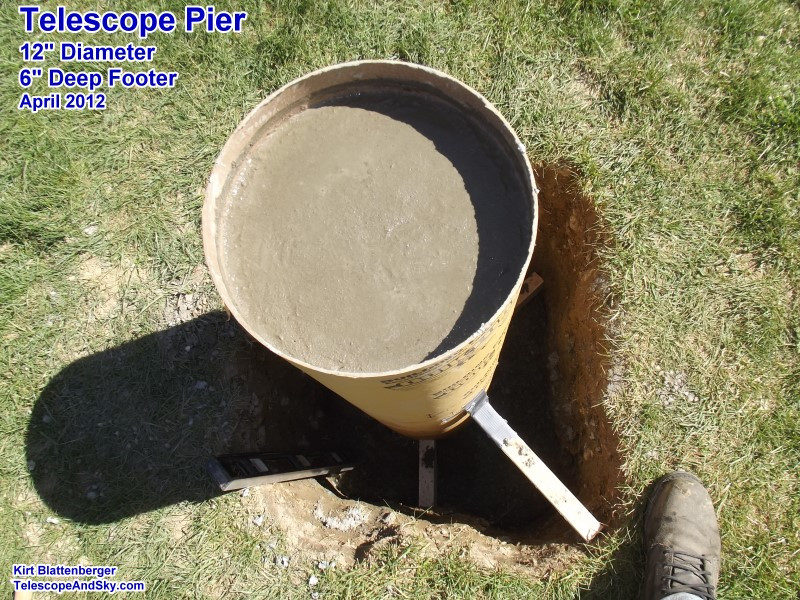
12" diameter Quik-Tube for for the pier post (note rebar inside)
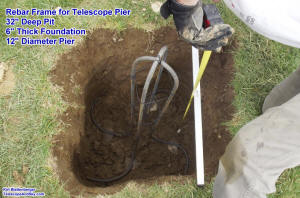
A 24" wide square hole was dug 32" deep for the concrete pier
footer and column. 3/8" rebar was bent and wired to ensure maximum strength and
resistance from cracking due to the ground freezing and thawing.
In the picture (below) of the observatory, you will see a piece of plastic about
9" down from the top of the pier. I needed to pour an extension to clear the top
of the shed enough to have a good view to the east. The plastic is a separator so
that it is removable in case I get a new mount or new telescope someday and need
a different overall pier height. 1/4-20 all-thread bolts run from the original base,
up through paper tubes, so that the entire extension can be lifted off. It took
exactly one 80-lb bag of concrete to fill the 12"-diameter form.
After a year of using my Celestron 8SE telescope on its tripod, and in alt-az
mode, I decided it was time to commit to a location in my back yard and build an
observatory. My yard sits on a unobstructed north-facing ridge in Erie, Pennsylvania,
which looks directly over Lake Erie and into Canada. Although there is a fair amount
of city lighting to the north
(I'm about 2 miles from the lake) and especially to the east, the southern and
westerns skies are not too bad
(for a city, that is). I bought a used Celestron equatorial wedge - the heavy
duty one made for the C-11- and I bought a used JMI electric focuser on eBay (both
excellent condition, saved ~$250 over buying new).
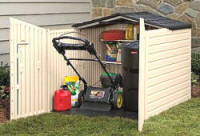
I was planning to design and build a minimally-sized observatory structure with
a rolling top, and then Melanie handed me a sales flyer from Sears that had this
Rubbermaid® Resin Slide Lid Shed on sale. It seemed like it might fit my needs exactly.
The dimensions even seemed to be perfect for the height of the pier that I had just
poured. A search on the Internet showed that I was not the first to decide to convert
one of these slide lid sheds into an observatory. Among the nice features are an
integral floor to keep it dry inside, the resin construction is strong and UV resistant,
it goes together very easily in a short time, and it is not that much more expensive
than building a decent one from scratch. I have built a lot of sheds and other structures
in my lifetime, so being able to take the easy way out on this one is a welcome
change from the cutting, screwing, nailing, priming, and painting.
As of this writing I have not had a clear night to do the precision alignment
on the equatorial wedge - it's supposed to be clear tonight, though. After that,
the next order of business will be creating an organized "office" space to provide
a table and low-level light source for setting up the computer and notebook, plus
a storage area for the accessories. The OTA (optical tube assembly) will be stored
in the house, but everything else will remain in the observatory
These construction photos are posted in reverse chronological order. To start
at the beginning, please go to the bottom of the page
and work you way back up.
If you are interested in seeing the guts of a
Celestron
NexStar 8SE, please read my teardown report on it.
I also did a teardown report on the Celestron
NexImage telescope
camera.
1-mil plastic sheet was placed on top of original pier in order to make the extension
removable. Three layers of notebook paper were wrapped around a 1/2" wooden dowel
to form tubes to place around the 1/4-20 all-thread bolt extensions to allow concrete
extension to be lifted off if necessary. A 1/4" plywood template was made to locate
the tops of the mounting bolts for the equatorial wedge. The 12"-diameter Quik-Tube
form was a snug fit over the original pier, which is what is desired. Duct tape
held the tube in place after using a straight edge to ensure that the tube was parallel
to the original pier. An 80-pound bag of Quikrete fills 0.6 ft3. The
Volume of a 12" diameter cylinder, 9" high is about 0.59 ft3. The single
bag just barely filled the mold (actually about 1/8" low), so Quikrete is over-stating
its capacity, especially since subtracting the Volume of the three bolt clearance
tube makes the actual Volume even less.
The final step was installing the two doors. A bar on the sliding roof with a
hole in it for a lock pokes through a slot in the overlapping doors. I don't store
the telescope or eyepieces outside, so there's nothing for a thief to gain after
breaking in. The west side of Erie is a very safe area (the welfare crowd is on
the east side) so I'm not too worried anyway.

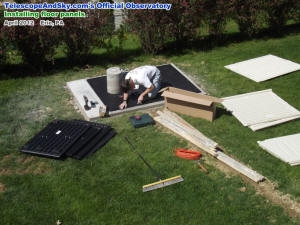
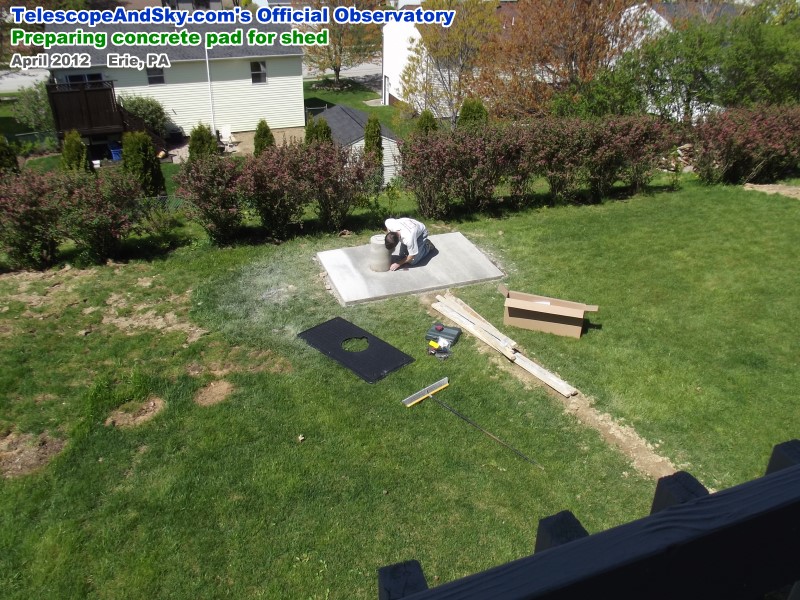
Rubbermaid Slide-Lid Shed Assembly - concrete pad preparation
and floor assembly
A clearance hole was cut in the floor panel to make way for the 12" pier. Concrete
screws were used to secure the floor to the pad.
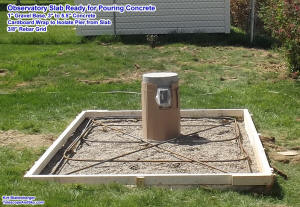
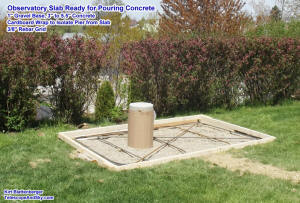
Wooden frame for concrete pad w/rebar framework (3½" min to 5½"
max).
The pier was wrapped in 4 layers of corrugated cardboard for isolation from concrete
pad. After the concrete hardened, the cardboard was removed and sidewalk crack caulking
was applied between the pad and the pier. 120 vac weatherproof GFIC receptacle box
was installed along with an underground feeder inside 1/2" PVC pipe.
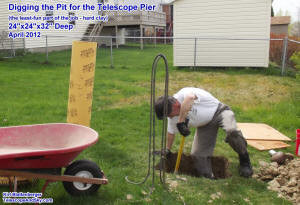
Digging the pit for the pier footer post.

Concrete poured.
Posted January 1, 2024
(updated from original
post on 4/21/2012)
|