|
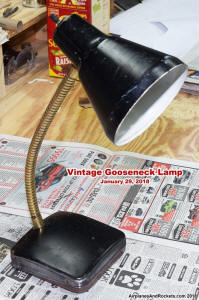
  While perusing the local Goodwill store,
Melanie and I happened upon this old gooseneck lamp. Unlike most of the newer models
found in places like Walmart, this one is made of heavy stamped steel, and the gooseneck
part is very sturdy with no plastic. When you bend this lamp into position, it stays
exactly where you put it without reflexing back a little. It was just what Melanie
needed for use on her sewing table, so we bought it as a fixer-upper. While perusing the local Goodwill store,
Melanie and I happened upon this old gooseneck lamp. Unlike most of the newer models
found in places like Walmart, this one is made of heavy stamped steel, and the gooseneck
part is very sturdy with no plastic. When you bend this lamp into position, it stays
exactly where you put it without reflexing back a little. It was just what Melanie
needed for use on her sewing table, so we bought it as a fixer-upper.
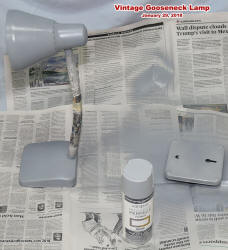
As can be seen in the photos, the original condition was useable but not very
ornate. Removing a couple minor dents, giving it a good sanding, priming, and painting
would make it as good as or better than new.
 Metal-framed lamps that do not have a 3-wire
grounded power cord can have lethal live voltage (115 V) connected to exposed
surfaces if a bare wire with damaged insulation comes into contact with the metal.
If you use a 2-wire power cord, it is vitally important to ensure that the wire
insulation cannot be damaged with use. Use a good quality power cord, insulating
grommet where it passes through the frame, and have good strain relief so that the
cord cannot pull out of the lamp. Also, ensure that the connections to the bulb
socket are secure with no loose strands hanging out, and that neither connection
screw can contact the metal frame. Metal-framed lamps that do not have a 3-wire
grounded power cord can have lethal live voltage (115 V) connected to exposed
surfaces if a bare wire with damaged insulation comes into contact with the metal.
If you use a 2-wire power cord, it is vitally important to ensure that the wire
insulation cannot be damaged with use. Use a good quality power cord, insulating
grommet where it passes through the frame, and have good strain relief so that the
cord cannot pull out of the lamp. Also, ensure that the connections to the bulb
socket are secure with no loose strands hanging out, and that neither connection
screw can contact the metal frame.
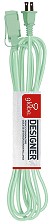 I used a 2-prong, Globe
Electric 9-ft, 13-Amp, 125-Volt, 3-outlet, 16-gauge, Mint-colored extension
cord from Lowes because its cloth outer sheath has a vintage look. The receptacle
end was cut off and discarded. After painting, the cut end of the cord was pushed
through a rubber grommet that had been installed in the lamp base. It was then threaded
through the gooseneck and connected to the lamp socket. The ends of the stranded
wire were stripped, cleaned, and a light coat of solder was applied. All flux was
removed with isopropyl alcohol. Needle-nose pliers were used to form a hook in the
ends for connecting around the socket screws. I used a 2-prong, Globe
Electric 9-ft, 13-Amp, 125-Volt, 3-outlet, 16-gauge, Mint-colored extension
cord from Lowes because its cloth outer sheath has a vintage look. The receptacle
end was cut off and discarded. After painting, the cut end of the cord was pushed
through a rubber grommet that had been installed in the lamp base. It was then threaded
through the gooseneck and connected to the lamp socket. The ends of the stranded
wire were stripped, cleaned, and a light coat of solder was applied. All flux was
removed with isopropyl alcohol. Needle-nose pliers were used to form a hook in the
ends for connecting around the socket screws.
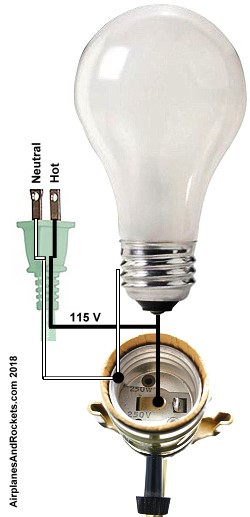
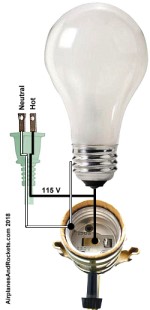
 Early power cord plugs were not keyed (polarized)
to ensure that the neutral always went to the outside of the bulb base rather than
to the small dot in the center at the bottom. The light bulb doesn't care which
way it is connected because the line voltage is AC (alternating current); however,
while inserting or removing the bulb while plugged into the wall receptacle (a bad
idea) it is possible (50-50 chance) to have your fingers come into contact with
the bulb base. If the base happens to be connected to the 115 v line, you'll
get zapped - and possibly killed. The way to prevent that is to use an ohmmeter
to identify which wire at the lamp socket end is connected to the larger blade on
the cord's plug (neutral), then connect that wire to the lamp socket's outside contact
(usually a silver- or chrome-colored screw). The "hot" wire connects to the little
contact in the center of the bulb socket (usually a black- or brass-colored screw). Early power cord plugs were not keyed (polarized)
to ensure that the neutral always went to the outside of the bulb base rather than
to the small dot in the center at the bottom. The light bulb doesn't care which
way it is connected because the line voltage is AC (alternating current); however,
while inserting or removing the bulb while plugged into the wall receptacle (a bad
idea) it is possible (50-50 chance) to have your fingers come into contact with
the bulb base. If the base happens to be connected to the 115 v line, you'll
get zapped - and possibly killed. The way to prevent that is to use an ohmmeter
to identify which wire at the lamp socket end is connected to the larger blade on
the cord's plug (neutral), then connect that wire to the lamp socket's outside contact
(usually a silver- or chrome-colored screw). The "hot" wire connects to the little
contact in the center of the bulb socket (usually a black- or brass-colored screw).
 Note that even a proper electrical connection
as just described does not guarantee you will not receive an electrical shock if
you are not careful. With or without a grounded frame, if the lamp switch is turned
on and there is a working bulb touching both contacts in the socket so that it is
illuminated, you can still receive a fatal shock by touching the outside base contact
of the bulb. The safest option is to unplug the lamp from the wall when installing
or removing a bulb. If you don't unplug it, at least be sure the switch is turned
off - which can be hard to do if the bulb isn't working. Therefore, just unplug
the lamp - problem solved. Note that even a proper electrical connection
as just described does not guarantee you will not receive an electrical shock if
you are not careful. With or without a grounded frame, if the lamp switch is turned
on and there is a working bulb touching both contacts in the socket so that it is
illuminated, you can still receive a fatal shock by touching the outside base contact
of the bulb. The safest option is to unplug the lamp from the wall when installing
or removing a bulb. If you don't unplug it, at least be sure the switch is turned
off - which can be hard to do if the bulb isn't working. Therefore, just unplug
the lamp - problem solved.
The original power cord was discarded The bulb socket / switch assembly was removed
and inspected to assure it was in acceptable condition. It appeared the socket had
been replaced in the past and was in very good condition, so I re-used it.
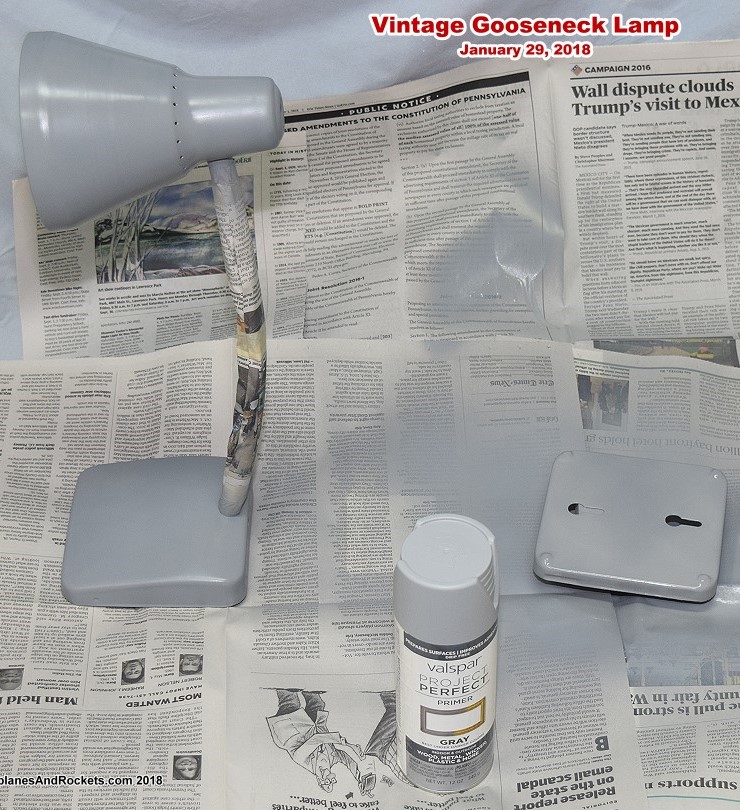
The lamp frame was prepared for priming by first knocking out a couple minor
dents in the base and sanding with 220 grit sandpaper. After vacuuming and wiping
everything off, the gooseneck component was cleaned with acetone and the masked
off with tape. All surfaces to be painted were wiped with isopropyl alcohol and
then a light coat of primer was sprayed and left to dry overnight.
Next, 320 sandpaper was used to sand everything smooth. Everything was masked
off with tape and newspaper except the inside surface of the lampshade, then two
coats of gloss white were applied. Since we will not be using bulbs greater than
40 W (either incandescent or LED), a high temperature paint is not needed.
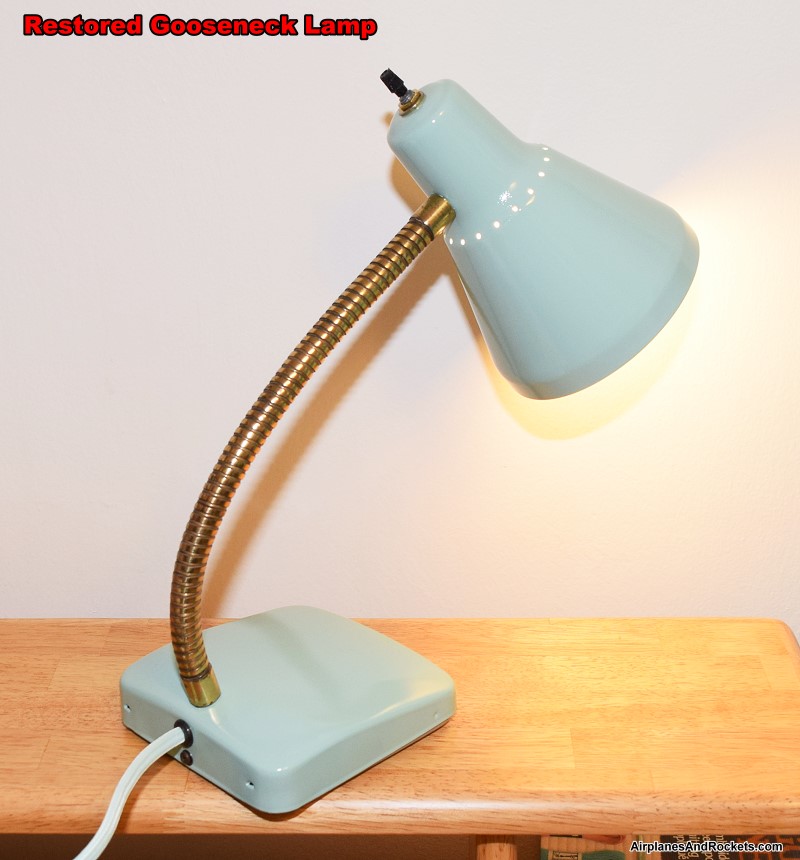
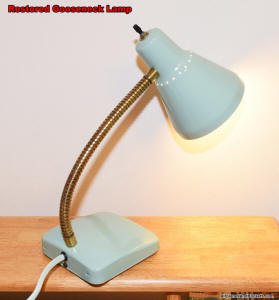
The next day the inside of the lampshade was masked and three coats of
Krylon Catalina Mist spray paint were applied. It is a very good color match
to the power cord. Masking tape and paper were removed a few hours after the final
coat of paint. The metal base cover plate presses into the base with a friction
fit and is retained by a single screw. The base cover plate was painted silver.
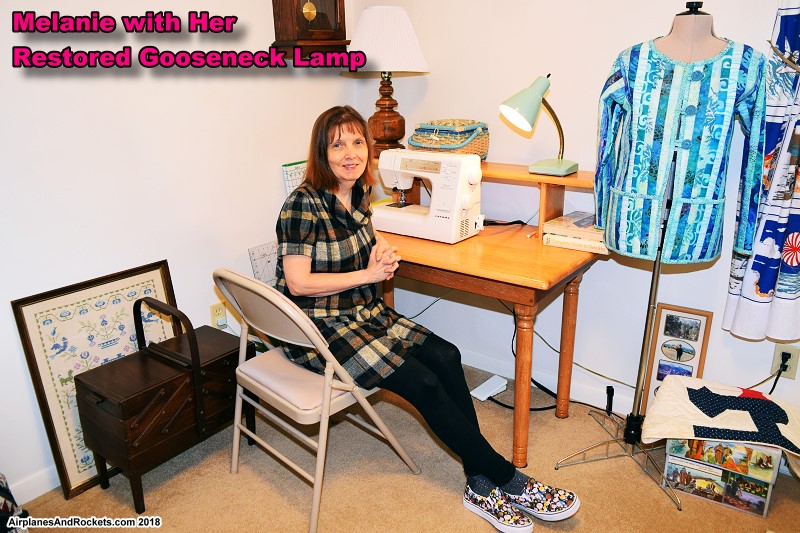
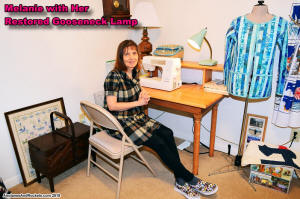
After allowing everything to dry for a couple more days, the electrical components
were assembled as described above. Melanie's restored vintage gooseneck lamp is
now doing regular duty at her sewing table, as planned. She's happy, so I'm happy
;-)
Posted February 24, 2018
|