|

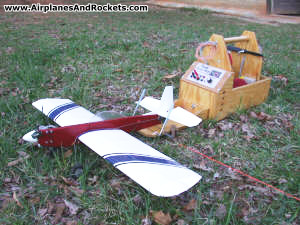
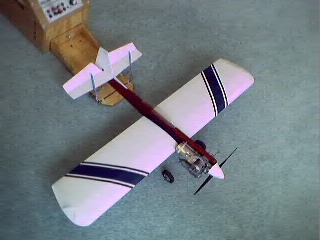
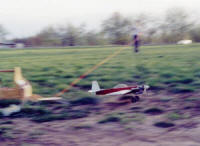
Here is my Sig Akromaster control line airplane sitting in
the launch position on the launching stooge. You can see the bright orange
release line that runs out to the center of the circle where the handle is
waiting. I have never had a problem with the wheels getting caught in the string
during landing.
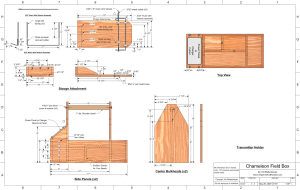
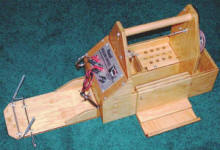
Chameleon Field Box plans re-drawn in Visio. The transmitter
holder tray is not included.
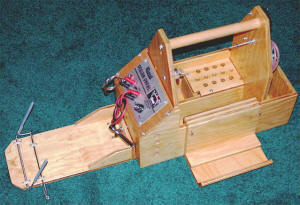
Stooge, Power Panel, Transmitter Cradle.
Top View of Main Box.
Stooge Release Mechanism.
C/L Sig Akromaster Model on Stooge.
Depending on the phase of the moon, the prevailing wind, stock market activity,
or the color shirt I'm wearing, my interest in airplane activities alternate between
radio control, free flight, control line, static display, electric or glow fuel
power, or any other aspects of modeling. Over the years, I have designed and built
probably four or five different field boxes to accommodate the mood du jour. Each
was sold before moving on to the next design iteration. Finally, I decided that
rather than keeping on making new field boxes, it would make more sense to design
a one-size-fits-all version. The Chameleon Field Box™, as I have dubbed it, comes
pretty close to achieving that goal.
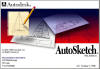 The design work was done on
Autodesk's AutoSketch release 6. I still have the file, but upon opening it again
after many years, I discovered that I never did put in all the detail for the hardware.
All the dimensions are there for the wooden pieces, but that is as far as I got. The design work was done on
Autodesk's AutoSketch release 6. I still have the file, but upon opening it again
after many years, I discovered that I never did put in all the detail for the hardware.
All the dimensions are there for the wooden pieces, but that is as far as I got.

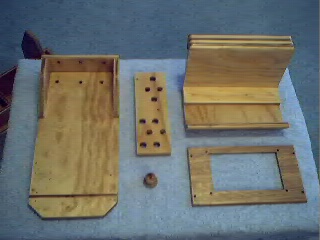
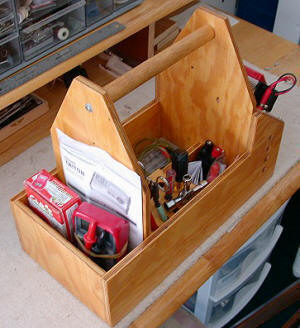
As can be seen in the photos, there are accommodations for just about everything
that a small to midsize model might need. The photo to the right shows the configuration
set up for nitro powered control line flying. For radio control flying, there is
a removable transmitter tray that hangs onto either the side or back end of the
field box. When doing electric flying, the Royal power panel is replaced with a
Great Planes Triton battery charger.
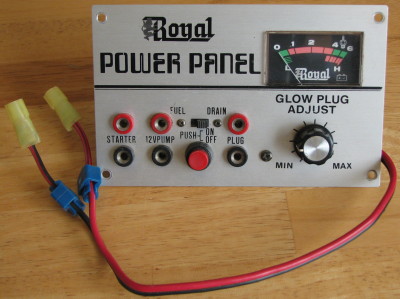
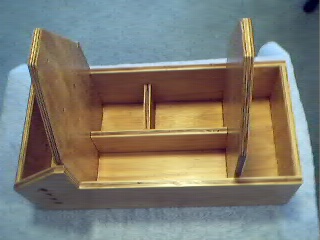
There is a 1970s era Royal power panel on the end where the launching stooge is
attached in the stowed position. The power panel has jacks for an electric starter,
a glow plug clip, and electric fuel pump. A rheostat adjusts glow plug current,
and a forward/reverse switch control the pump. A 12-volt sealed cell battery is
in the compartment below, with cooling/ventilation holes on both sides.
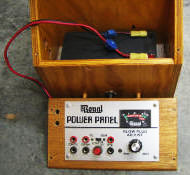
Power panel and battery.
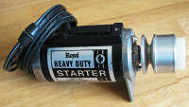
Royal electric starter.
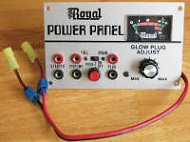
Royal Power Panel.
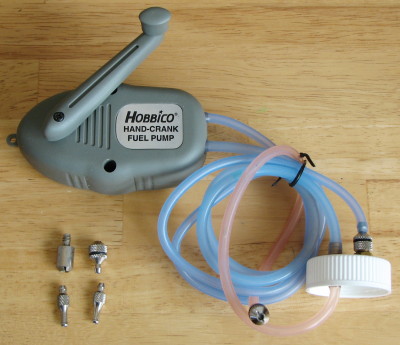
Hobbico hand fuel pump.
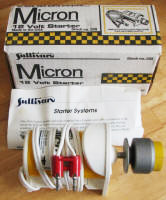
Sullivan Micron electric starter.
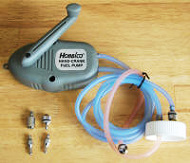
On the other end is where the fuel bottle is stored. Since my models have never
used more than a Super Tigre .46 for power, a quart of fuel is plenty for any one
trip to the flying field. Accordingly, a cleaned out plastic auto oil container
is use. I could never see the sense in lugging a gallon jug around when most times
I never even came close to using a full quart. The electric fuel pump is mounted
to the inner end bulkhead.
Anyone who has flown control line airplanes knows what a pain it can be winding
the lines in after a flying session. My simple solution was to mount the line reel
to one of the field box bulkheads in such a manner as to allow an index finger to
spin the reel. A lead-out guide was formed from 1/16" music wire to keep the leads
within the realm of the reel. It works very well.
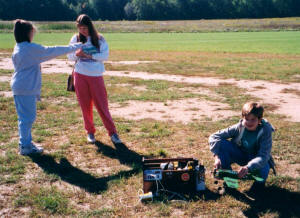
Even though Melanie is almost always with me on my flying excursions, and is
a willing holder and releaser of the airplane, I though it would be spiffy to design
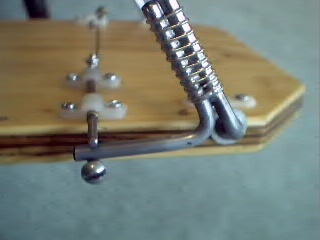
a launching stooge. The picture at the right shows what I came up with. It uses
common modeling supplies. A piece of high visibility string is attached to the release
mechanism trigger and run out to the center of the circle. The airplane is set with
the horizontal stabilizer behind the two wire retainers (covered with blue fuel
tubing). When the line is yanked, the retaining wires are free to flop forward to
release the model. Works like a dream. As shown in the picture, the launching stooge
is attached to the field box, but I soon learned that it is not a good idea for
a nitro powered model unless you do not mind having a thick layer of fuel all over
everything in the field box. After a couple times of wiping everything down (yeah,
sad that it took a couple times to learn), I began using a long spike through the
center hole in the bottom (it need to be enlarged a bit).
This was probably one of the first uses of the launching stooge, because the
stooge is attached to the field box.
Here is the Sig Akromaster right after being released from the launching stooge
on my Chameleon Field Box. You can see the orange release triggering line still
in my hand.
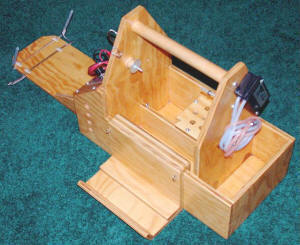
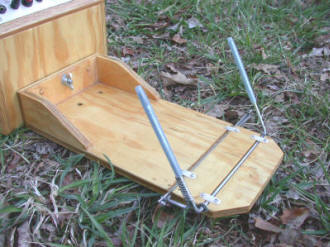
These next two shots are of the Chameleon Field Box set up with the control line
launch stooge attached to the front. No tools or equipment has been loaded other
than the power panel and the electric fuel pump.
 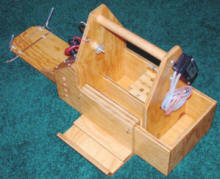
Completed Chameleon Field Box
The photos below shows the Chameleon Field Box configured for supporting electric
flight. The Royal power panel has been replaced with a Great Planes Triton charger,
and the fuel bottle and pump have been replaced with a multimeter. Not having to
haul an electric starter, glow plug clip, and other heavy duty tools for nitro power
really lightens the load. This has worked out very well.

Here is one of my other custom field boxes that was in service in the early 1990s.
Posted November 18, 2021
|