N-Gauge Lionel Train Come'n 'Round the Bend.
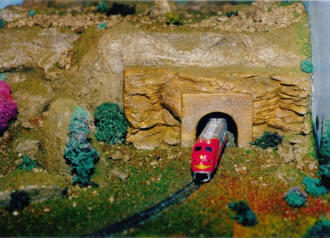
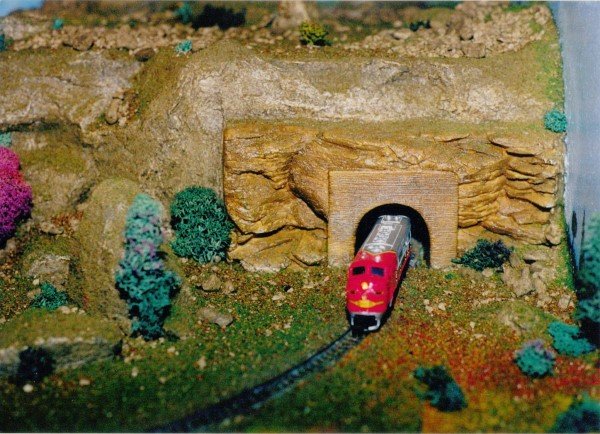
N-Gauge Lionel Train Exiting the Tunnel
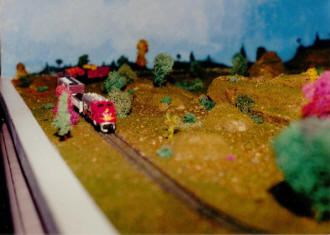
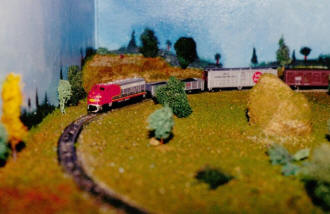
N-Gauge Lionel Train Chugging Through the Prairie Lands.
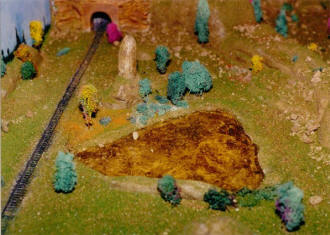
N-Gauge Lionel Train Layout Watering Hole.
While living in Colorado Springs, CO, in the 1990s, our family decided to build
a compact N-gauge model train layout that looked like the northwestern Nebraska
landscape that we had driven through many time. It represents the old west that
comes to mind from the Oregon Trail days, although that pre-dated the train routes
of the day. An inexpensive Lionel N-gauge train set was purchased, along with a
few extra sections of track.
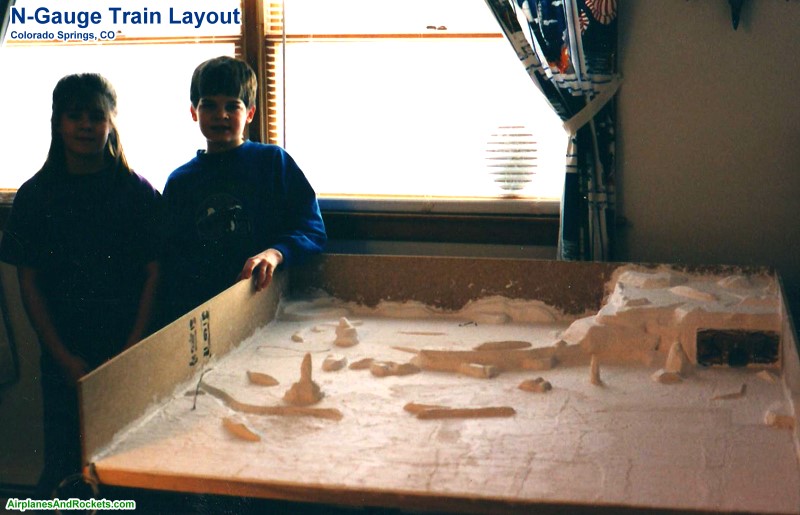
Since space was very limited, a 4' x 4' platform was used, and was cut out of
3/4" plywood in order to make it rugged enough to be moved around. Three sides were
cut from the remaining 4' x 8' sheet. Unfortunately, digital cameras were not the
norm then, so I didn't take a lot of photos throughout the process.
Styrofoam sheets were cut and sanded to form the track underlayment, the hills,
and tunnel, then gauze impregnated with a plaster mix was applied over top of it
all. Trees and underbrush, the pond water, and faux grass and sand are standard
hobby shop fare. The rock tunnel faces are also commercially made.
We began by laying down a base of 1/2" thick Styrofoam sheets (2 layers) that
is sold as insulation in Home Depot. Then, layers of foam were built up for the
tunnel and landscape rises. The train path was cut into the mountain layers as they
were being stacked. It was all later sculpted into shape using a razor blade and
sandpaper. Gauze cloth was laid over the foam and plaster slathered on for a rigid
texture. Tunnel entrances were purchased from the hobby shop and molded into place.
The train track was then temporarily fitted, with electrical line being buried
in the foam base.
We painted the sky, cloud, dirt and grass colors on the sides, and then Melanie
then painted the trees. Landscaping paints and material for trees, water, etc.,
were purchased form the hobby shop for coloring the rock and dirt, and some plants
were added later.
After the painting was complete, the raised track bed grave was added, and then
the track was permanently installed. Some final touches were added in the form of
trees and small stones.
Finally, the electrical connections were made, and the train was placed on the
track. It all worked like a charm. The only problems were when some of the track
gravel worked its way onto the track, causing the train to get stuck. It doesn't
take much with a system this small.
So, what happened to it, you may ask? Well, like nearly all of the things I built
for my kids over the years, they had no interest in it, so a couple years later
I ran an ad in the paper and sold it. Of course I'd like to have it back now for
old time's sake, but too bad.
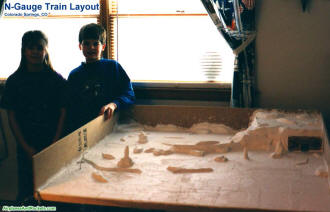
N-Gauge Lionel Train Layout Styrofoam Base.
Posted June 25, 2021
|