The Aquila has been converted back to its original pure sailplane configuration
(no electric power). I removed the e-power firewall and cowl and glued the pine
nose block back in place. You can see in the photos where the division line is from
where Monokote was applied across the joint. It still looks good, but you can see
the line. There is still a little adhesive residue on the transparent red Monokote
that you might be able to remove, but I didn't want to risk it. Lots of construction
photos and video below.
January 10, 2015: Not being able
to hold off any longer, I finally began working on a scratch-built version of the
Aquila. I had the good folks at Staples enlarge the plans to 105% to push the wingspan
just over 100" (~104") so it will be my biggest sailplane
ever - yeah, I know, lame. By scaling up so slightly most of the structural components
like the spars, balsa and plywood, etc., will be able to stay per the original without
risking overstressing. However, since this Aquila will sport a brushless motor in
the nose (sacrilegious?), I am beefing up some of
the areas and using harder balsa in places I might not have otherwise. Since I do
not have easy (pronounced "affordable") access to
the large pieces of 1/8" LitePly specified for the fuselage sides, medium density
3/16" balsa is being used instead, and will be judiciously carved and sanded to
apportion strength and weight as experience guides. None of the original custom
hardware - nylon stabilator control horn, special all-flying rudder hinges, canopy,
etc. - is available anymore, so everything had to be made from scratch as well.
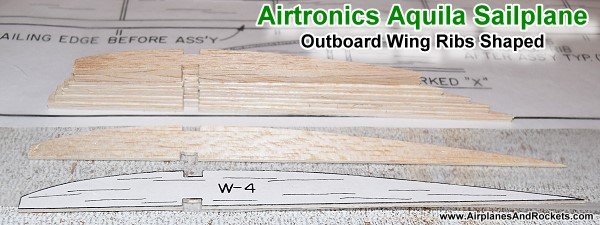
The positive Hoerner wingtips were shaped per the original.
I will post photos as they become available.
April 9, 2015 Update:
Video tour of the completed 105% Aquila - April 11, 2015
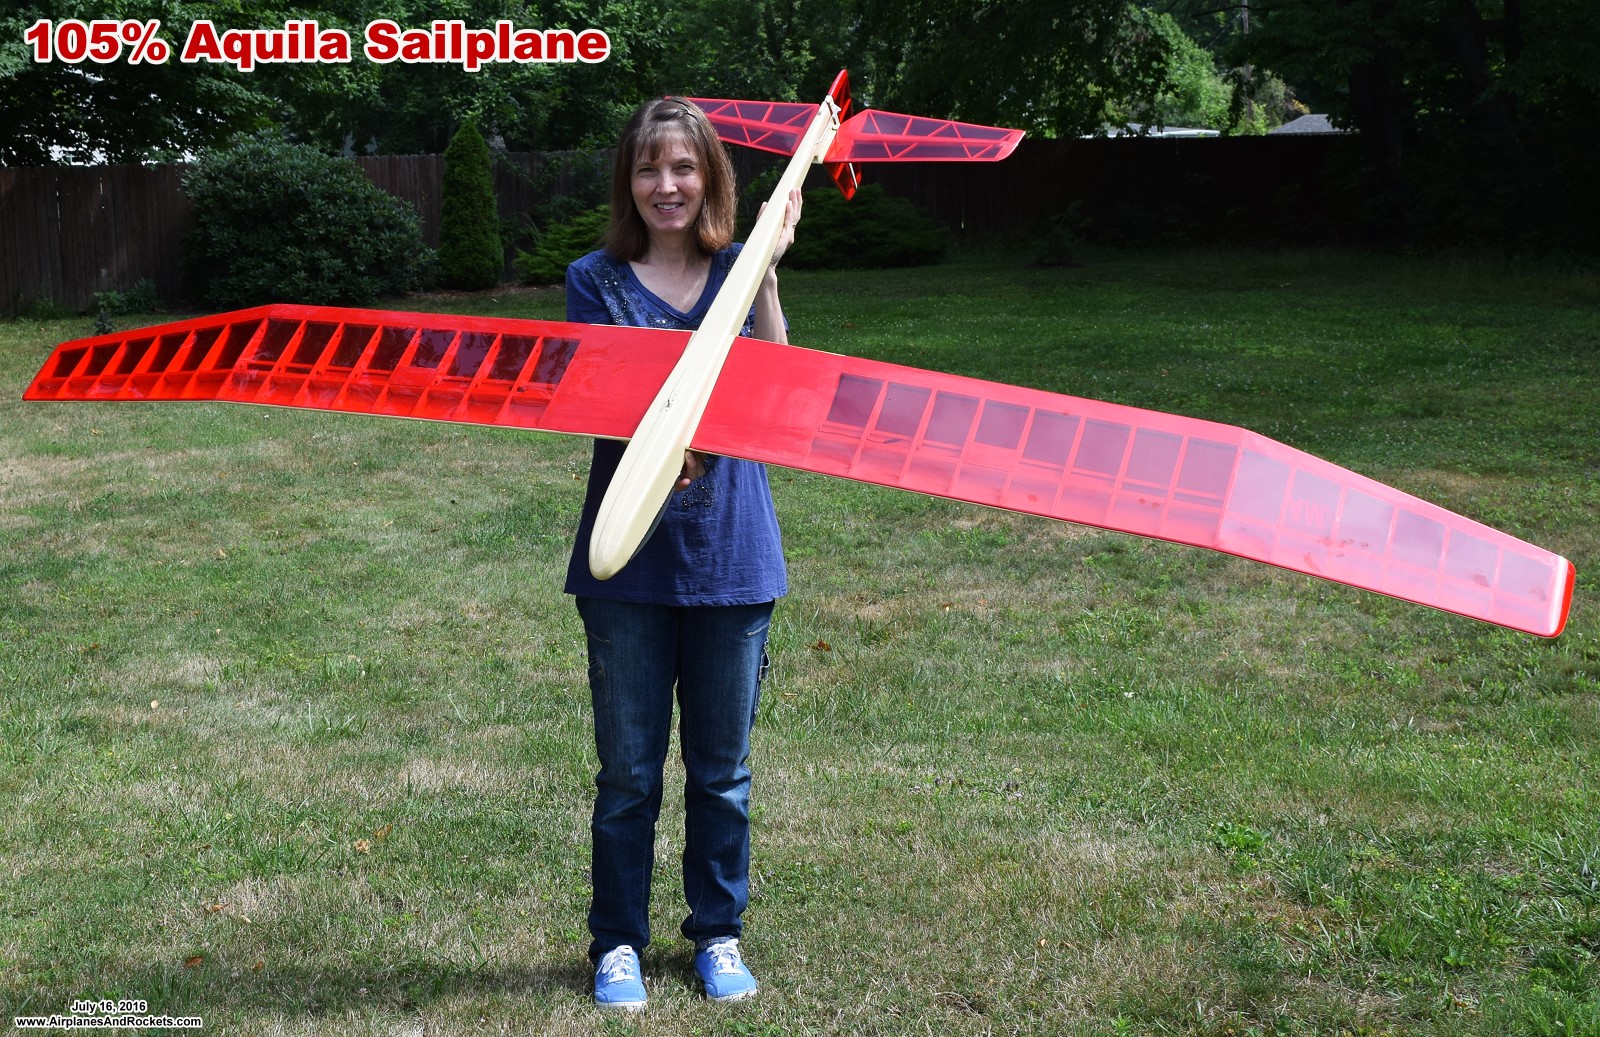
The Aquila appeared in a Cox / Sanwa ad in the May 1977 issue
of Model aviation magazine.
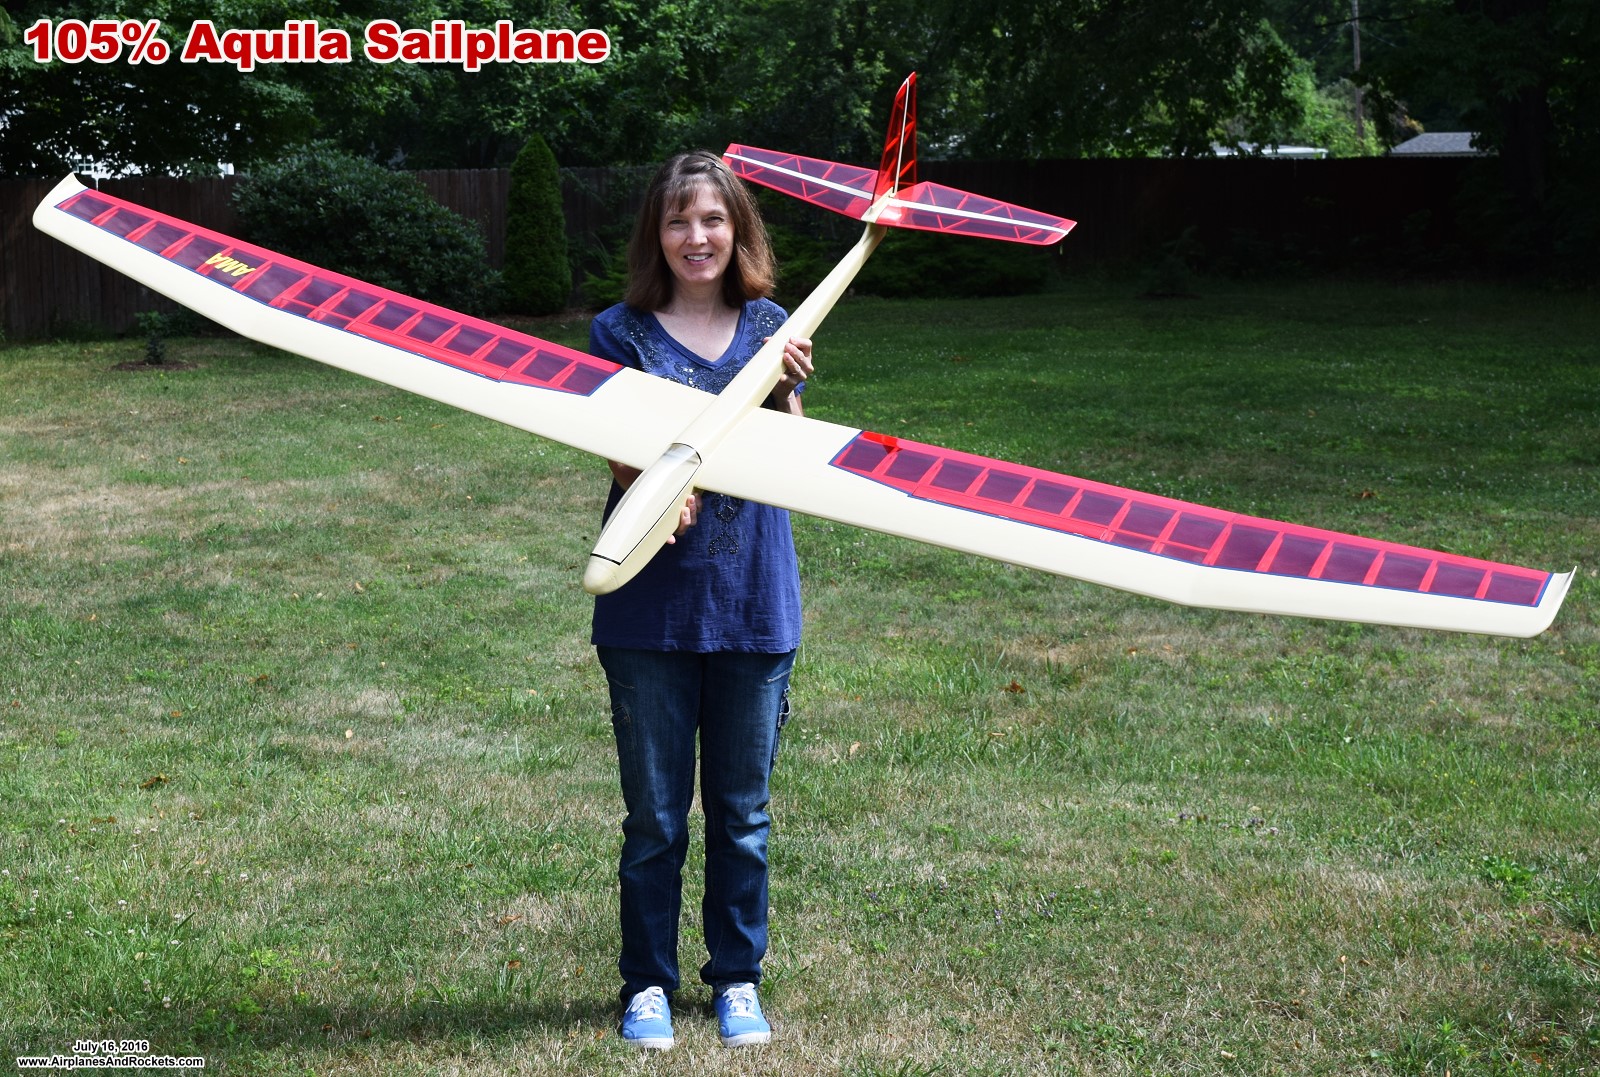
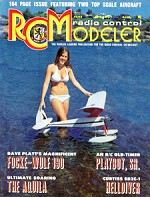
As of today I declare the 105% Aquila to be officially complete! The final flying
weight is 51.2 oz., resulting in a wing loading of 8.6 oz./sq.ft. That is a
tiny bit more than I would really like it to be, but she has a very strong frame
that should endure. Since the motor was replaced with a tow hook, I now need to
find an open field large enough to accommodate the full-size Hi-Start launcher (~800
feet needed). The Up-Start (~300 feet needed) did well for my 2-meter Spirit glider,
but it'll never be able to launch the Aquila. Quite a lot of work goes into planning
and executing a plans-built model, and is further complicated when you change the
size and a few aspects of the implementations. It's no wonder s many people these
days have either never built a model or have given up building. Here are a few photos
of the radio installation and other details that might be helpful if you decide
to build your own some day.
The color scheme, BTW, was suggested by Melanie. She likes my Old Spice aftershave
lotion aroma and thought the transparent red and cream colors of Monokote would
look nice - and they do. I considered doing the Old Spice logo on the fuselage,
but figured the company might try to sue me for infringement.
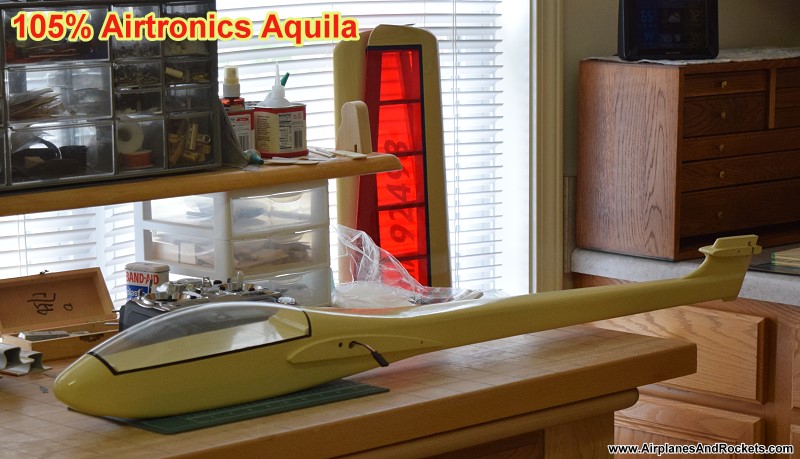
Completed Aquila fuselage
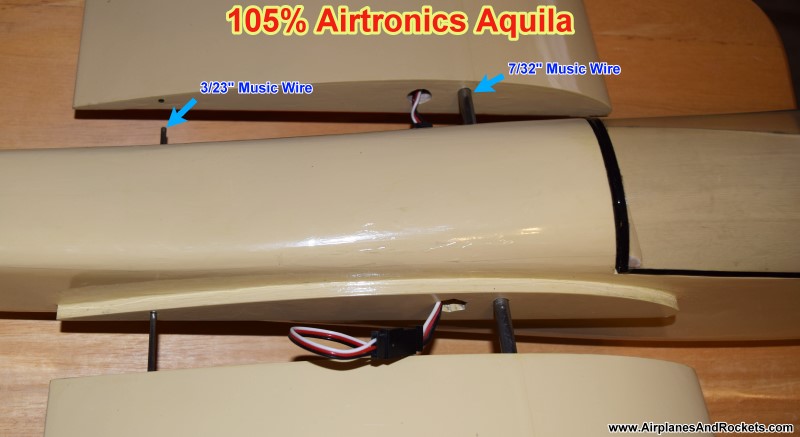
Wing joiner rods and spoiler servo leads. The 7/32" main joiner
rod will never fail, although it is pretty heavy. Replacing all the music wire (4x
3/23" and 1x 7/32" = 2.2 oz.) with carbon fiber rods would save about 2 oz.
Spoiler servo & pushrod detail. Pushrod is shaped to relieve
lateral force on servo when fully deployed.
Cockpit area showing radio installation, canopy hold-down method,
and HowHigh altimeter.
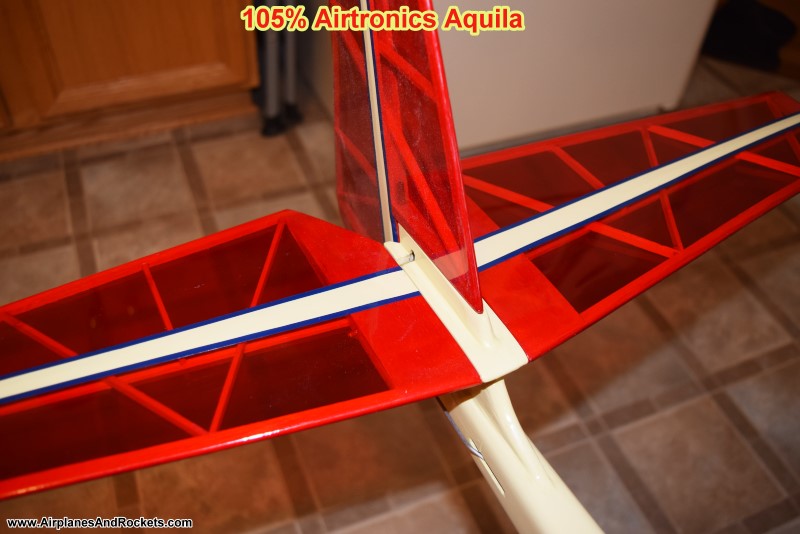
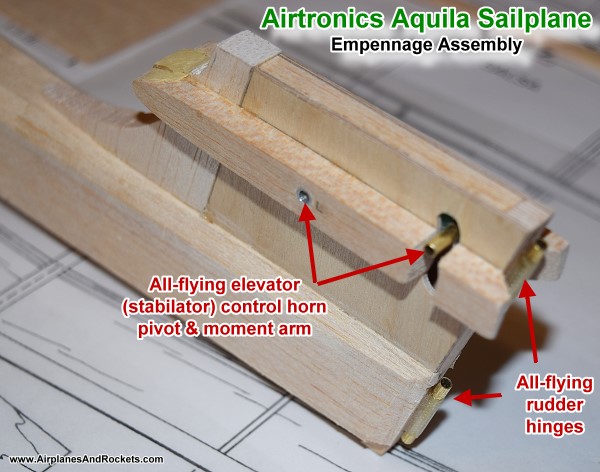
Aquila empennage overview.
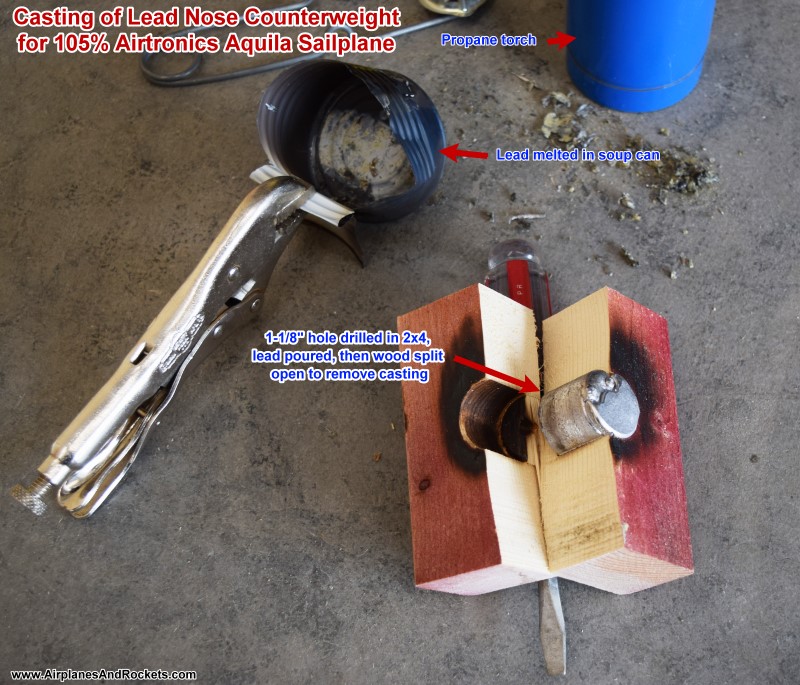
Casting the 6.8 oz. lead nose weight.
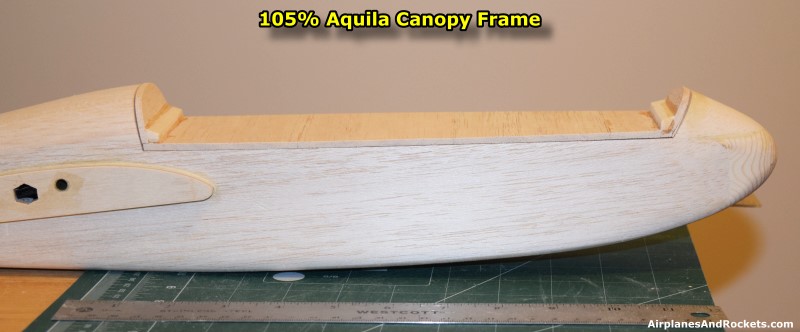
Canopy frame.
The Great Planes GPMA2365 canopy, made for the U-Can-Do ARF,
is a near perfect fit for the 105% Aquila. At $7 it is quite a deal!
All-flying rudder and stabilator halves and 3/32" music
wire hinge pins.
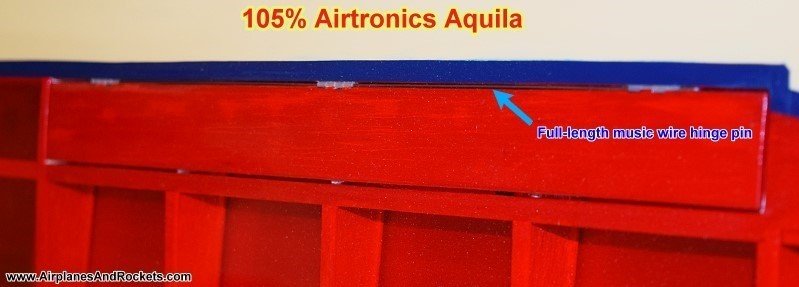
Spoiler full-length hinge pin allows easy servicing and
makes covering much simpler.
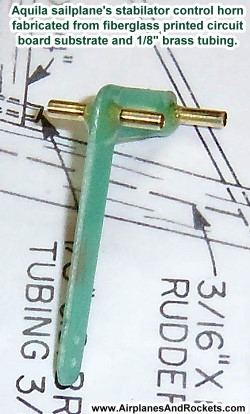
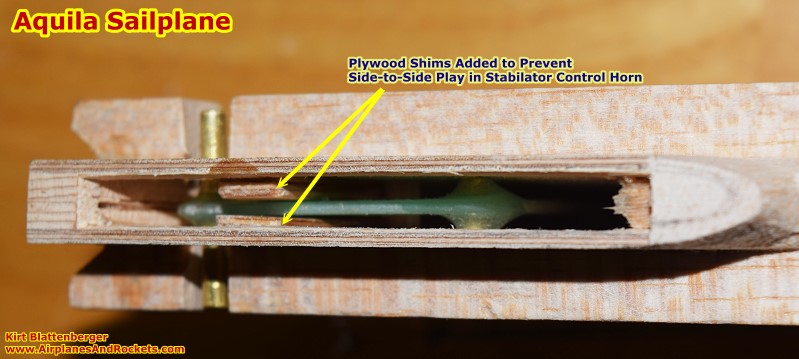
The stabilator control horn is made from 0.062" fiberglass printed circuit board
material, and sections of 1/8" brass tubing were epoxied as shown, being careful
to keep the tubing at right angles wrt the fiberglass control horn. 3/23" music
wire passes through the tubing and into the two stabilator halves.
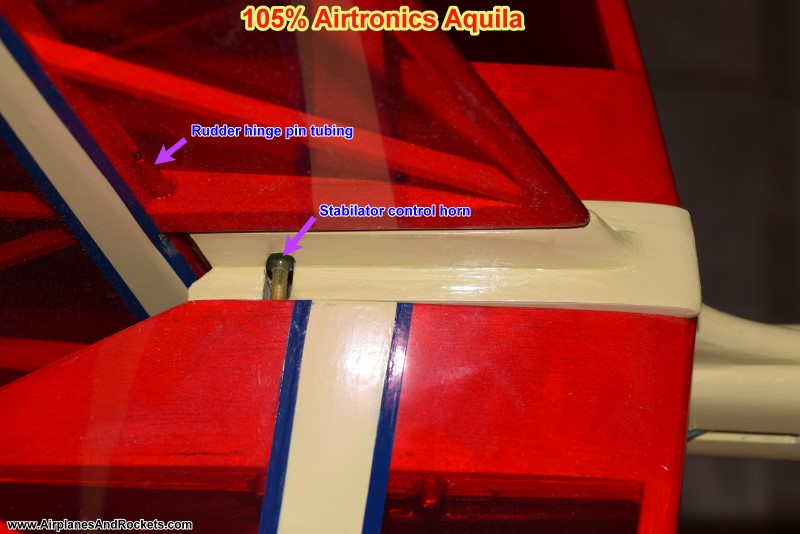
The original all-flying rudder hinges were heavy duty nylon jobs with a tab to
be inserted into the fuselage and rudder, and had a hole lengthwise to accommodate
a 3/32" music wire hinge pin. The ones shown are fabricated from sections of 1/8"
brass tubing with a piece of fiberglass cloth tightly wrapped and epoxied around
them. Clamps pulled the cloth tight and held it while the epoxy cured. Afterward,
the epoxy-impregnated tabs were trimmed for insertion into the frame members. It
worked amazingly well and is very sturdy.
Tailpost construction is conventional, using custom-built stabilator control
horn as seen here.
Stabilator & fin post assembly parts.
Completed stabilator control horn.
Plywood shims added to prevent wobble in stabilator control horn.
Vertical fin hinge construction.
Completed vertical fin hinges.
Maiden flight of the 105% Aquila - March 8, 2015.
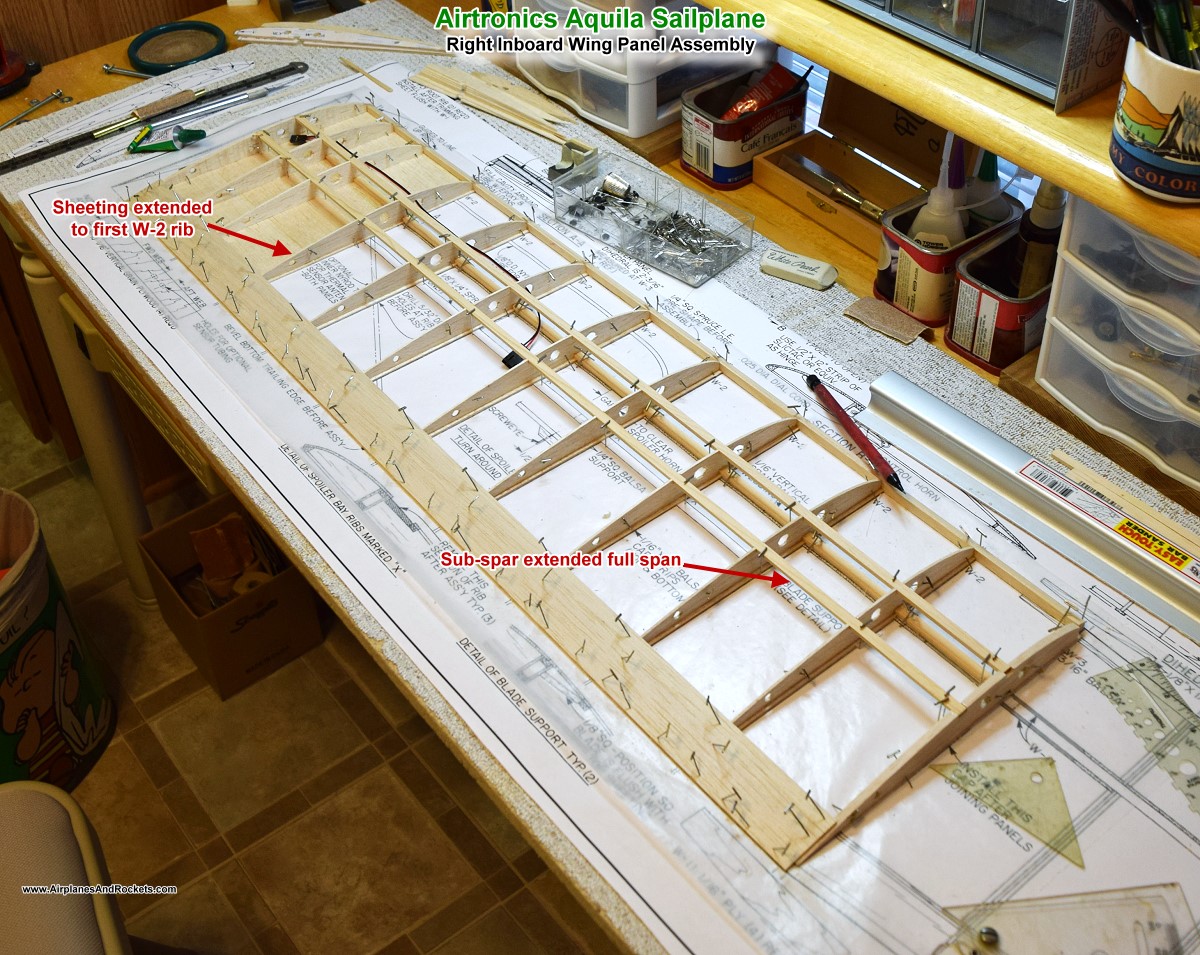
Aquila inboard wing panel construction.
Aquila wing rib templates
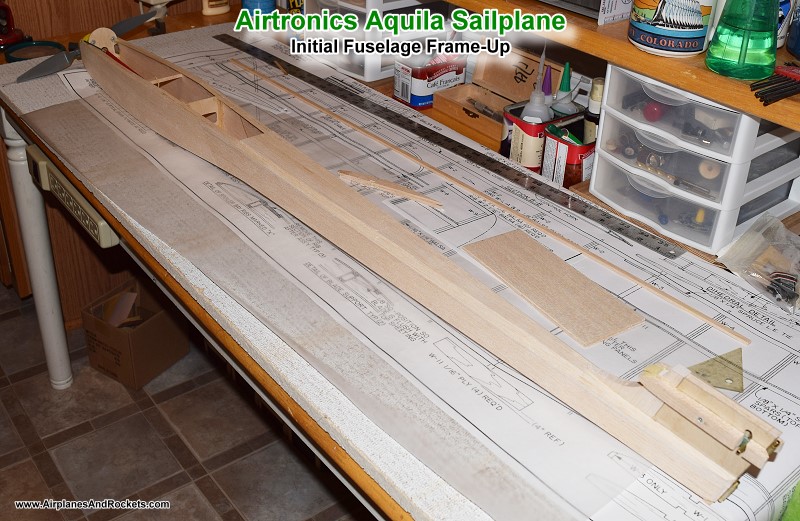
Aquila fuselage initial frame-up.
(December 25, 2014 update)
Inboard wing ribs sandwiched and shaped.
Outboard wing panel ribs.
Empennage assembly.
Plugging in the wings for the Aquila's maiden flight.
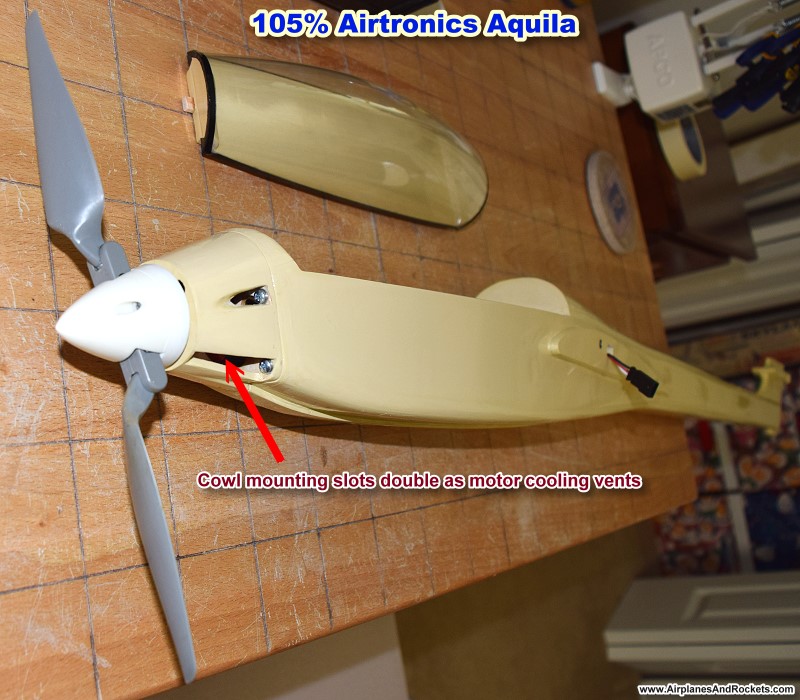
Electrified Aquila
E-flite 450 brushless motor mount &
cowling
Pine nose block replaced with 450 brushless motor and cowl with
cooling slots. Nose block can be re-attached using cowl mount screws for a quickly
reconfigurable sailplane. Underside of Aquila showing belly skid &
tow hook.
Note: The Aquila has been converted back the to pure unpowered
configuration again.
March 8, 2015 Update:
Back in the late 1970s I built an Aquila from plans that appeared in RC Modeler
magazine, then I built another Aquila in the early 1980s from a kit. Both are long
gone. About 6 months ago while waxing nostalgic about the Aquila, I decided to build
another, but this time I had the plans enlarged to 105% to get the wingspan over
100" while not having to change airframe component sizes. This version has a 450-size
electric motor for power. I wanted to determine the amount of down-thrust needed
to prevent a nose-high climb prior to final nose shaping and canopy installation.
For this maiden flight, there was about 8 degrees, which was not enough. It really
needs about 12 degrees at full power. As you can see from the video, the flight
went flawlessly. It was very gusty so I only put in one flight. The wing spoilers
work like a charm and bring the Aquila down FAST when fully deployed. I do believe
that I'll remove the motor and its support equipment and convert the Aquila back
to its original tow line format. That'll make it more authentic and reminiscent
of old times (and save a few ounces of weight to boot). Thanks for watching.
December 2015 Update:
A month or so after completing my 105% Aquila sailplane, I decided to convert
it to electric power. I would have preferred to fly in pure sailplane mode, but
there is no field in my area large enough to safely employ the full-size Hi-Start
towline. E-power was really the only option without needing to drive long distances
to fly. The nose block was carefully cut off so it can be re-attached for reverting
to unpowered flight. The motor and cowl bolt on for easy swap-out. Here are the
details of the installation.
I finally got around to processing and uploading a video of my 105% Aquila sailplane
with a short narration about its unique features. The flight was made on July 26,
2015, in Kernersville, North Carolina, across the street from where we lived at
the time (we have since relocated back to Erie, Pennsylvania).
It was a typically hot, humid day there, and the sun was shining brightly - up until
a couple minutes after I launched, and then it went behind some slow moving clouds
for about 20 minutes. After a total of 25 minutes in the air I decided to land and
wait for the clouds to clear. Once on final approach and committed to landing, the
sun appeared again. If you watch closely, you can see a few seconds before landing
where the Aquila makes a sudden drop toward the ground, demonstrating how effective
the spoilers are when fully deployed.