|
Airplanes
and Rockets website visitor Michael M. wrote to request that I post
this article, along with the ones for the
Satellite 1000 free-flight champion, and
The
Giants of Free Flight. His reason was that he wanted to
get his flying team back together again in Bill Hunter, who passed
away recently. This article on covering with Mylar is very
extensive and is another example of such efforts that were common
in hobby magazines of decades ago - a large part of my motivation
for making them available. It is rare to see such in-depth articles
in today's publications, where the focus seems to be more on cramming
in as many different topics as possible to provide something for
everyone in every issue. Of course it wouldn't be so if consumers
didn't demand it. At this point relatively few even know that articles
such as this one could be found in just about every edition of magazines
of yore. Mylar
Ultralight and highly colorful sheet plastic is great for FF ships.
Here's how to work with it and where to get it.
By Bill Hunter What is Mylar? Glad you asked! Mylar
is the best thing since the phone call from that farmer in Fresno
saying: "I found your model and the cows only ate one wing tip."
Mylar is a clear, paintable, space age polyester film, manufactured
by DuPont. Several different grades are produced, all of which will
heat shrink at various temperatures according to the use designated.
We have chosen a grade in the 275° heat shrink range, so that after
heat shrinking with a "Sealector" iron, it is least affected by
weather and temperature changes. After shrinking, it will withstand
direct heat to 150° with no change. Thickness of the Mylar governs
weight, so we've stayed within one quarter thousandth to one thousandth
(1/4 mil, 1 1/2 mil, and 1 mil) using the thickness determined by
our own research, for the particular type model we wish to cover.
How light is it? How strong? Is it fuel proof? Easy to use?
Can my models look as good or better using Mylar, than they do already?
All of these questions have been asked and I'll try to provide the
answers. Weight of 1/4 mil Mylar is .8 gram per sq. ft. (clear);
1/2 mil is 1.6 grams per sq. ft. (clear); 1 mil is 3.2 grams per
sq. ft. (clear). As a comparison of weight: Jap tissue less dope
weighs 1.5 grams per sq. ft. (28.35 grams = one ounce.) The tensile
strength of 1/4 mil is 6250 lb./sq. in.; 1/2 mil is 12,500 lb./sq.
in.; 1 mil is 25,000 lb./sq. in. Such strength results in extremely
high puncture resistance with great resilience. Mylar is definitely
fuel proof. Clear Mylar may be left to set in pure nitro methane.
When cleaned off and dried, it can be used ,as described with no
effect showing.
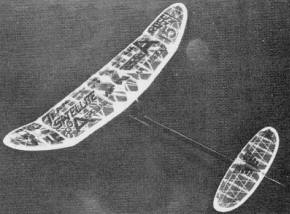
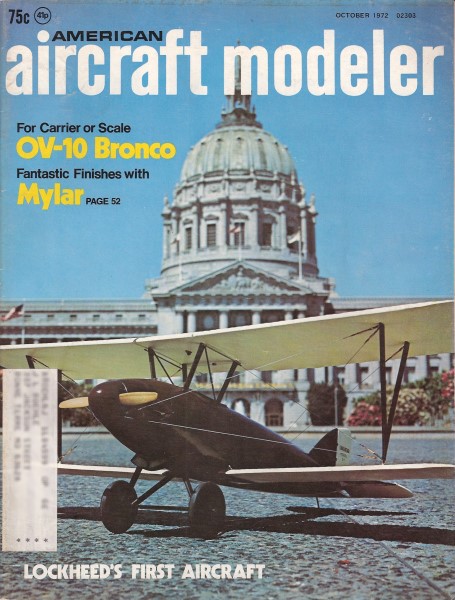
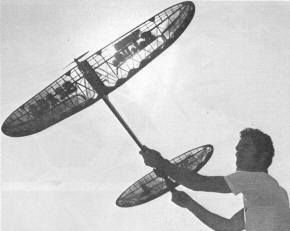
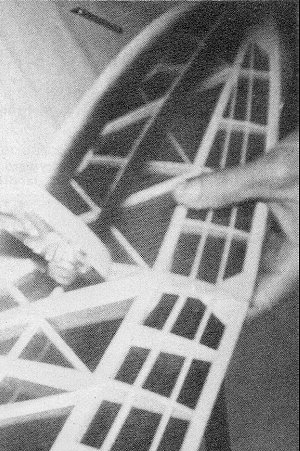
The finished plane shows its geodetic structures. Mylar adds
little strength, so its lightness can be offset by beefier structure
design.
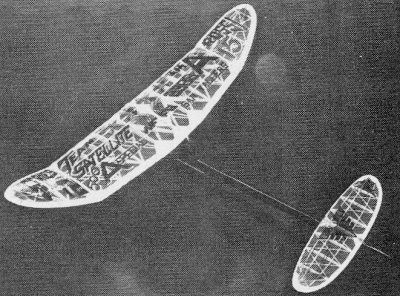
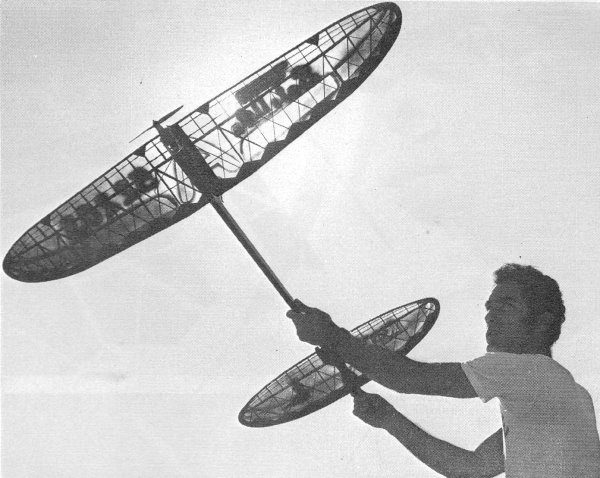
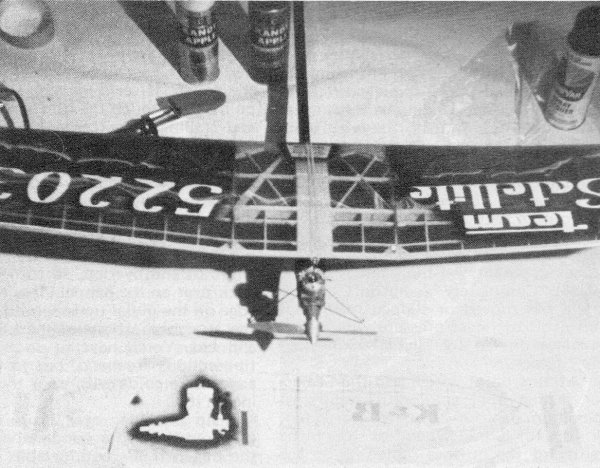
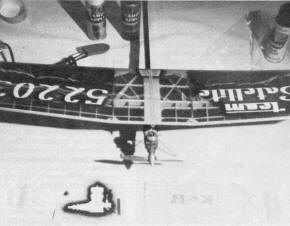
Only one word can describe this model - beautiful.

S.T. 65 drives this Class C-D ship skyward at extreme velocities,
yet 1/4 mil Mylar over Jap tissue worked fine and even survived
DT landings in Volkswagen size rocks.
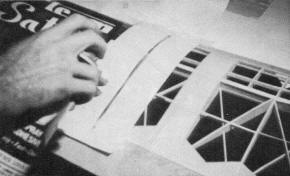
Thin cutout is paper used to mask the wing ribs for spraying
adhesive.
With heat iron, attach Mylar to dihedral break ribs and around
edges of structure - just like MonoKote.
Pull and stretch while heating. Compound curves are a cinch.
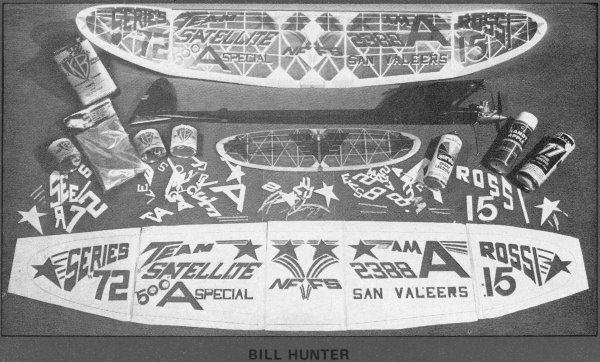
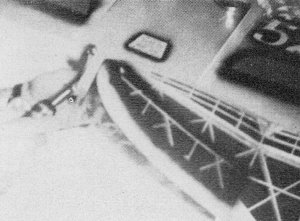
Complete wing and stencil layout of stab covering with spraying
of K&B engine in progress.
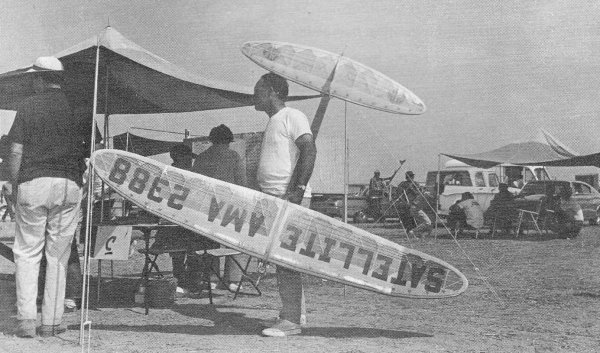
The ease in using Mylar is demonstrated by the fact that a 'C'
Special Satellite 100 sq. in. wing, prepared as later described,
can be ready to fly within one hour from covering, start to finish.
The reflective brilliance of a Mylar-covered surface is
most easily compared to that of glass. Since all paint work is done
on the side that will be placed against the surface to be covered,
even the smallest 1/2 model looks like it has fifty coats of hand-rubbed
dope, yet weighs less than a doped model of the same structure.
An added advantage to Mylar is the very low surface drag which becomes
important as the model's speed increases under power. We
combine the use of Mylar-covered flying surfaces with a fabulous
new epoxy paint process, developed by K&B Manufacturing Co.,
called Super Poxy which we use on all balsa fuselage and fin surfaces.
The Super Poxy process virtually eliminates the dust-epoxy problem,
since it sets up dust-free in twelve minutes at 70° and is fuelproof
flyable in twenty-four hours. Light weight again is the
name of the game since using Super Poxy involves only: sanding balsa
smooth; coating with K&B resin/catalyst combination; covering
with K&B's new one and two- tenths thousandth superlight fiberglass
cloth (1/4 the thickness of a human hair) and blotting the excess
resin up with tissue. The resin/catalyst sets up in from five minutes
to an hour depending on amount of catalyst used and does not get
brittle or become waxy. When set, spray on coat of K&B primer
with primer catalyst and K&B thinner. After primer is dry, sand
lightly with 220 grit 3M tri-cut silicone paper and spray one coat
of your favorite K&B Super Poxy color. (Mixing color charts
are available at your hobby shop.) No further sanding or rubbing
is necessary and the reflective brilliance rating is 98% that of
glass. Trim colors with Super Poxy may be sprayed after
24 hours. We use vinyl plastic tape - it is extremely thin, bends
perfectly around curves and corners and leaves a super-thin paint
edge which requires no sealing for bleed under. Note of
caution: K&B's research and development of the Super Poxy process
has been extensive, with best results for the modeler's use as the
prime target. They have succeeded so don't try to substitute other
products into the process. As a finished example of the
total Mylar Super Poxy process, see the photo of the Satellite "500"
A-Special. The engine, pan mount, timer and accessories weigh 11
oz. and the model weighs nine oz. with 1/2 mil Mylar covering.
We have found Mylar to be an ideal covering material for
all sizes and classes, of models, from indoor penny planes covered
with 1/4 mil (don't shrink it), through U-Control Combat to the
largest 1300 sq. in. Satellite class C-D jobs at 1 mil.
Now we can build strength into structure as never before, so tissue,
silk and dope are things of the past. Semi-geodetic construction
is used on all Series 70 Satellite classes, and flutter-free surfaces
result utilizing Mylar to its best advantage. Our 300 sq. in. 1/2As
come out at six oz. ready to fly and the 1000 'C' Specials barely
make 34 oz. The records set and held by the Series 70 Satellites,
covered with Mylar, are extensive, i.e., all of the 1971 Category
IA, B and C Free Flight Junior records, the 1971 Category I Open
C record at 73:24, 1972 Category I Open C record at 34:54, 1972
Category I Open B at 24:04, and the latest Category II Open C record
at 26:41. In addition, the Satellite 1300 holds the Western States
special Class D record at 25:00. I realize that Mylar is
an entirely new medium for most modelers, and for those who have
developed their skill with tissue, silkspan, silk, and dope, the
change could be mind-bending. I've been a member of the glue-chewing
fraternity for over seventeen years and changes in method don't
come easily to me either, but "try it, you'll like it!"
The procedure for painting and covering flying surfaces is as follows:
Color must be added to the clear Mylar unless you want to drive
the timer crazy! To paint the Mylar on a clean, workbench, layout
a rectangular section, twice the chord plus a couple of inches for
overlap (all around) of the surface you intend to cover. Tape the
section to the bench where necessary to stretch out any wrinkles
or creases. To do a solid translucent color with no lettering or
design, shake a spray can of your favorite color of "Kandy Apple"
brand lacquer, and lightly spray the Mylar. Let it set about three
minutes and spray again. You'll start to see the color you desire
by now. Don't try to make it too deep, as it is translucent. When
you are satisfied with the color, let it set to dry. I usually check
on the very edge with my finger tips. An adhesive is applied
to the framework of the wing or stab. We use 3M "77" clear spray
contact cement. We've found 3M 77 to be the best available, after
experimenting with many different types. The container holds 23.5
fluid ounces and it's enough to spray contact several huge "C-D"
free flights. Dry weight is 1/10 fluid weight. Hold the
framework to be spray contacted up away from any other material
and lightly spray the entire framework particularly the outline,
and bottom. As an example of how much spray contact should be applied,
passing the spray over one entire side of a Class "C" stabilizer
should take no more than six seconds. Then hang it up to dry for
a few minutes. Even when the spray has dried for ten minutes or
so, it will still feel a bit tacky, especially if you've sprayed
your fingers! We always cover the bottom of any surface
first, so let's suppose you have spray contacted a flat bottom wing,
such as the Satellite. The Mylar you have painted is still taped
to the bench. Set the wing right down on the painted Mylar, locating
it so that you'll have enough to cover full length in one piece,
and also so that plenty is left chordwise to cover the top, with
overlap. Look down on the wing outline and with a sharp blade cut
the Mylar all around the edge outline. Leave some overlap to allow
for error. When the Mylar has been cut all around, tip the wing
spanwise, first to one side and then the other, to pick up the Mylar
with the slight tackiness remaining from the contact spray. Turn
the wing over and set the center section on something so it will
stay where you put it. Now something very important becomes
apparent. All the paint is on the inside! Completely fuel proof!
If the Mylar has moved or slipped readjust it and a bit of finger
pressure will hold it in place due to the slight tackiness of the
contact. At this point we plug in the Sealector sealing
iron, and set it at 50% of maximum heat for 1 mil, 45% for 1/2 mil,
or 40% for 1/4 mil. When hot, touch the center of the bottom center
rib on the Mylar with the tip of the iron. With just the touch,
it seals immediately at that point. Now touch the iron at the leading
and trailing edge (center rib) the same way. Do the same at the
dihedral breaks and at the center of the tips. Since the wing has
polydihedral, we slice the overlap with a blade out away from the
dihedral joints at the leading and trailing edge. This is
a good time to do away with a lot of the overlap, so turn the wing
back over on the bench. Place a straight-edge on the Mylar up to
within 1/16" of the straight portions of the LE and TE and cut.
You'll have to do the curved tip sections freehand, but just use
the edge for a guide with your thumb resting on it. Flip
the wing over again; now you can hold it in your hand rather than
on the bench if it's comfortable. With the sealing iron at right
angles to the edge to be sealed, touch the iron gently to the Mylar
with a downward wiping action all around the outline. Do not shrink
the Mylar on the bottom at this time! For the top of the
wing, it's best to cover the tips first and, since the Mylar must
overlap when cut into tip, outboard panels, and center panel sections,
be sure you start your first tip cut far enough to one side of the
Mylar on the bench to allow for the overlaps. To do a tip, prop
the wing up, so the tip lays flat on the Mylar. Mark or cut the
Mylar about 3/8" inboard from the tip dihedral break. Cut around
outline of the wingtip leaving at least 1/2" overlap all around,
to allow for curvature (camber) and sealing under later. Remove
the Mylar tip portion from the bench and place it on the opposite
tip, paint side down, overlapping the dihedral rib. Carefully razor
cut slits in the overlapping portion at the tip dihedral rib, away
from the rib, toward the center of the wing. This is done to allow
the Mylar to fit the curve of the rib well, and to allow the overlap
to be sealed down the vertical side of the rib. Some contact cement
was sprayed on the side of the dihedral rib when the top and bottom
of the framework was done, but it's a good idea, at this time, to
take the tip piece off. Lay it paint side up and, using a piece
of paper as a shield (outline of tip), spray the tip overlap and
the outline overlap light with contact. Replace the tip
Mylar when contact is dry. Fit so that the razor slits line up on
the dihedral rib, and press down the slit portions along the side
of the rib with a finger. Slit the outline, away from the leading
and trailing edge, at the dihedral break rib. Touch the sealing
iron to the top of the dihedral rib in the center and at the LE
and TE. Also touch at the very tip edge and, with a wiping down
motion, several spots around outline. Using the same motion, now
complete the seal. Using the tip of the iron, heat seal and slit
overlap sections you pressed down on inboard side of dihedral rib.
The maximum amount of overlap needed is about 1/4", so if you have
an excess around outline, trim with a sharp blade or scissors. Slit
these, in the center of each wrinkle, on the overlapping portion
only and seal under with the Sealector iron. Now that the
tip is covered and sealed, you may want to find out how it shrinks
up. First, take a straight pin and puncture a small hole in each
sealed bay to allow air to breath in or out when shrinking. Starting
at the tip on the bottom, just touching the surface, pass the iron
over the first section. Go to the top of the wing, and starting
at the very tip, touch the iron to the surface and pass it back
and forth from LE to TE slowly, and as you move in toward the tip
rib you'll see those wrinkles disappear. Satisfied? Don't go any
further! Do the other tip! Everyone who has ever covered a polydihedral
wing, straight or elliptical, has had the problem of tissue, silkspan
or silk pulling up across the dihedral angle; Mylar is not different.
With a bit of extra balsa, you can your rib template and
cut two sliced ribs from 1/8, 3/16, or 1/4 sheet to fit the top
camber. Fit and cement these slices next to the tip dihedral rib
on the inboard side. You'll have to cut them at the spars. You now
have a thicker rib on top at the tip dihedral break and something
extra for the outboard panels to contact to. We've been
using a new clear liquid contact cement for jobs such as this called
Permabond. It has the consistency of water and if you have a section
fitted such as the sliced ribs, place one drop on the crack and
it penetrates and hardens in three seconds. Sure saves time! Any
excess on the surface just sets there so wipe it off with a piece
of tissue. If you get it between your fingers, get the razor blade
out and prepare for surgery! This material is very similar to Eastman
910. It doesn't warp structure (I build indoor jobs with it) and
works great on plywood/balsa or balsa/balsa lamination as well.
Now to cover the outboard sections: Lay a piece of paper
with a slot cut in it over the Mylar, balsa tip dihedral break and
spray contact that area. Set the wing down on the rest of your painted
Mylar, and cut the outboard panels, allowing for overlap at the
inboard dihedral breaks and also for the center panel to overlap
those breaks by at least 3/16" past the ribs. Set the outboard panels
in place, paint side down, touch iron same as tips, to center of
outboard dihedral rib and inboard dihedral rib and at the LE and
TE both ribs. To contact the overlap along LE and TE, lay a card
on the bottom of the wing near overlap and spray lightly. Let dry
and trim to 1/4". Complete seal same as tips. No balsa fill is needed
here since the angle is shallow. Use the same piece of slotted paper
to spray contact the Mylar over the inboard dihedral rib. Fit the
center section and seal. It sure took a lot more time to
write this than it has to cover the wing. Pin hole the rest of the
sealed bays in the outboard and center sections and start shrinking
from the tips in. Do a bay on the bottom and the same on the top
and keep moving in. Any excess spray may be cleaned away with turpentine
or auto enamel reducer or lacquer thinner - just a few drops on
a cloth. 3M also makes a 1/2" chrome Mylar self-sealing tape that
looks great on the leading edge and flashes well in the sun. When
your ship is out of sight the flash can still be seen and can give
you extra time on the watch. By the way, if you twisted
a warp in or would like to put some wash-in or wash-out into a surface,
just heat up the iron, secure the surface at the position you like
and pass the iron over and under again - that will set it. I usually
leave a wing or stab on the ship to do this, then I don't have to
hold the center. Right about now, you may be wondering how
the lettering, stars and bars were done on the Satellite 500 A Special.
It takes an artist like Walt Prey, President of the San Valeers,
to do freehand and few have hid talent, including me. So, "here's
the 'easy way an "all thumbs" type does it: Cut sections
of poster board that exactly fit the spanwise length of all panels.
Leave the chord of these pieces about an inch wider than both the
leading edge and trailing edge. Set the bare framework down on the
poster board and draw an outline with a ballpoint pen. Tape the
poster board sections together with 3/4" or 1" masking tape across
the chord leaving each section about 1/2" apart from the other.
It doesn't hurt to mark the dihedral breaks also. With a straight
edge draw in the center spar, spanwise, or any straight register
line. Doodle in your lettering and design ideas with a soft pencil.
When you've arrived at something you like, use angles, straightedges
and curves to solidify your idea with a ballpoint pen. Tape the
poster board down. Get out the No. 11 blade and X-acto knife
and cut all those neat designs you've figured out. Be sure they
are free and cut clean, but don't lift them out yet. Write on each
cut piece, what it is and where it goes (the center of the second
A in AMA, for example). At this point I use five plastic bags -
one for each panel and put the cut out parts from each panel in
a separate bag. Never did care for jigsaw puzzles! Wow look at that
stencil! Sure did get carried away, didn't you? Let's paint.
Secure your clear Mylar to the bench as described earlier. You probably
won't be doing letters on the bottom of the wing so cover that section
of Mylar with taped paper for now. Turn the stencil over, end for
end, so the letters are reversed. Place the stencil over the clear
Mylar. Mylar doesn't show pin holes and they won't cause rips, so
pin the stencil to the Mylar at various spots near cut out portions
of the stencil. This holds it down in that area and when you spray
through the cutouts, a clean line results. How about doing
the letters first? Look in the plastic bags and get the centers
of As, Ps, Bs, etc. and pin them in place. Cover all other stars,
stripes, moons, and whatever you don't want painted or fit the cut
out pieces in. Fitting is easy since they are all identified. I
used black letters with gold edging later. Spray the letters with
whatever color you've decided. Do it lightly and then again. Let
dry. Replace the cut out and spray blue, then replace them. Spray
the stripes and replace. To get the gold shading on the black letters,
pull all the pins out of the stencil, move it down toward the TE
about 1/8" in with the letters out, so you can see through, pin
around the letters, and lightly spray Kandy Color gold base. As soon as this is dry, remove the stencil and look at the results.
A whole gang of letters, stars, strips, and bars over clear Mylar!
Are they all sharp? If any edges are too fuzzy or have bled, don't
despair, Use a very fine brush and little lacquer thinner and clean
it, then dry with a Kleenex. This won't affect the Mylar at all.
In fact, if you don't like the job, soak a rag in thinner and wipe
it all off, and do it over. Painting only takes a few minutes anyway.
We always use the lightest color for the main color
because it can be sprayed lightly and look great. In the case of
the Satellite "500" A Special, the main color is Kandy Color Lime
Gold. Whatever color you choose, remove the paper shield from the
other section of your taped down Mylar at this time, if you want
the top and bottom to be the same color, and go ahead and spray
the entire piece. You might want to pin stars back in place since
lime gold, for instance, could turn blue stars green. Covering
and heat shrinking involves the same process as earlier described.
Just remember what you registered your design from, such as the
center spar, and lay it up that way. Be certain to allow for all
overlaps when you cut the separate panels. You can turn the Mylar
paint side down and put the stencil under it, and your previously
marked points for dihedral breaks will show through. This will assist
in making your cuts. It's a good time to put all of the pieces back
in the bags and hang up your stencil someplace. It will come in
handy if you want to do a T-shirt or another wing in a different
color just to show what kind of an artist you really are. Mylar is very tough, but all models get rips, tears, snags and holes
eventually. If you are at a contest and the covering is damaged,
it can easily be repaired on the field with scotch tape and later
the section can be replaced with Mylar painted the same as the rest
of the surface (contact the edge of the repair to seal). I've had
a pound of bacon go through the top of my wing tip from the refrigerator
in my trailer and in this case I used MonoKote "trim film" over
the huge hole and went ahead to win the San Valeers Annual in Class
C. To keep your surfaces gleaming like new, clean
with a soft cloth and DuPont Enamel Reducer (small amount) and dry
with another soft cloth. Refer to the following for
size, use, price and ordering information: 1/4 mil (.00025), Penny
Plane, 1/2A, Coupe, light Sport Gas and Rubber, 50 sq. ft. at $5.00;
1/2 mil (.0005), 1/2A, A, Wake, Unlimited Rubber, (1/2A, A Sport
UC), 50 sq. ft. at $7.50; 1 mil, B, C, D Gas, Sport and Combat UC,
50 sq. ft. at $10.00" To order, include fifty cents postage. Send
checks or money orders to: Bill Hunter, Satellite City, 9486 Sandusky
St., Arleta, Calif. 91331. Sources of other materials: "Kandy
Apple" Lacquer and DuPont Enamel Reducer - Auto Supply Stores; 3M
77 Spray Contact Cement and 3M Chrome Tape- Hobby and Craft
Shops, Auto Supply Stores, or call nearest 3M representative; Sealector
Sealing Iron (may use household iron - Hobby Shops, or Seal Inc.,
Derby, Connecticut; Permabond Contact Cement - Satellite City; Poster
Board - Art Supply, Stationers, Drug Stores; K&B Mfg. Super
Poxy 30 - Hobby Shops. Other films available at Hobby Shops for
covering models include Citizenship's Silictac and Top Flite's Super
Monokote.
Posted October 9, 2011
|