|
Airplanes and Rockets website visitor Jim S. wrote
to request that I post the original article for the Friend Ship I full house R/C airplane from
the May 1973 edition of American Aircraft Modeler. Jim says he has already built a 30" span
version, but is now looking to build a balsa-framed 60" wingspan version. He must really like the Friend
Ship I! The original model used Glaskin foam wings with fiberglass covering, so the plans do not
show a built-up wing construction.
Friend Ship I
by Don Gutridge
 Friend Ship I has been created as a result of a casual conversation,
and a desire to build an aerobatic aircraft that looks realistic, rather than like some kind of jet
with a prop on the nose. I was discussing aircraft design at the '71 Internats with Bob Smith, Chuck
Smith and Terry Prather, when the feasibility of utilizing Bob's Miss B.S. for pattern was mentioned
which immediately lit a fire under me. The sleek, lean, clean lines of Bob's racer make it look like
it is doing 150 mph when it is sitting on the ground, and this type of model generates intense excitement
in all who view it. Friend Ship I has been created as a result of a casual conversation,
and a desire to build an aerobatic aircraft that looks realistic, rather than like some kind of jet
with a prop on the nose. I was discussing aircraft design at the '71 Internats with Bob Smith, Chuck
Smith and Terry Prather, when the feasibility of utilizing Bob's Miss B.S. for pattern was mentioned
which immediately lit a fire under me. The sleek, lean, clean lines of Bob's racer make it look like
it is doing 150 mph when it is sitting on the ground, and this type of model generates intense excitement
in all who view it. The goals established for this design are necessarily tough, because the
competition in pattern today demands perfection. Competition reliability and perfection have been built
in from the outset by using only the best equipment available. Access to every vital component is provided
through purely logical placement (and lack of room to put it anywhere else), ensuring precise contest
trim. Aerodynamics plays an important role in providing this aircraft with the ability to achieve
flying perfection. A feeling of freedom and absolutely precise control overcomes the flier as soon as
she takes to the air. Total penetration ensures that windy flying is no longer a problem, and corrections
during a maneuver are extremely rare. Though not difficult, this subject is designed for the
experienced builder, so construction notes will be primarily restricted to features unique to this design.
The Sunday flier who wants something special to take to the local field will have no trouble building
Friend Ship I. Careful wood selection is a necessity. Use medium balsa for the fuselage sides, and light
stock for the remainder of the plane.
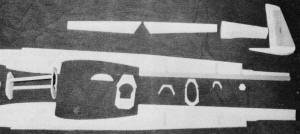 Pre-assembly for fuselage includes the nose section alignment
jig. Successful pattern plane must be accurately built.
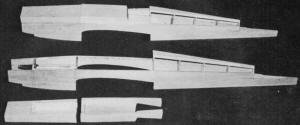 Top blocks need hollowing before mounting. Use a template
to be sure not to remove too much balsa. A Dremel tool and X-acto round-gouge blades make the work go
quickly.
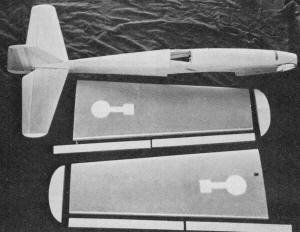 Glaskin wings featured in this model are available from
the manufacturer with retract cut-outs. Plans show templates for making your own foam and balsa wings.
 Friend Ship is an impressive flying machine. It is fast
and smooth even in strong winds, yet easy to fly well and win with.
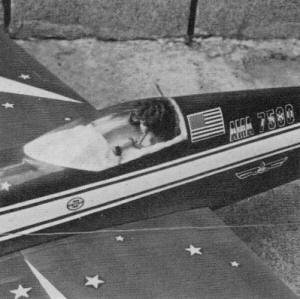 Fast way to dress up a cockpit is to line it with cloth
and put a Barbie doll in it. Canopy is put on backward as explained in text.
 A unique feature is the bottom hatch for access to the nose
gear which also mounts the on-off switch.
After cutting out the fuselage sides, doublers and bulkheads, splice the two-piece sides together lining
them up over the plans. Make both sides identical using a sanding block. Mark bulkhead positions, thrust
line, and wing and stab incidence lines before framing with doublers, longerons, and triangle pieces.
Also mark centerlines on all bulkheads, and the thrust line on the firewall. Perfect alignment
of the fuselage is accomplished with the nose subassembly shown on the plans. Cut the two hardwood beams
(measuring from the top view), and hold F2 and F3 between them with rubber bands. Line them up using
both views on the plans, and spot glue with epoxy when perfect. F4 and the subassembly are now epoxied
to one side of the fuselage. Join the two sides at F2 and F3 only making sure they are parallel as viewed
from the side. The sides will now come together at the tail meeting on the top view centerline together
with the bulkhead centerlines. After adding the remaining fuselage formers, begin forming the
turtle deck starting with the 3/8" top piece. Plane the sides even with the formers and add the decking.
Now bevel the sides with the top, and add a piece of 1/8" scrap to provide room to shape it into a gentle
curve. Add the freon tank support using 3/8" scrap balsa. It is now time to prepare for the
real fun in building this ship. The two top blocks are fitted by notching at F2 and F3, and cutting
to match up with the fuselage sides. Make two angle cuts to form the cockpit opening in the rear block,
and make the final cut using the top view for reference. Hollow the blocks to the outline on the plans,
but be careful not to go too far, or you may find some unexpected holes when the outside is being shaped
(as I did). After adding the engine mount, push rod tubes, and blind nuts for the nose gear, add the
1/4" tank compartment doublers, install the top blocks, and fill the nose with triangles and scrap balsa
where needed. Fit, but do not glue, the bottom block under the tank compartment. With the engine
fitted and removed to get the nose rings in place, take your trusty razor plane in hand and let the
shavings fly. When this operation is completed, and you are standing knee-deep in curly little strips
of balsa, the wood remaining on your creation will truly form a thing of beauty, which is now ready
to receive the tail section. Be sure your wife understands that the large piece of wood will not fit
in the vacuum cleaner, or she may get carried away. The shaping of the tail section is an important
part in determining the success of this model, so take care to form them into a very streamlined airfoil,
and ensure a close fit at the hinge line. It is also a good idea to countersink the control horns. Apply
epoxy. to the well when they are screwed in place, then fill with putty and sand smooth with the control
surface. This eliminates that added-on look, and provides a neat-looking streamlined installation. If
a heavier engine than the Veco 61 is used, it would be wise to make the vertical fin from hard 3/8"
sheet to aid balancing. After the horizontal stab is fitted, mark the center of the vertical
fin block, and pre-carve to fit the fuselage contour and the fin outline. Now epoxy the block, and the
vertical stabilizer in place. The fuselage is now ready for wing fillets, but we will first need a wing.
The templates on the plans may be used to cut a balsa covered foam wing. A great deal of time,
and weight may be saved, however, by simply ordering a Glaskin Wing from A.R. Flight (23326 Ladrillo
St., Woodland Hills, Calif. 91364). This type of wing was used on the original and is highly recommended.
It is available complete with retract cut-outs for $33.95, or set up for fixed gear for $29.95.
All that is required to assemble the wing is fitting the trailing edges, aileron linkage and ailerons,
retract mountings, and join the halves. The vertical part of the aileron linkage is offset 5/8" to the
right of the wing center, and the clevis should be connected 3/4" up from the center of the trailing
edge. The main gear doors are attached to the legs of the retracts with silicone rubber after painting.
Do not add the wing tips until after the wing has been fitted to the fuselage. Use 1/4" dowels
to hold the front of the wing, and reinforce F3 with two small squares of 1/8" ply where they enter
the forward compartment. The rear of the wing is held with camlocks, which are countersunk into the
foam and braced with a 1/8" ply ring. With the wing fitted, add F3a and F4a and build the pod below
the wing with 3/8" scrap balsa as shown on the plans. Now install the engine and muffler, and both main
landing gears (with the wheels up), and balance the aircraft laterally as you hollow and add the wing
tips. This operation is vital to optimum performance, so make sure it is not overlooked. As with the
tail section, be sure the wing tips are shaped to the outline on the plans. All that remains
is to fit the wing fillets, and complete the detail in the tank compartment. The outline for the 1/16"
ply tank floor is seen in the top view. The floor is supported with 1/8" sq. balsa rails, and is removable
through the slots in F3. Split the bottom block as outlined in the top view, and drill two holes
in each to accept the head of a small screw. A small square of 1/16" ply is epoxied over the holes to
act as a stop for the screw heads. Cut four small blocks of hardwood for the screws to go into, and
epoxy them inside the nose just above the bottom blocks. This nose assembly is extremely neat, and may
be completely disassembled in a matter of moments. Before filling and final sanding, add the
cockpit floor, instrument panel, and final detailing. It does not take very long to cover the dash panel,
side rails, and head rest with some material from the nearby yard goods store, to add a little touch
of realism. When the canopy is fitted, make sure it is cut with the pointed end facing forward. The
contour of the canopy will not blend properly into the lines of the fuselage if it is fitted facing
the other direction. Using tape to define the line of the frame, flair the canopy into the fuselage
with micro balloons, epoxy or Epoxolite. Everyone has his own method for finishing his creations,
so that will be left to the individual. My favorite method is Francis resin, and K&B Superpoxy.
These products are fast and easy to work with, and the end result is always perfect. Since Friend
Ship I is rather compact inside, there are some close tolerances encountered during the radio installation.
When mounting the aileron servo, be sure it is buried below the top of the wing, otherwise it won't
fit. The offset linkage mentioned earlier will provide clearance for other push rods. This plane was
designed around the Rom-Air retracts - if you are planning to use a different type, measure first. The
12 oz. Pylon slant tank fits perfectly, but clearance for the wheel must be made by heating and warping
a dip at the rear of the bottom. (I only ruined one tank doing this, so do it slowly.) Alas-
the day of truth is finally staring you in the face. Filled with anticipation of the events about to
take place, the adrenal in pours rapidly through your heart as Friend Ship I taxis to the end of the
runway. The engine responds instantly as the throttle lever is gently advanced to full power and rotation
begins as the blur on the runway rapidly reaches take-off speed. STOP! There is something else you should
know first. Prepare yourself for a totally new experience in flying. The masterpiece you have
just created is unlike any plane you have ever flown before. Even with all control movements cut to
a minimum, low speed handling is extremely positive, and rock steady. The original is light at seven
lb. total, and will continue a vertical climb for some time after the power is cut. Believe it or not,
the original model flew right off the board with only the slightest amount of elevator trim needed on
the transmitter.
 Friend Ship I Plans
<click for larger version>
Notice:
The AMA Plans Service offers a
full-size version of many of the plans show here at a very reasonable cost. They
will scale the plans any size for you. It is always best to buy printed plans because
my scanner versions often have distortions that can cause parts to fit poorly. Purchasing
plans also help to support the operation of the
Academy of Model Aeronautics - the #1
advocate for model aviation throughout the world. If the AMA no longer has this
plan on file, I will be glad to send you my higher resolution version.
Try my Scale Calculator for
Model Airplane Plans.
Posted August 8, 2013
|