|
Its profile on the plans looks like Mini Mono designer Ralph Pearson
fashioned it after the
F-86 Sabre, but that's mainly because the Pee Wee .020 engine
is not shown. This 1970 vintage 2-channel R/C model was a marvel
in compactness for its day. An Ace superhet pulse radio did the
guidance for an all-up flying weight of only 9.5 ounces for a 21"
wingspan low wing airplane. Supposedly it would bore holes in the
sky with impressive aerobatics (for 1970). Full-size plans were
printed on four pages along with the construction article.
Mini Mono
Ralph H. Pearson
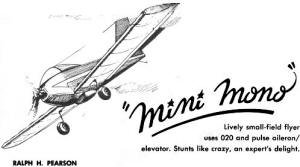
Lively small-field flyer uses .020 and pulse aileron/elevator.
Stunts like crazy, an expert's delight.
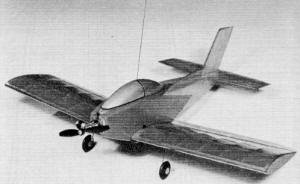
Suggestion - take Mini Mono on a trip; it fits in most large
suit cases. Although small, this plane is not fast. Pee
Wee engine has restrictor to reduce power. A schoolyard
flyer.
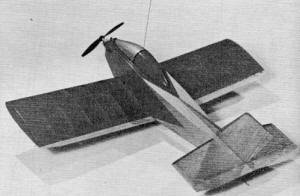
Who likes single channel? Two groups: low-budget beginners
and experts who think it is more sheer fun than getting
Excedrin headaches over powerful, fast, multi-bombs or 707's.
|
When building small models over the past several years, I first
used escapement and then Adams magnetic actuators. Rudder alone
was satisfactory; next some elevator control was used to obtain
pitch trim in flight for mild dives and flare-outs for landing.
The models ranged from 17 to 30 inches, with Pee Wee 020's for power.
It was while devising a plate for push-rod operation of
rudder and elevator that I decided, for good measure, to use this
plate for ailerons with elevator trim. The resulting model became
the Mini Mono. Its performance was gratifying. Initial flights
were surprisingly smooth with beautiful aileron turns. As a bonus
(to me, at any rate), this plane is not as fast as it looks. However,
a Vogt restrictor is used on the Pee Wee 020. Even with the engine
set wide open, some of the exhaust area is still covered, and the
loss of rpm is quite evident. By all means, use a restrictor on
the first flights. I use 3.6 volts (3-225's) on actuator,
tapping the battery pack at 2.4 volts for Ace Commander DE Superhet.
With 3.6 volts to actuator, six to eight flights per charge is the
limit, but that is usually sufficient. With a transmitter
not equipped for rate, the elevator trim feature must be eliminated.
In this case, 2.4 volts can be used for receiver and actuator. This
makes for simpler installation and a lighter model. In any case
the transmitter must have a width ratio of more than 80-20.
Do not try rudder only on this particular model. For ailerons
only, keep tail surfaces extra light, put aluminum straps on the
elevator hinge-line, and move the actuator forward slightly for
balance. Either way, the overall weight should be kept to 10 oz.
or less. The original model came out at 9.5 oz. Because
the Mini Mono plans are presented full-size, the building instructions
are brief, touching only on special construction details. To build
the model, cut out the plan pages and make Xerox copies of each.
Scotch-tape them together in the proper relationship and use them
as working plans. Mark bulkhead locations on fuselage sides
and assemble upside down over the centerline. If doublers are left
off until the sides are pulled together at nose and tail, less distortion
results. When dry, add doublers, 1/8" sq. strips, and firewall braces.
Also add wing-retaining tongue at trailing edge. Leave top and bottom
covering for later when all equipment, location, and operation have
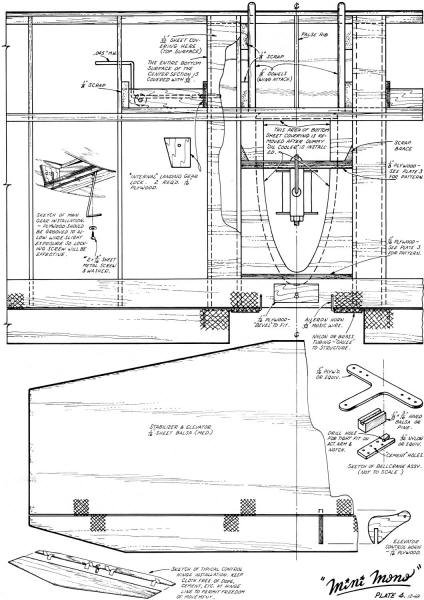
been checked out. The aileron-elevator plate can now be
made, using dimensions taken from the views on the plan. Assemble
the parts with epoxy and thread over a piece of wire the same size
as the actuator shaft. A little wax on the wire will aid removal
of the assembly after the epoxy has hardened. Check wing
fit and if satisfactory glue leading edge dowels in place. When
this is dry, drill hole for retaining screw. Cut out ailerons
and tail group; hinge as desired. Surfaces must be able to flop
of their own weight. Aileron horns are made from 1/32" wire, nylon
or brass tubing, and a drilled nylon fitting. Mount actuator
in the wing, connect linkage (z bend is for adjusting length) and
check for smooth operation. Use inner holes on plate and restrict
actuator movement to 45 degrees each side of neutral. Ailerons should
move approximately 15 degrees each side of neutral. Make
a pushrod from medium 1/8" sq. and 1/32" wire. 'The rod is held
in place at the elevator horn with a slice of small fuel-line tubing
used as a retainer. It also acts as a sort of centering device.
Mount the wing on the fuselage and connect elevator pushrod. Check
operation of the elevator for 1/4" total movement - more up than
down. Remove wing, radio, etc. Drill holes for the engine
to one side of the firewall so that 3 degrees of right thrust will
center prop. Now finish fuselage top and bottom. Shape a
canopy from soft balsa and place it so that the back half can be
removed rearward for removal. Fuselage under the back half is cut
out slightly smaller than the canopy. Reach into this opening with
tweezers to attach the pushrod to the plate.
Note
that the switch is removable but is held in place by the wing. Use
a small brace to strengthen the notch-weakened area. The battery
is wrapped in foam and wedged into the nose area. Hobbypoxy
clear was used on all sheet surfaces. Three coats give a light fuel-proof
finish with no warpage. A bit of colored trim livens up the model.
The original wing was covered with Japanese tissue, but I intend
to recover it with MonoKote. Weed-ripped tissue is too often a problem.
Check for 5 degrees down- and 3 degrees right thrust for
the first flights. Do test flying over a grassy field on a calm
day. Use a restrictor on the engine and conduct powered glides,
increasing power and making adjustments to thrust line and elevator
if necessary. Keep the model in close. These small models can't
carry much antenna (a vertical antenna is recommended), and orientation
is difficult if they are too far away.
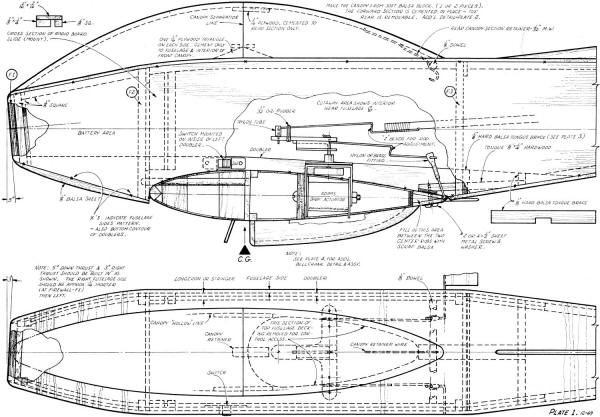
Mini-Mono Plans (Plate 1)
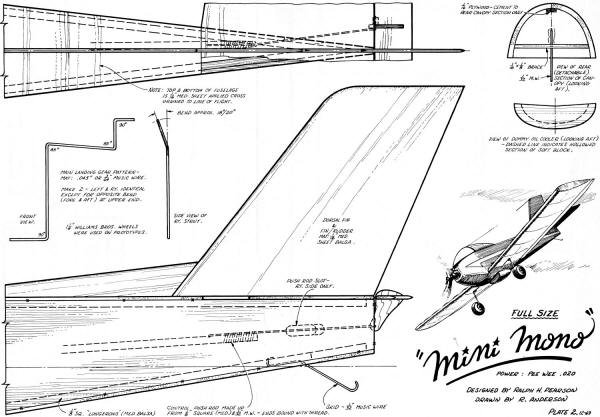
Mini-Mono Plans (Plate 2)
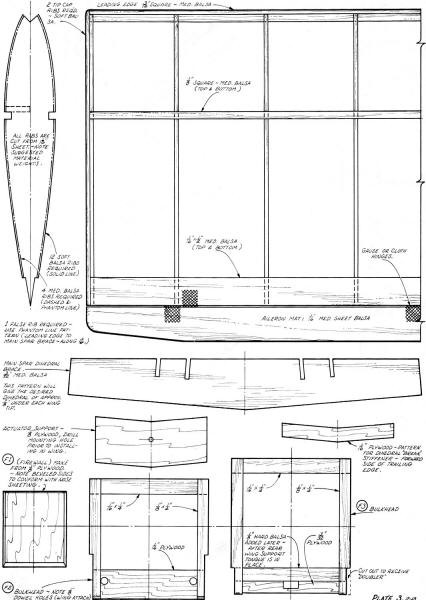 Mini-Mono Plans
(Plate 3)
Mini-Mono Plans (Plate 4)
Notice:
The AMA Plans Service offers a
full-size version of many of the plans show here at a very reasonable cost. They
will scale the plans any size for you. It is always best to buy printed plans because
my scanner versions often have distortions that can cause parts to fit poorly. Purchasing
plans also help to support the operation of the
Academy of Model Aeronautics - the #1
advocate for model aviation throughout the world. If the AMA no longer has this
plan on file, I will be glad to send you my higher resolution version.
Try my Scale Calculator for
Model Airplane Plans.
Posted June 29, 2013
|