|
You might expect this "Flying
Broomstick" article to be about one of the many novelty witch-on-a-broomstick models
that typically appear in September or October issues of model airplane magazines,
but in this case it is simply a contest-worthy Class C rubber free flight job.
The fuselage has a slight resemblance to an old wooden broomstick, but the similarity
pretty much stops there. The hollow tubular fuselage made of rolled 1/16"'
balsa holds 18 strands of rubber. Semi-elliptical shaped wings with a gull type
dihedral give it unique look. Per designer / builder Kukuvich, "Flights of 2
min., 30 sec., are common in "dead air" and are accomplished without the help of
risers."
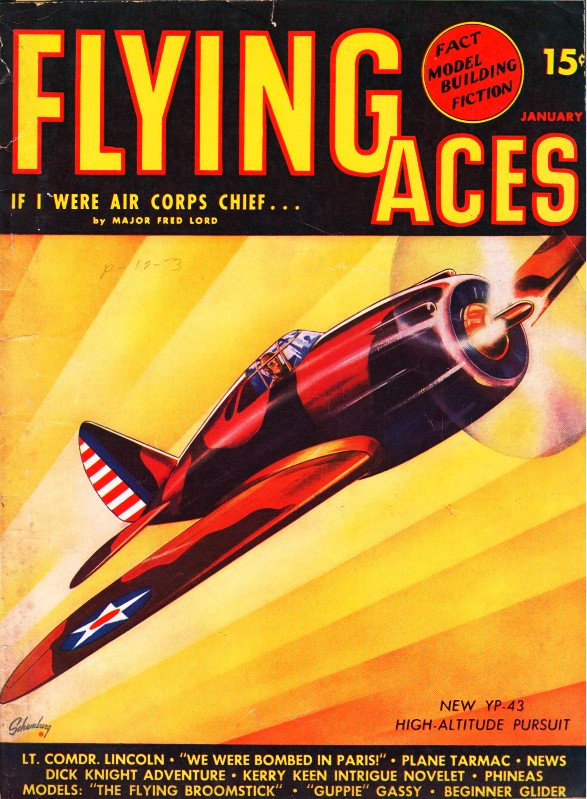
Here's a Flying "Broomstick"
The author demonstrates the position in which his Class "C" stick
job glides.
A queerly-named craft, no doubt, but it has plenty contest cleaning-up possibilities
by C. A. Kukuvich
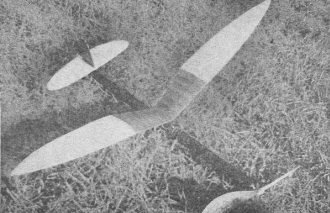
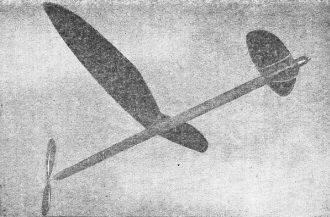
We believe this gull-wing stick has every characteristic of a satisfactory contest
model. The climb is very steep in a spiral-like fashion. At the peak of the climb,
the model rights itself and goes into a long, flat glide.
Flights of 2 min., 30 sec., are common in "dead air" and are accomplished without
the help of risers. The best single flight to date is 4 min. plus, which took place
during a local contest, and the model did not fly outside the airport bounds.
The drawings presented are self-explanatory and no difficulty should be encountered
in building this abbreviated "Flying Broomstick."
Fuselage "Stick"
The first thing to do when making the shell is to soak for several hours a 1/16"
by 4" by 36" sheet of balsa in a bath tub filled with about 3" of lukewarm water.
Place the sheet at the bottom of the tub and use water-filled glasses for weights.
After the stick is removed from its bath, wrap it around a form, either wood
or metal, with an outside diameter of approximately 7/8". Then bind cloth tape (not
friction or adhesive) over the balsa sheet to hold it in place while drying on the
form. When the balsa is thoroughly dry, remove it from the form and cut the balsa
"shell" into two pieces, one 30" long for the stick itself and the other 6" long
for the wing mount saddle. Now cement the longer piece joint the full length of
the stick. When the joint has dried satisfactorily, give the stick one coat of clear
dope and then sand lightly. The stick is now ready for covering with 2 1/2" wide
strips of tissue in a spiral-like fashion.
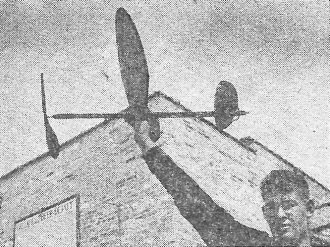
Like an exhausted bird, the "Flying Broomstick" comes to earth
after a flight of four minutes plus. This is excellent time, considering that the
flight was made without the aid of thermals.
Eighteen power strands housed within the shell of this graceful
craft give it plenty of power for high-altitude soaring.
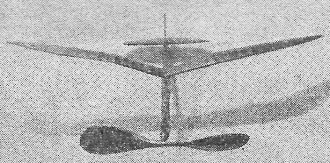
Gull wings and wide prop blades add to the efficiency of its
flying characteristics.
Make the 2 1/2" wide strips of tissue by cutting up a large sheet. Apply the
strips by doping and pressing firmly with your thumbs until the full length of the
stick is covered. This type of stick construction is exceptionally strong and also
quite light.
The stabilizer column mount and fin (which forms part of the rudder along the
bottom of the stick) is made from 1/8" by 1" by 36" sheet, as shown on Plate 1.
After shaping the stabilizer mount, cement two pieces of 1/16" by 1" by 2" balsa
to the top of the mount to form a seat for the stabilizer. This is shown in the
detail in Plate 1. Cement both the stabilizer mount and fin in their respective
places on the stick.
The nose and tail plugs are made from individual blocks 3/4" by 1 1/4" by 1 1/2",
which must be cut to shape to suit the stick. Cement 1/4" pieces of balsa, which
are of the same size as the inside of the stick, to the backs of each plug, thus
preventing them from turning when the power strands are wound for flight.
Bend the rubber hooks from 1/16" diameter piano wire and cement in place the
one for the rear plug. The hook for the nose plug is laid aside until it can be
fitted onto the prop and bent to shape.
To make a better bearing, a piece of aluminum or brass tubing 1/16" I.D. should
be inserted in the nose.
Wing Construction
Cut ribs 1 to 19 from 1/16" soft balsa sheet. Then, spars numbered 29 and 30
are cut to shape from 1/8" sheet. Next, cut the trailing edges 33 and 34 from 1/32"
sheet balsa.
After having formed all the parts necessary for the wing, make a full-size layout.
When the layout has been completed, place a sheet of wax paper over the drawing
to prevent the structure from sticking to it.
Lay the trailing edges, 33 and 34, in place and use a few pins to hold them down.
Then pin down the spars, numbered 29 and 30 and cement all the ribs (with the exception
of 1 and 7) in their respective places. Before gluing the ribs to the spars, be
sure to pull the spars up into the rib cut-outs provided for them. Cement the 1/8"
sq. balsa strips in place to form the leading edges.
The wing tips are made from a strip measuring 3/16" by 1" by 3" and are roughed
out before cementing in place. Having allowed the wing structure to dry thoroughly,
remove the four sections from the layout and add the proper amount of dihedral.
Be sure to have the same amount of dihedral on each wing half. Next, cement ribs
1 and 7 in place and add 1/32" sheet, re-enforcing at the joint with liberal amounts
of cement. When the dihedral joints are dry, add 1/32" sheet balsa covering to the
bottom of the wing between ribs 1 and 7 in each half of the wing. Before applying
the tissue covering, finish off the wing tips and the rest of the structure with
fine sandpaper. The wing tips should continue, in a tapering manner, the outline
of rib 19.
When covering the wing use red tissue for the section from ribs 7 to 1, then
cover the section from ribs 1 to 19. After covering each half of the wing, top and
bottom, pin down until dry to prevent possible warping. Spray the top of section
rib 1 to 7 and pin down when drying to prevent warping. The bottom of section rib
1 to rib 7 need not be sprayed with water because when the tissue was applied over
the 1/32" sheet balsa, dope was used over the full surface.
Give the entire wing two thin coats of clear dope to protect it from dampness
and to give it more strength. The doping is done by applying it to one surface at
a time. First dope the top section from rib 1 to rib 19 and pin down when drying.
Then dope the bottom of the same section and pin down. Now dope the top of section
from rib 1 to rib 7 and pin down to dry. Repeat this method of clear doping to each
wing half twice.
The wing mount is made by cementing together two pieces of 1/4" balsa and then
shaping it as shown on Plate 1. Now cement the mount to the wing, using glue liberally.
When the cement joint between the wing and mount is dry, take the 6" piece of balsa
"shell" and cement it to the bottom of the wing mount. Be sure that when the "shell"
is opened and set over the stick the wing will line up properly. Before laying the
wing aside, and after all the wing mount cement joints are dry, cover the 6" "shell"
with tissue to give it flexibility.
Stabilizer and Rudder
Ribs 20 to 24 are made from the 1/16" soft balsa sheets. Cut spar 31 from 1/8"
sheet balsa and the trailing edge number 32 from 1/32" sheet. Next, make a full-size
layout of the stabilizer by scaling the drawing where dimensions are not given.
Lay a sheet of waxed paper over the layout and lay spar 31 in position. Place the
ribs in their respective positions and fit in trailing edge 32.
After having lined up the ribs properly, cement in place and add a 1/8" sq. balsa
leading edge. The stabilizer tips are made from 1/4" balsa and are roughed out before
attachment.
When the tips are cemented in place and the whole structure is dry, remove from
the layout and cover the spars between ribs 20 with 1/32" sheet balsa. Then sand
the whole structure with fine sandpaper and finish off the tips to suit.
Cover the stabilizer with two pieces of red tissue (one for each side of stabilizer)
and water-spray. Be sure to pin down the whole stabilizer after spraying. When the
tissue is dry, give the surfaces two coats of clear dope. Dope one side at a time
and pin down on the board. Repeat the doping process and the stabilizer is finished.
The first thing to do when making the rudder is to cut ribs 25 to 28 from 1/16"
soft sheet balsa. Make a full-size layout of the rudder by scaling off the drawing
where dimensions are not given, then cut out the necessary outline from 1/16" sheet
balsa. Place a sheet of waxed paper over the layout, set the ribs and the outline
in position, pin down, and cement at all points of contact.
After the bare structure has dried, remove it from the layout and cover with
red tissue, using the same procedure as in the case of the stabilizer. Give the
rudder one coat of clear dope by brushing one side at a time.
When the rudder has been completed, cement it in place on the stabilizer and
fill in the gap between rib 28 and the top surface of the stabilizer with scrap
pieces of balsa. Finish by trimming off neatly. The corner which is formed by the
rudder and top surface of the stabilizer, may be neatly filleted with scrap pieces
of tissue.
Carving the Propeller
The propeller is a right-hand type and is made from a hard balsa block, 1 1/4"
by 2 1/2" by 16". Layout the block, as shown on the drawing, and cut away the portions
which are unnecessary to the prop itself. Care should be exercised in carving the
prop and all bumps or hollows should be sanded out after carving. Remember that
the prop is what makes or breaks the model as a contest ship.
After the bumps and hollows have been removed, give the prop several coats of
clear dope and sand lightly between coats. Cover the blades with silk or tissue,
as desired.
Now enlarge the hole in the center of the prop to take either aluminum or brass
tubing. If free-wheeling is added, it is very essential for the airscrew to turn
smoothly on the shaft. However, in the case of a folding prop, the important point
is good alignment. The Garami free wheeling is a reliable type, which has been tried
and tested many times.
Try the "Broomstick" under power, using a few turns to shirt off with, and adding
more revs on each successive flight.
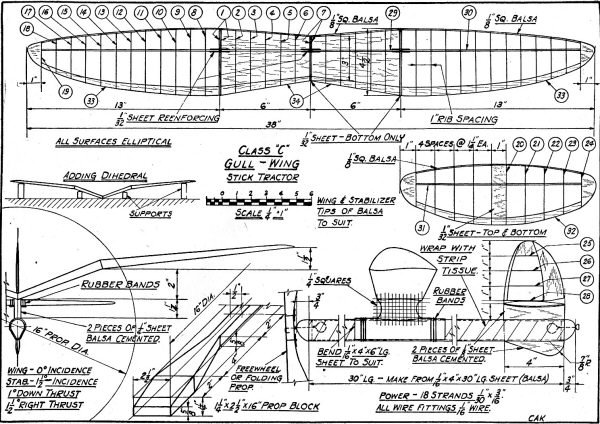
Flying Broomstick Plan Sheet 1
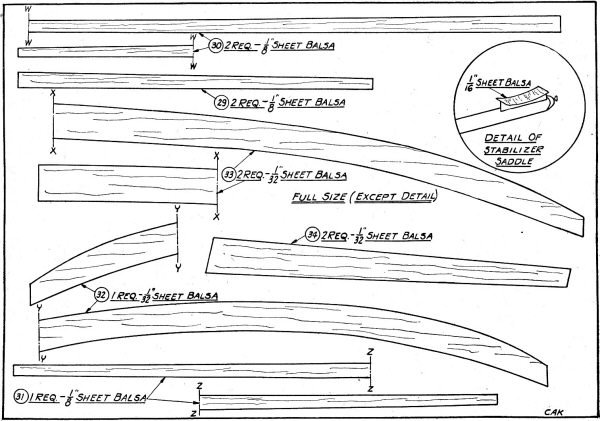
Flying Broomstick Plan Sheet 2
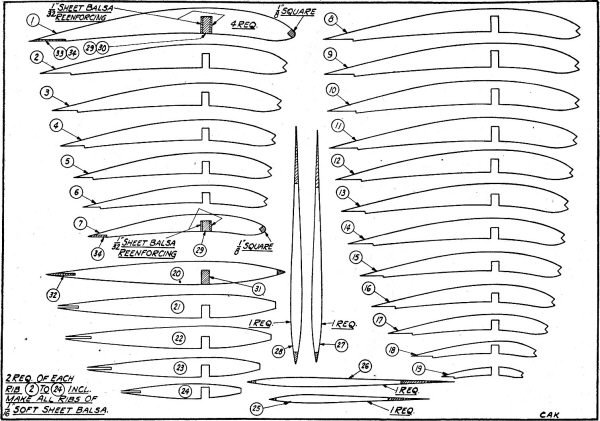
Flying Broomstick Plan Sheet 3
Notice:
The AMA Plans Service offers a
full-size version of many of the plans show here at a very reasonable cost. They
will scale the plans any size for you. It is always best to buy printed plans because
my scanner versions often have distortions that can cause parts to fit poorly. Purchasing
plans also help to support the operation of the
Academy of Model Aeronautics - the #1
advocate for model aviation throughout the world. If the AMA no longer has this
plan on file, I will be glad to send you my higher resolution version.
Try my Scale Calculator for
Model Airplane Plans.
Posted October 2, 2021
|