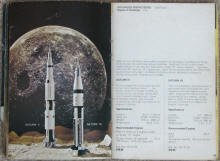
Estes 1971 Model Rocketry Catalog - Pages 42 & 43

Estes Saturn V Ready for Painting
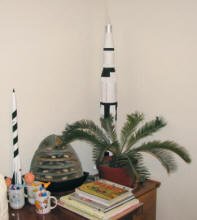
Estes Saturn V and Gemini Model Rockets
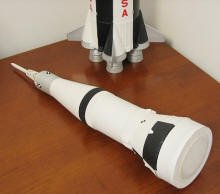
Estes Saturn V Upper Two Stages
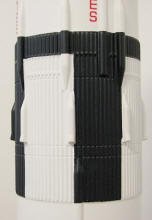
Estes Saturn V Painted Markings
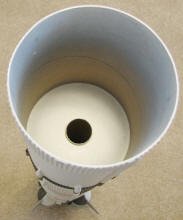
Estes Saturn V 1st Stage Interior
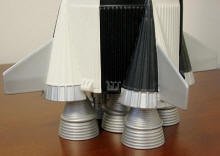
Estes Saturn V Fins and Engine Nozzles
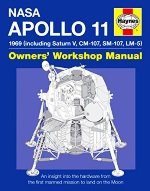
NASA Apollo 11: Owners'
Workshop Manual - Haynes
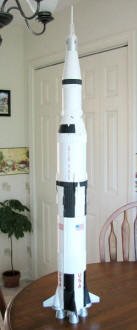
My Estes Saturn V Model Rocket
The Estes Saturn V rocket is a model that I really wanted to have as a kid, but
never could justify spending the money. In those days, I launched everything that
I built, so I could not see spending a huge amount of my paper route money only
to take the risk of destruction due to the parachutes not deploying properly or
maybe an engine malfunction. I had launched enough rockets to know that the probability
of something going wrong was directly proportional to the cost and time spent building.
Instead, I stuck mostly with models that cost no more than about $3 (in 1960s-1970s
dollars). The photo to the left is one of my favorites since it shows the Estes
Saturn V behind a sago palm plant - kind of how you might have seen it in the distance
while sitting on the launch pad at Cape Canaveral.
 Building Instructions Building Instructions
Specifications: Price = $16.50
Length = 43.5" (110 cm)
Body Diameter = 3.938" (100 mm)
Weight = 9.9 oz (280 grams)
Above are pages 42 and 43 out of the 1971 edition of the
1971 Estes Model Rocketry
Catalog that featured the Saturn V and
Saturn 1B models. In August of 2005, I decided that at 47 years old, time was
running out to finally buy and build the Saturn V. It was purchased at King RC,
(in King, NC) and was finally completed in September of
2007.
 The Estes Saturn V cost $16.50 in 1971 dollars,
which in 2005 dollars, is about $80. That is pretty amazing, because I paid $85
at King RC. If you can find one of these gems on eBay, be prepared to pay up to
$150. My kit was one of the 30th Anniversary editions, not the original kit, which
was fine with me because the original kit had a lot of paper and wood parts instead
of the molded plastic. Even the newer version had 50 or more parts to be assembled.
Building the escape tower out of 1/16" wooden dowels would not have been fun. You
can see in the picture to the left that there was quite a bit of work involved in
assembling the Estes Saturn V rocket model. Since this model was meant to be flown,
it has the standard construction of the cardboard body tubes and fairings, a "D"
size engine mount, three parachutes, and all the myriad injection molded plastic
components. The Estes Saturn V cost $16.50 in 1971 dollars,
which in 2005 dollars, is about $80. That is pretty amazing, because I paid $85
at King RC. If you can find one of these gems on eBay, be prepared to pay up to
$150. My kit was one of the 30th Anniversary editions, not the original kit, which
was fine with me because the original kit had a lot of paper and wood parts instead
of the molded plastic. Even the newer version had 50 or more parts to be assembled.
Building the escape tower out of 1/16" wooden dowels would not have been fun. You
can see in the picture to the left that there was quite a bit of work involved in
assembling the Estes Saturn V rocket model. Since this model was meant to be flown,
it has the standard construction of the cardboard body tubes and fairings, a "D"
size engine mount, three parachutes, and all the myriad injection molded plastic
components.
Although you cannot see it in the picture, the very thin plastic body wrap areas
that have the vertical cooling lines had a tendency to warp where the glue made
contact. I used plastic model cement, but even in modest amounts, it still attacked
the plastic. You have to know to look for the distortions in the finished model,
but it irks me to know it is present after putting so much care into the construction.
The finished model, in all its splendor, is shown below to the right. I used spray
enamel paint for everything (black, white, silver, clear). Taping the roll patterns
was a real challenge, but it turned out pretty well, IMHO. The edges of the black
areas are nice and sharp, since after taping, I sprayed a coat of clear at the tape
lines to seal off the edge to keep black paint from creeping underneath. I let the
entire model dry for about two weeks before applying the decals. They are the pressure
sensitive type (as opposed to water activated), so getting everything in the right
position the first time was essential. To do that, I applied masking tape just outside
the stencil areas and marked alignment targets. Then, the decals were applied while
holding each end with a pair of tweezers. Doing it that way resulted in a nearly
perfect alignment vertically and horizontally. You can sight down the length of
the rocket body and see that the "UNITED STATES" and other decals are just right.
Two light coats of matte clear were sprayed over the entire model after all the
decals had been applied (that was a nervous time, because I feared the decals might
react unfavorably with the paint).
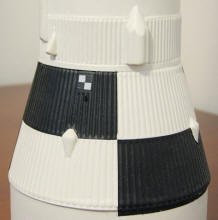
Estes Saturn V 1st & 2nd Stage Coupler
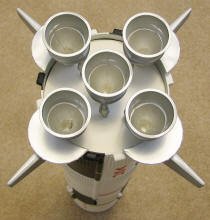
Estes Saturn V Engine Cluster
As she stands in the photo at the top left, the Estes Saturn V rocket is flyable.
The five nozzles are removable to expose the functional motor mount. Stages 2 and
3 are glued together, but the assembly separates from the booster stage so that
the parachutes and shock cord could, in theory, but it back to Earth safely. In
my lifetime, however, that will never happen. Probably once I assume room temperature,
one of my kids will probably give it to some schmuk who will launch it and destroy
all my hard work. I will be certain to haunt whoever that might be ;-)
Below are a few more detailed photos of the Estes Saturn V construction and paint
job. Testors spray enamel paint was used everywhere, with very light sanding between
coats using 600 grid sandpaper. All masked lines had a coat of clear sprayed before
the next color in order to seal the mask line to prevent color seepage under the
pate. After decals were applied, two coats of flat clear were sprayed.
My Saturn V is not necessarily museum quality, but it sure makes a nice display
model, and of course it will never be flown.
I'll be glad to adds photos of your Saturn V models to this page if you e-mail
them to me.
 Saturn V Model Built from Legos Blocks (left) Saturn V Model Built from Legos Blocks (left)
Melanie got me the NASA Apollo 11: Owners'
Workshop Manual for my birthday (see to the right). It is published by
Haynes,
the people who offer all the car and truck repair and maintenance manuals. This
is probably the most comprehensive collection of technical information and
development history of the Saturn V booster rocket and Apollo module of any
meant for the general public.
Here is a list of my other rocket models.
Posted March 10, 2023
(updated from original post on 7/12/2007)
|