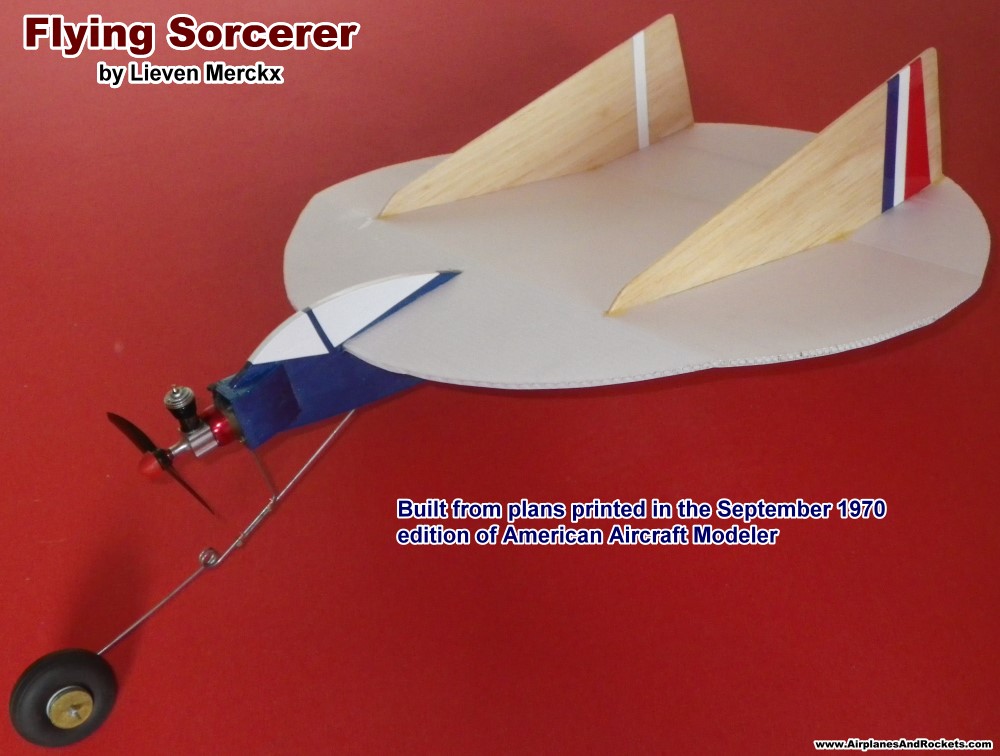
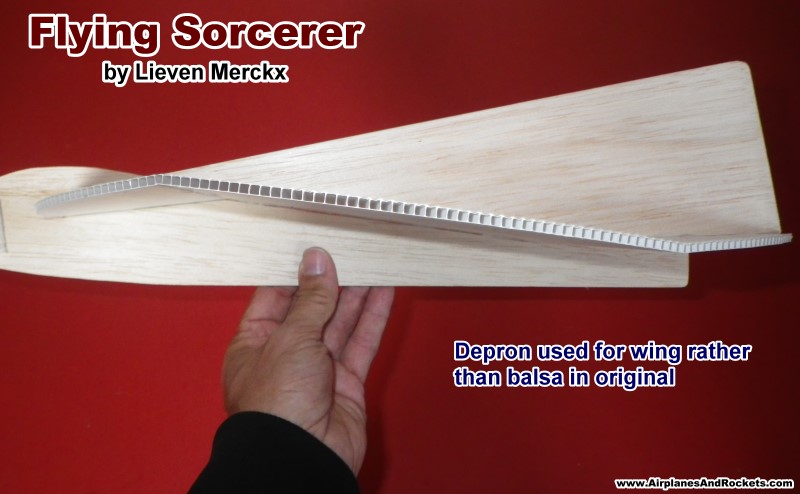
Here is an interesting little 1/4A
free-flight model. The round wing planform is unique enough, but what I really like is
the s-curved airfoil formed into the balsa sheet wing. Designing and test flying these
kinds of models with unusual construction techniques often takes a lot of time and effort
by the designer. It is really good old seat-of-the-pants aircraft development. Whether
it be flying Snoopy dog houses, witches on broomsticks, or flying saucers, there is always
someone out there willing to put the work into making those kinds of models fly.
Website visitor Lieven Merckx, of France, was
kind enough to send me these photos of the 'Flying Sorcerer' that recently he built.
Depron corrugated plastic was substituted for the original balsa wing. The heavier weight
of Depron necessitated more counterweight ahead of the center of gravity, so Lieven made
good practical use of it by adding a wheel.
At the bottom of the page are a couple close-up photos and a
video of the first flights. Notice how each flight improved
as Lieven made trim adjustments. Free flight is the one realm of model aviation that
requires a good working knowledge of aerodynamic in order to achieve a good combination
of powered and unpowered flight. He noted that these flights were made 45 years after
the article's appearance in the September 1970 edition of American Aircraft Modeler.
Flying Sorcerer
Do you believe in flying saucers? Now you can -this one's for real, an 020
free flight.
Jack Headley
Photos by Author
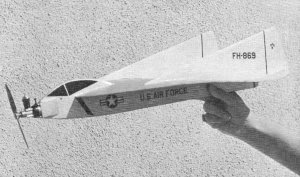
AFTER some years of study, the Air Force apparently has decided that flying saucers
really don't exist. Perhaps they should have paid more attention to Southern California
before making up their minds, because flying saucers have been seen there for quite a
while. Of course, these saucers are not too big and don't fly too long, so possibly the
Air Force can be excused.
These UFO's are in reality models, the latest version being the Flying Sorcerer. Earlier
models were powered by various-sized engines, including one Jetex-powered version. Then
there was the model known as the Flying Pizza because of an unfortu-nate color scheme
composed mainly of yellow and red!
Construction
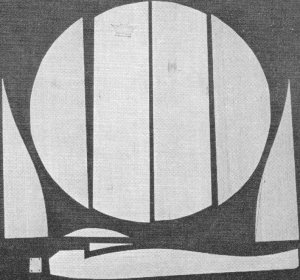
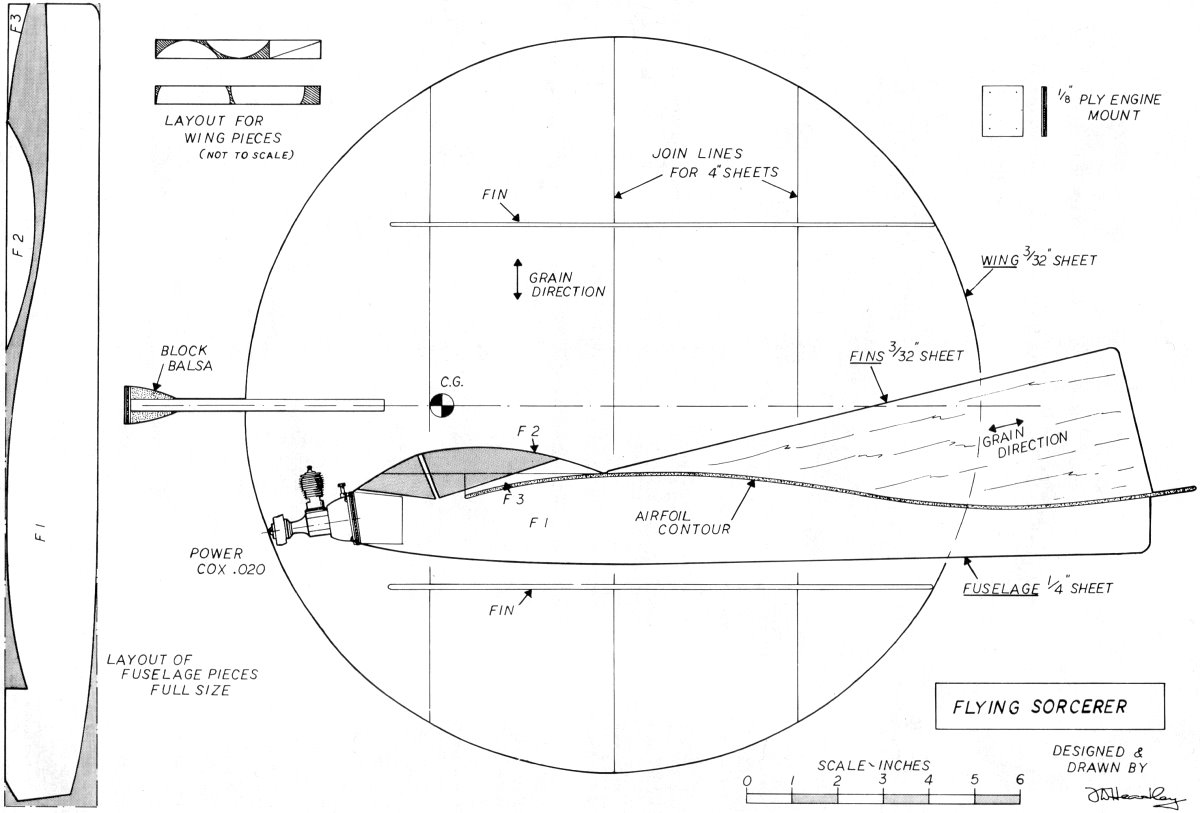
Before beginning construction, it is especially important to study how the various
pieces are cut from sheet wood. The following materials are needed: 2 pieces of 3/32
x 4 x 36" balsa; 1 piece 1/4 x 2 x 18" balsa; 1 piece 1/8 x 1 x 1" plywood; 1 piece 1
x 2" gauze; and 4, No.2 x 3/8" wood screws.
Take the two sheets of 3/32" balsa and select the harder. This is the sheet to use
for the front and back pieces of the wing and for the fins. To get the shapes correct,
put the wood under the plans and , with a pin, prick through the outline of the shape
onto the wood. Next, using a ballpoint pen, join the marks. Mark all the pieces before
beginning to cut the balsa.
When assembling the few parts involved, fuselage and rudders hold
wing's curved airfoil. Use lots of glue and pins at these joints.
Simple markings made with paint, decals, and marking pens turn it
into a USAF-type plane. Model must be painted for fuel protection.
When everything is laid out and all the various pieces have been fitted onto the sheet
stock, cut out the pieces with a single-edged razor blade. Check these pieces with those
shown in the photo to make sure all the required ones have been cut.
Pin down the plans on a flat board, cover with wax paper, and cement together the
four balsa pieces to make the circular wing. While this is drying, the engine mounting
can be fixed to the fuselage. Cement the small blocks of balsa to the nose of the body
(these blocks can be built up from scrap pieces of 1/4" sheet if no block balsa is handy).
When the blocks are dry, sand the nose pieces flat and cement on the 1/8" ply engine
mount. It is best to leave this to dry overnight.
When both assemblies are thoroughly dry, the wing can be cemented to the body. It's
a good idea to draw, with a ballpoint pen, the three lines on the top of the wing. They
indicate where the wing is placed on the body and where the fins are located. The fins
can be attached now, making certain they are lined up straight before the cement dries.
Next, add the remaining pieces of 1/4" sheet for the canopy. Suddenly, it's almost finished!
Let everything dry before going over all the edges with sandpaper. The final task
is to cement a strip of ordinary gauze bandage to the firewall and around the nose block.
This reinforces the engine mount. Use wood screws to mount the engine.
Give the completed model one coat of clear dope and, after this dries, sand lightly
and put on one more coat of clear. Sand again, then put on the color dope. Do this very
lightly; too much weight will reduce the model's performance. The prototype was sprayed
silver and a few decals added to dress it up. The markings also can be applied with colored
felt pens.
Check the balance when the model is completed. If it does not balance at the point
shown on the plans, add a little modeling clay at either the front or back until it does.
Then try a few hand launches into some long grass. A nice smooth glide is required. If
it dives too fast, bend the back of the wing up a little. If it stalls, bend the back
of the wing down. When it seems about right, at-tempt a power flight with the engine
at low power and the propeller on backwards. If the model climbs to the right, everything
is fine; if it flies straight or to the left, put a small washer under each engine mounting
screw on the left side. This will make the engine point a little to the right and should
make the model climb properly. Glide can be trimmed finally by small adjustments to the
back of the wing.
After a few flights at low power, try putting the propeller on the correct way and
opening up the engine a little more. The model's performance is excellent, so don't forget
to attach your name and address. They may be needed!
<click for larger version>
Notice:
The AMA Plans Service offers a
full-size version of many of the plans show here at a very reasonable cost. They
will scale the plans any size for you. It is always best to buy printed plans because
my scanner versions often have distortions that can cause parts to fit poorly. Purchasing
plans also help to support the operation of the
Academy of Model Aeronautics - the #1
advocate for model aviation throughout the world. If the AMA no longer has this
plan on file, I will be glad to send you my higher resolution version.
Lieven Merckx's 'Flying Sorcerer' from American Aircraft Modeler
Plans
Depron corrugated plastic substituted for balsa in wing
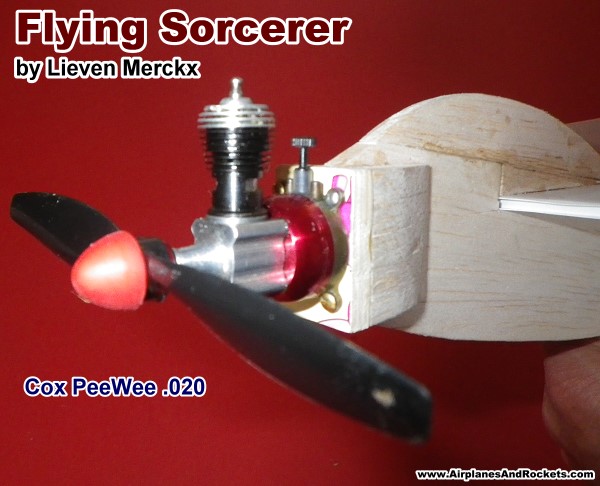
Cox PeeWee .020 engine for power
Video of initial trim flights - this takes real skill. Look at that
amazing flying field!
Posted September 13, 2011
About Airplanes & Rockets
Kirt Blattenberger
Carpe Diem! (Seize the Day!)
Even during the busiest times of my life I have endeavored to maintain some form
of model building activity. This site has been created to help me chronicle my journey
through a lifelong involvement in model aviation, which
all began in Mayo, MD
...
Copyright 1996 - 2026 All trademarks, copyrights, patents, and other rights of ownership to images
and text used on the Airplanes and Rockets website are hereby acknowledged.