|
Hal deBolt was
a well known and respected model aircraft designer in the early days of radio control.
By 1962, when this "How to Build Better Wings" article appeared in American
Modeler magazine, there were some proportional radio systems coming on the
market, but a lot of fliers still used escapement, galloping ghost, or reed systems.
With somewhat limited control , having an airplane that was inherently stable or
neutrally stable was important for success. Negative stability usually meant disaster.
One way to minimize airframe related issues is to build on a well-designed jig -
especially for the wing and tail surfaces. Even today's laser cut, perfect fitting
kit parts are of no use in obtaining a true airframe if the surface they are built
on is twisted or bowed. This article offers a simple jig that can be used for building
any normal wing. If you are one of the rare builders left and are having problems
with trimming your model to fly predictably, try checking the trueness of your current
models, and then consider building your next project on a jig.
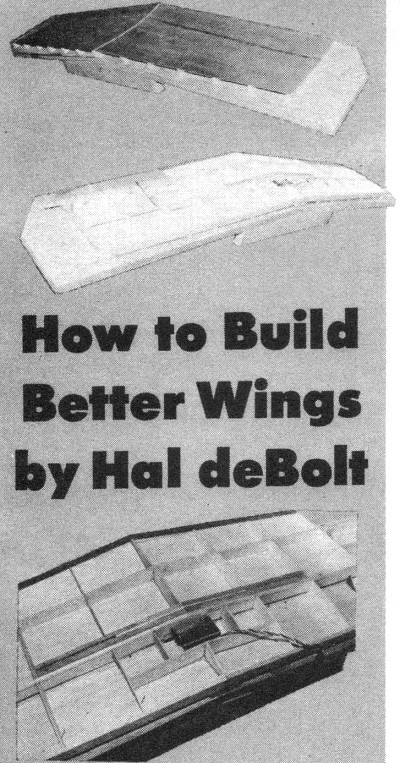
How to Build Better Wings

Author Harold deBolt in addition to flying as a member of America's
R/C International Team is president of deBolt Model Engineering Company.
By Hal deBolt
May I tell you a little story? Several years ago I was testing a new model of
different design and came up with a perplexing problem. This plane just did not
seem to have any directional stability; one time it would want to drift to the left
and the next it would be going to the right. All sorts of adjustments were tried
to make it fly straight but none had the least effect. In fact, it had me pretty
well stumped.
A complete and thorough check was made of the entire model, everything seemed
in order except the wing. The wing had been built without jigs and when a careful
check was made of it several small warps showed up. From what could be determined
these warps should have been cancelling each other out, or at least a definite drift
condition should have been created instead of the "wandering" problem that was present.
We agree that directional stability can be disturbed by wing warps, but it is also
true that other phases of the model design can also cause it.
Some chap asked me how I could pin the trouble down to one thing unless I had
an absolutely true model to start with. I decided that from then on I would be certain
that I had true wings and to be positive of this I would build all my wings in jigs.
Before this I had always hesitated when it came to the idea of a wing jig because
I figured it was an awful lot of work and some expense. Now, I can say that the
expense is less than the cost of one warped wing and the time is made up manyfold
by the ease of assembling a wing in a good jig!
Today's R/C models are flying faster and faster and we are asking them to perform
many intricate maneuvers. High top speeds plus normal low speeds means a great flying
speed differential with our models.
Warps do not like these conditions at all. We can adjust for the effect of a
warp at a given air speed, but it is almost impossible to do it for all flight speeds.
The same goes for a warp in maneuvers, you can compensate for the warp when doing
inside loops but when you perform an outside the problem is accentuated by the adjustment
you made to help the insides! The only real answer is to have true wings.
Then, too, a warp detracts from the efficiency of our model. The warp itself
creates drag; when we compensate for it with an adjustment we have doubled the original
drag. So you are sold on the idea of wing jigs? Let's see what is required to build
one and just what kind would fit our needs.
Generally speaking there is one type of wing construction today, it uses the
so-called D-Section" leading edge spar and usually a trailing edge spar, too. This
type, when it has a straight chord, lends itself readily to a universal sort of
a jig in which wings of many sizes can be built.
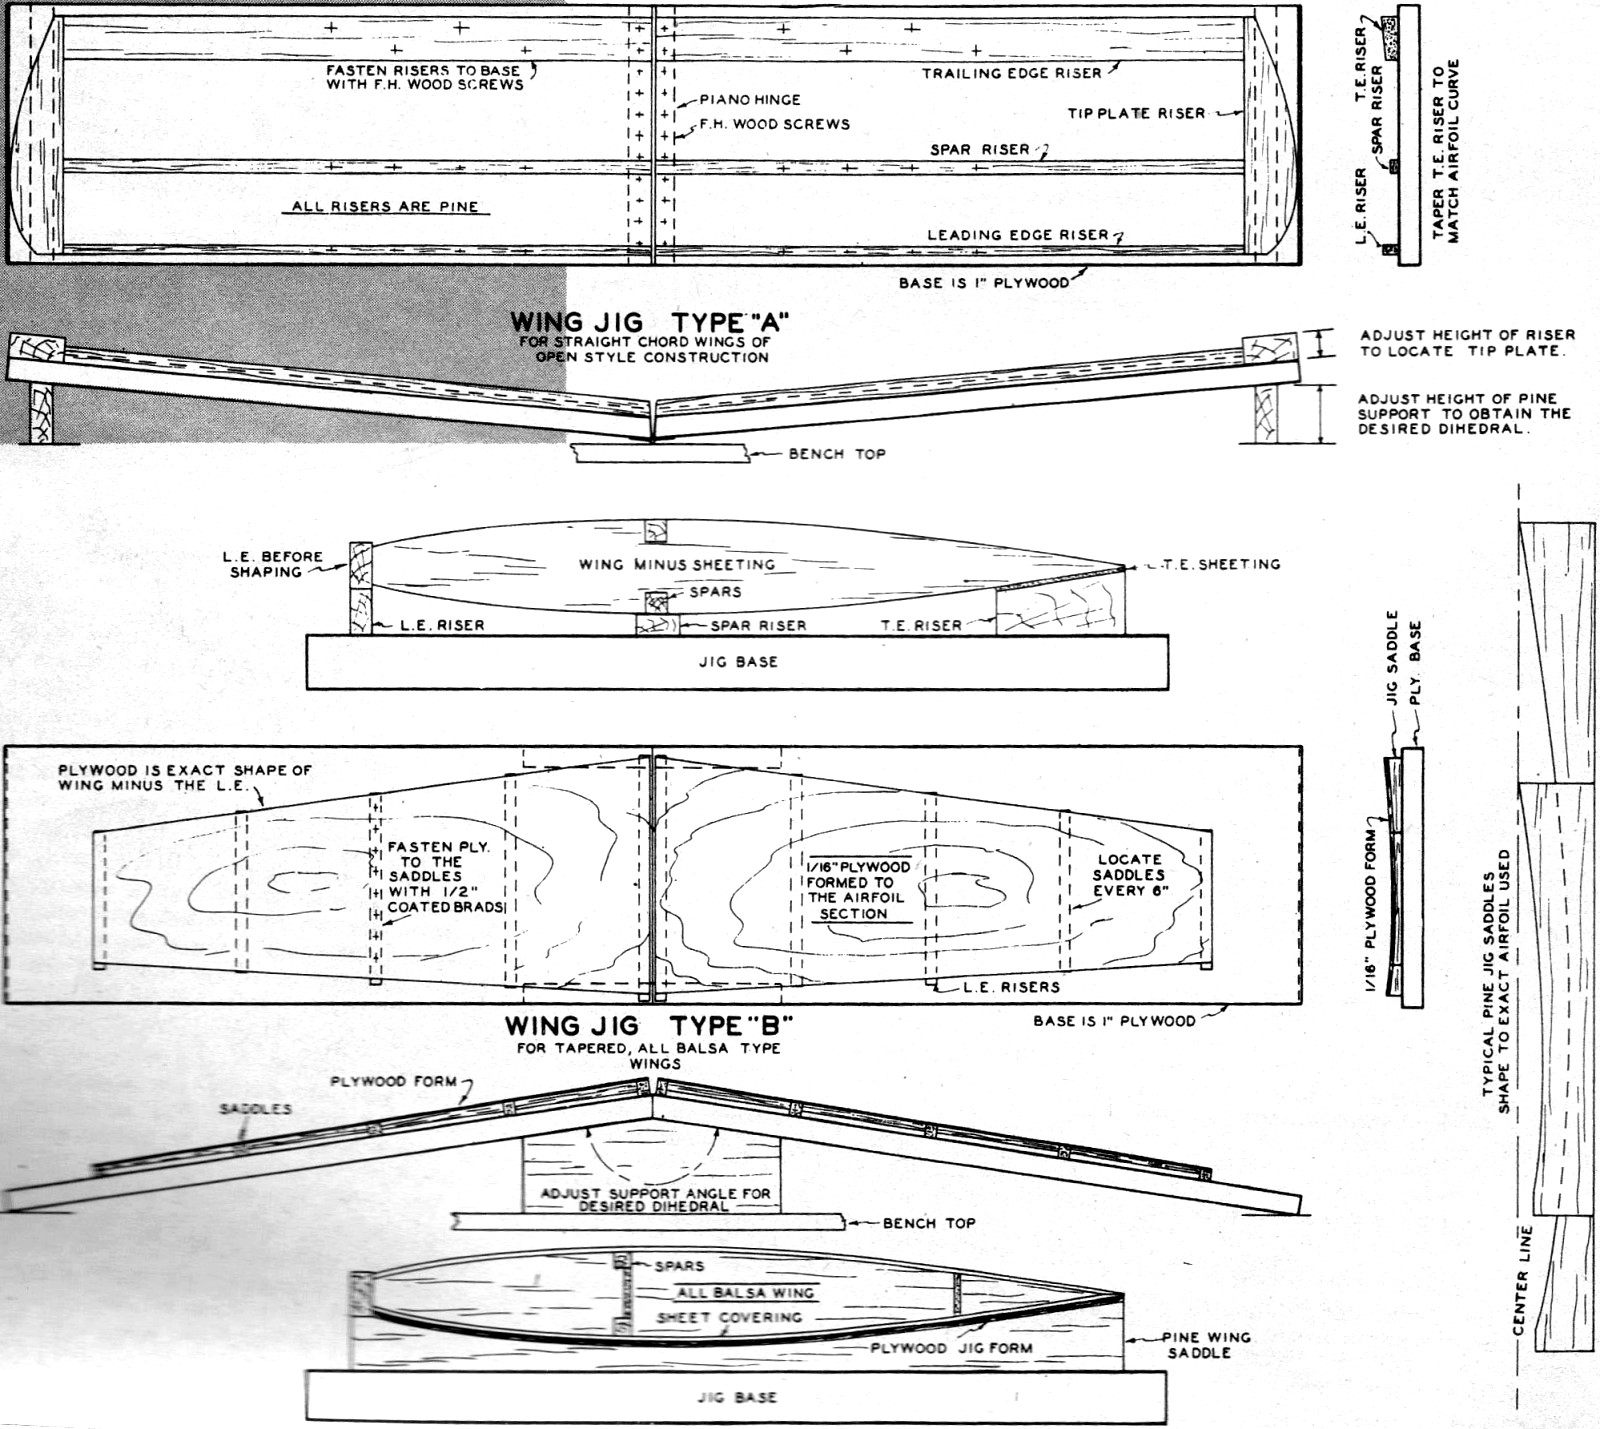
The drawing shows a Style "A" jig, this is the universal one and easiest to construct.
We purposely did not give exact dimensions because they will vary according to the
type airfoil used and the size of the wings which you generally build. The only
item of importance is to choose a base board of straight 1" plywood and a size slightly
larger than the biggest wing you expect to make .

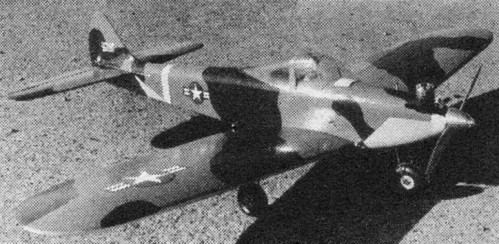
Compound-tapered all-balsa symmetrical airfoil wing job built
in Jig B.
The gimmick behind this jig are "risers" which can be varied in size and location.
For example, let's set up the jig for a 12" chord wing. First you make a template
of the airfoil to be used. Trace this on paper and locate the leading edge, spars
and trailing edge sheeting. Draw a line tangent to the bottom of the spar and parallel
to the center line of the rib. This will be the base line and represent the top
of the jig base. Add the trailing edge sheeting exact size. If you drop lines directly
down to the base line from the leading edge sides, spar sides and trailing edge
sheet sides you will have the exact size of the "risers" needed for your jig. These
should be cut on a circular saw from . straight white pine. When finished fasten
them to the base board and after your jig is hinged, you are ready to begin building
a wing.
Construction is started by placing the leading edge on its riser, the spar on
its riser and also the bottom trailing edge sheeting. The ribs are cemented in place
and the assembly work continued as far as possible before it is removed from the
jig-this includes all dihedral braces.
If you will observe closely it can be seen that wings of various chord sizes
and airfoils can be turned out simply by changing the location of the risers or
their sizes.
Another type of wing is coming into prominence because of its efficiency and
I suppose its better looks. This is the completely tapered wing using all-balsa
construction. These, difficult to build, are practically impossible to construct
true without a jig. The jig labeled "B" was developed to build this type. When I
say developed I mean it literally; our group experimented for a long time before
we found this to be the only practical way to build a jig for this wing type. In
the end it also proved to be the easiest.
Idea behind this is that you actually form the wing in the jig which is built
to match the exact outside contour of the completed wing. The fact that the jig
is one piece of 1/16" plywood means that when this is pulled down into the airfoil
saddles as shown it will naturally assume all the compound angles necessary for
the actual wing's surface. This characteristic is the secret to the success of this
compound taper wing jig.
The jig shown is also for a surface used on a low wing model. Note that in such
case the wing is built inverted. By assembling the wing upside down it is possible
to complete it before removal from the fixture. If it was built upright it would
be extremely difficult to install the landing gear mounting.
With Type "B" jig we also utilize 1" plywood for the base, only this time we
do not hinge it at the center. Instead, a pine support is cut to the dihedral angle
desired. By changing the angle on this support wings of varying dihedral can be
built.
The true outline of your wing is laid out on 1/16" plywood, this is carefully
cut out. Wing outline is also drawn on the jig base in its exact location. Since
this is a compound tapered wing it is necessary to layout each rib separately. Then
these ribs can be used as templates to make the jig saddles. A saddle is required
about every 6 inches along the span so a rib is selected whose station falls close
to each. The saddles are from pine strips 1/2" thick, width is 1/4" more than half
the thickness of the center rib. A saddle is cut to length for each station on the
jig - center, middle and end saddles are made longer to act as risers for the wing
leading edge. On the two center saddles scribe a center line which 1/4" higher from
the bottom of the saddle than 1/2 the thickness of the rib. Example: If the rib
is 1-1/2" thick, one half of this would be 3/4". So add 1/4" to this for clearance
and the center line of the saddle would be 1" from the bottom edge.
Now that the height of the center line has been determined a center line of the
same height can be drawn on each of the saddles. Next the shape of each corresponding
rib can be drawn on the saddles using the center lines laid out for the purpose.
These shapes are cut into the saddles and carefully finished to size. The saddles
are now fastened to the base board and the plywood nailed to them. To fasten the
plywood down you line it up with the saddles and nail it down the center with one
brad in each saddle.
 Then you work from the center out to the
edges nailing as you go, this will assure that the plywood forms exactly to the
saddles and thus the true shape of the wing. Then you work from the center out to the
edges nailing as you go, this will assure that the plywood forms exactly to the
saddles and thus the true shape of the wing.
To build this all-balsa wing you first glue up some 2" wide sheets on a flat
surface until you have a width greater than the maximum chord. It is important to
use 2" as the glue seams act as strengtheners for the skin spanwise. After these
have thoroughly dried they can be cut to the outline shape of the wing panels. They
are sanded well with a sanding block until the surface is smooth. Now the two skins
are put into the jig and located correctly by fitting the center line joint. Once
fitted the center seam is cemented and the skins are pinned to the plywood surface.
The top spar is cemented in place. This is followed by the ribs and lower spar.
At this point the wing construction is well along and can be completed in an
orderly manner. When everything is in place and the aileron linkages installed you
are ready for the bottom covering. This is put on a piece at a time instead of a
whole skin as was done for the top. After the bottom skin sheets are installed it
is wise to leave the structure in the jig for at least 24 hours to assure that all
internal cement joints have dried. You now have a wing which is true; it is completed
by final sanding and covering.
These jigs can be used over and over again and more than one builder can take
advantage of them. This makes them a very desirable club project, something everyone
can lend a hand in preparing.
For the R/C flyer who has a brand new expensive multi-channel model ready for
its first test hop it sure is reassuring to know that he has a true wing on it.

Harold deBolt's Wing Building Jig
Notice:
The AMA Plans Service offers a
full-size version of many of the plans show here at a very reasonable cost. They
will scale the plans any size for you. It is always best to buy printed plans because
my scanner versions often have distortions that can cause parts to fit poorly. Purchasing
plans also help to support the operation of the
Academy of Model Aeronautics - the #1
advocate for model aviation throughout the world. If the AMA no longer has this
plan on file, I will be glad to send you my higher resolution version.
Try my Scale Calculator for
Model Airplane Plans.
|