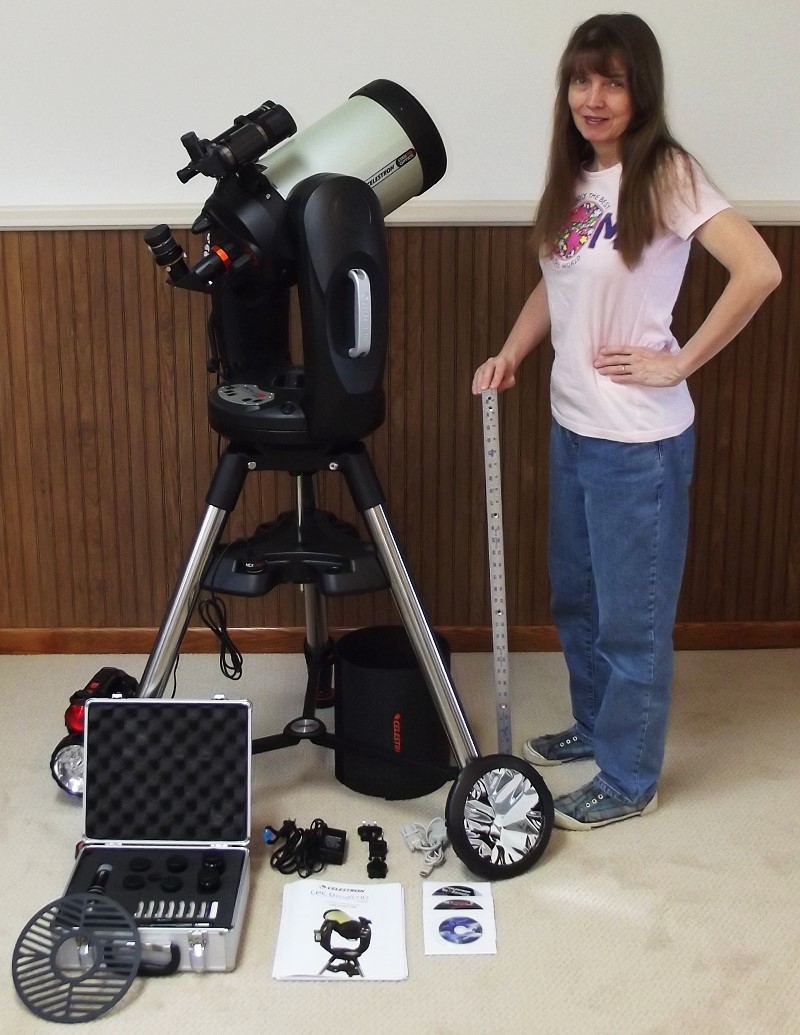
Tripod legs fully retracted and the
equatorial wedge is NOT installed. Melanie is holding a yardstick for size
reference.
It only took 32 years, but I finally have the telescope I have dreamed of having
since first peering through an 8" Celestron telescope at a meeting of the Macon
Astronomy Club of Macon, Georgia, while stationed as a radar maintenance technician
at Robins AFB, Georgia. In September 2012, I made the decisions to purchase Celestron's
high-end CPC Deluxe 800 HD telescope. It is a fine piece of work. A year and a half
ago I bought the Celestron NexStar 8SE telescope as my first scope in 20 years.
At the time it did not seem prudent to spend north of two thousand dollars on a
telescope when I didn't know for sure whether the enthusiasm would still be there
after so long. The single arm of the NexStar 8SE mount gave me pause, but after
reading comments by many people on some of the astronomy forums, it seemed to be
good enough for casual observing and entry level astrophotography, and indeed it
was.
Many sessions have been spent out in the yard with the NexStar 8SE, re-familiarizing
myself with the night sky and even taking some pretty darn impressive (for me) pictures
of Mars,
Jupiter, and
Saturn using the Celestron
NexImage camera and RegiStax software. At first I was a bit disappointed with the
GoTo and tracking on the NexStar 8SE, but the more I worked with it, the more I
realized that most of the issues were due to my not properly leveling the tripod
and/or not having the alignment stars exactly in the center of the reticle eyepiece
when pressing the Align button. Because of the single arm on the mount, it was sensitive
to winds more than a few miles per hour, and under high magnifications (17 mm
eyepiece or smaller) it was difficult to focus while holding onto the focuser knob.
The solution to focusing was to add a JMI electric focuser so that I never have
to touch the telescope.
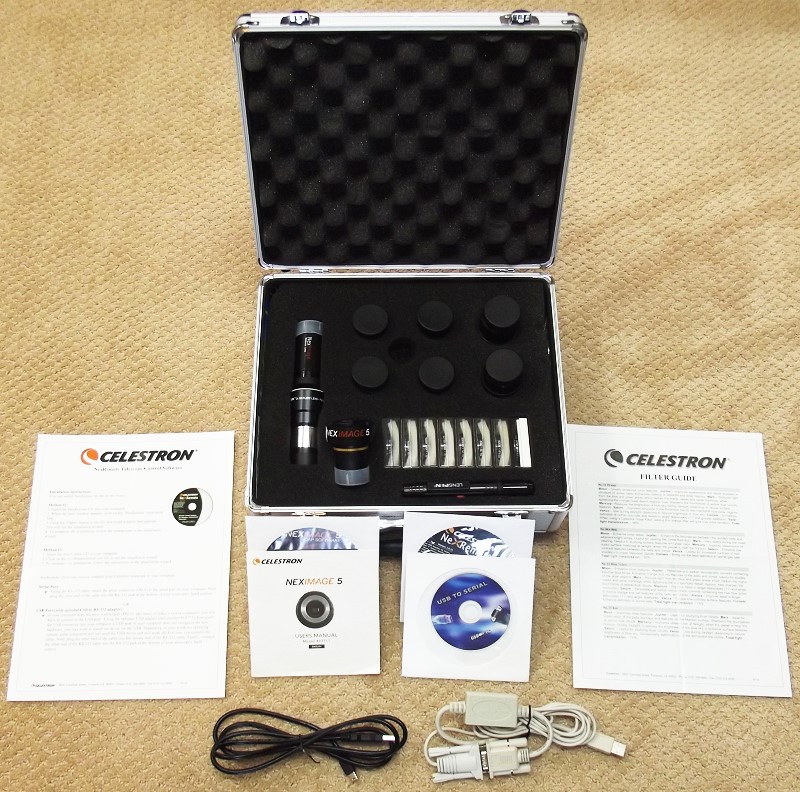
Eyepiece case, software, and cables.
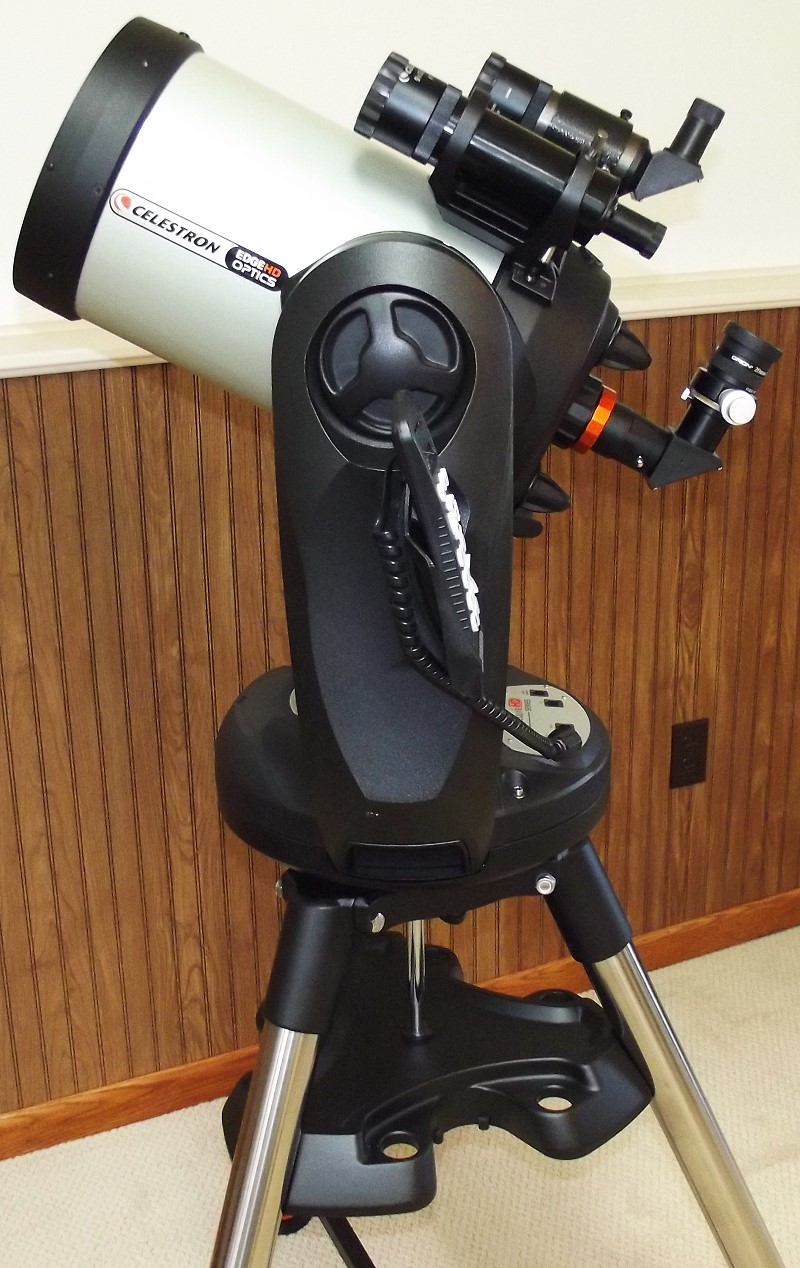
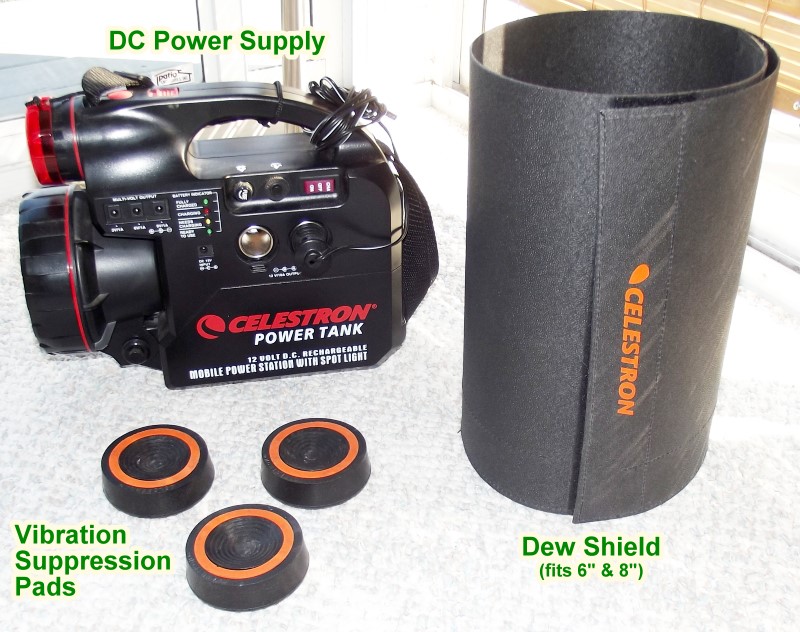
Dew shield installed.
Lfft side.
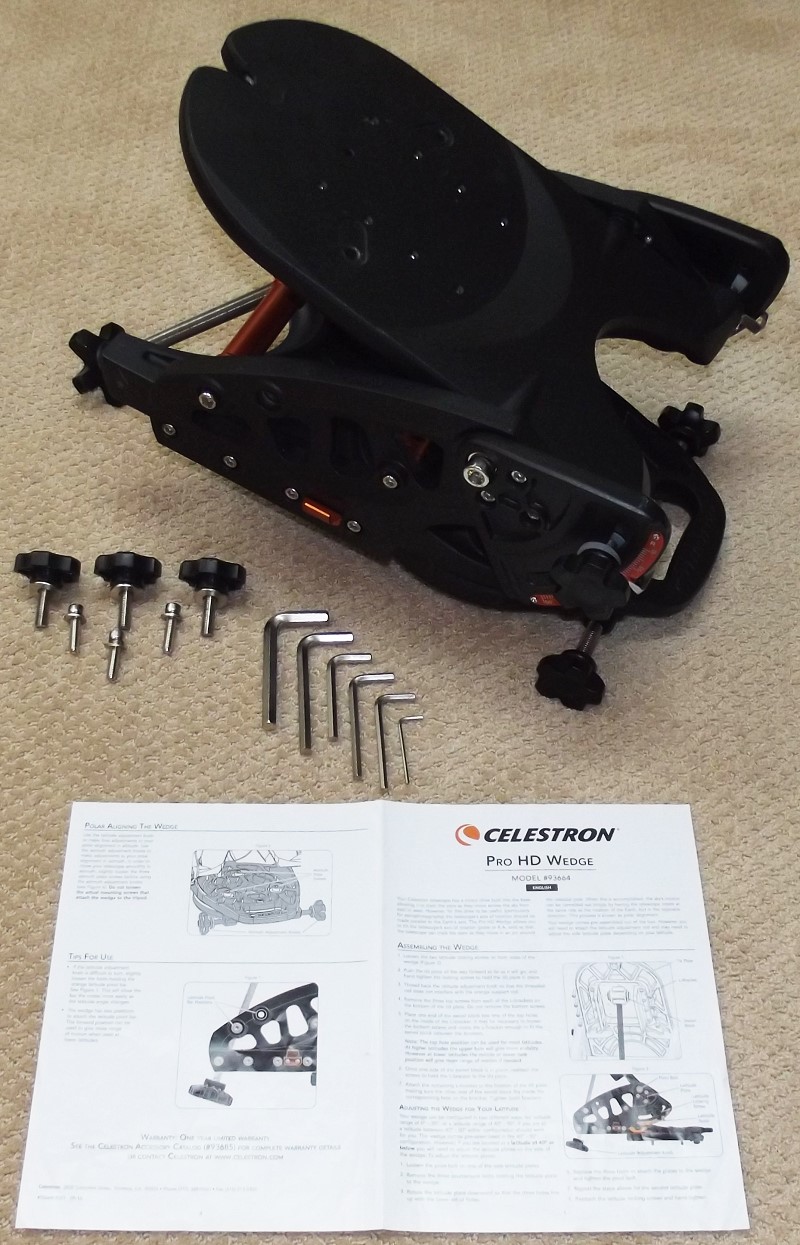
Celestron Pro DH Equatorial Wedge -
works with up to 11" telescope.
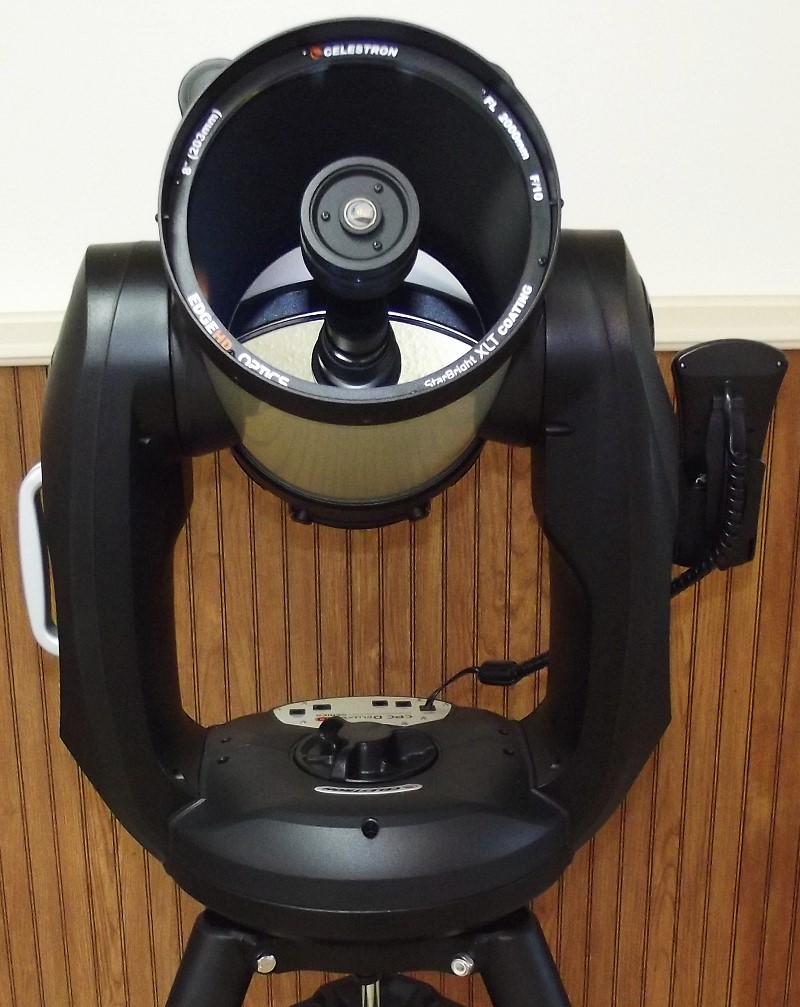
Front view.
Right side.
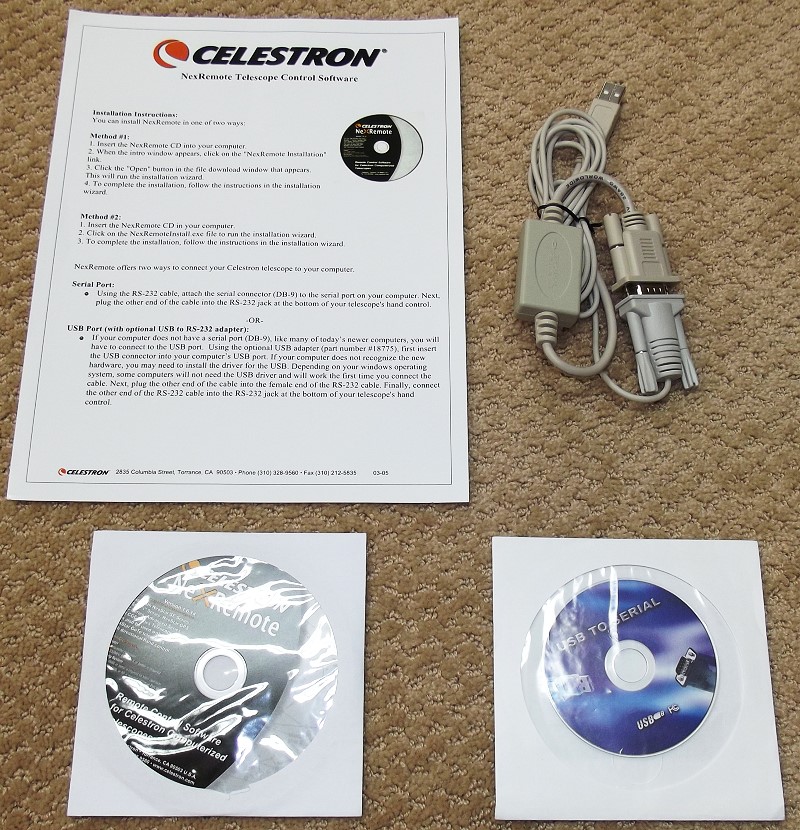
NexRemote and USB-to-Serial software
and cable.
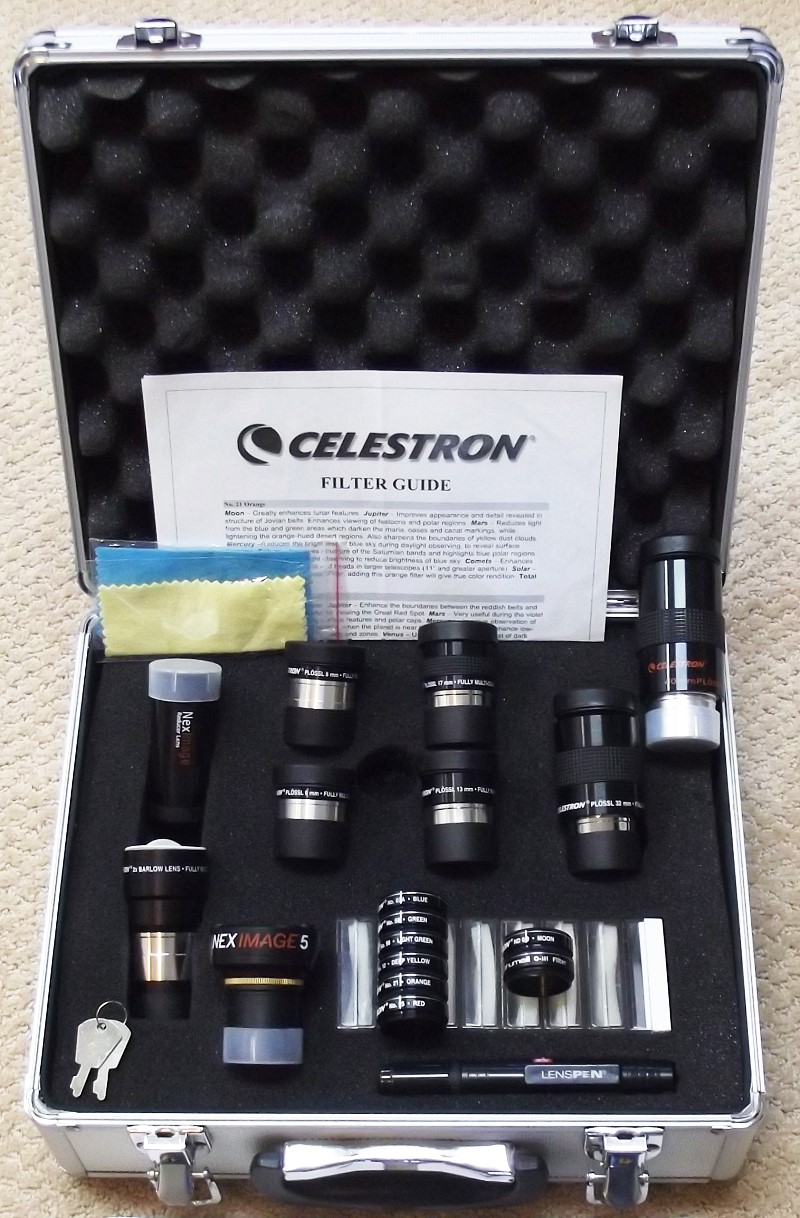
Close-up of eyepieces and filters with
readable numbers.
Power Tank & cable.
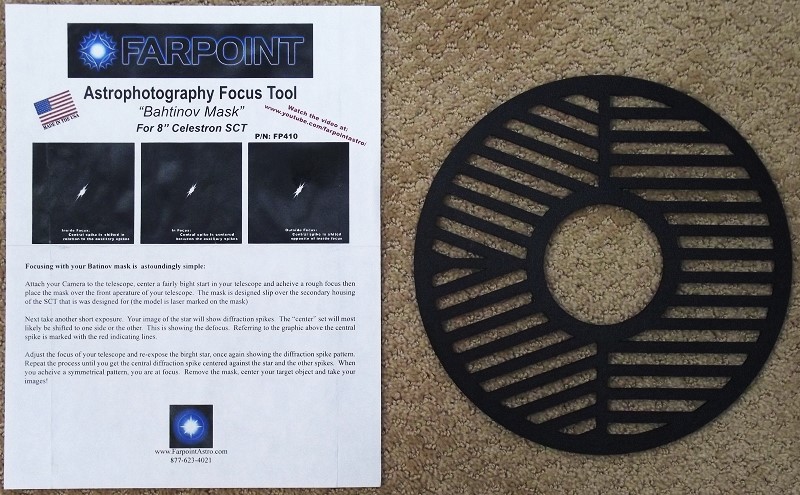
Bahtinov Mask.
Celestron NexImage5.
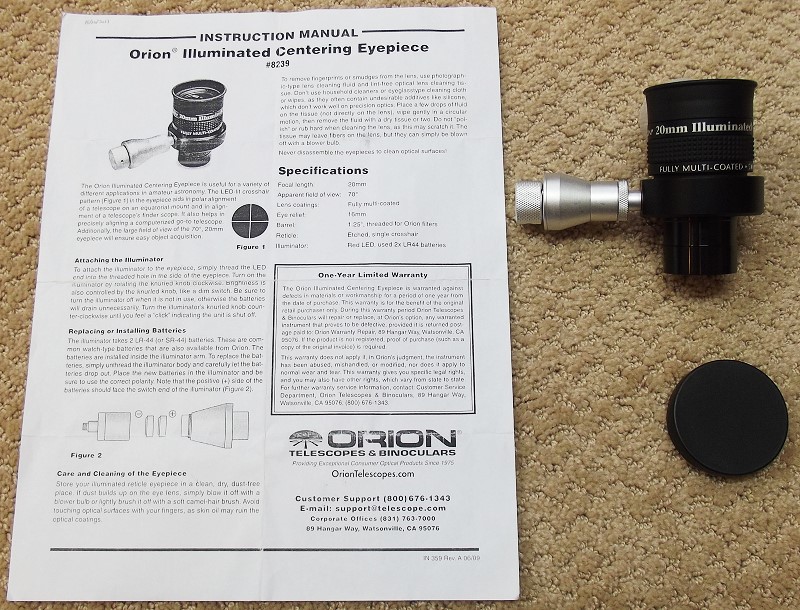
Orion 20 mm illuminated reticle
eyepiece.
All the included paperwork and software.
Back view.
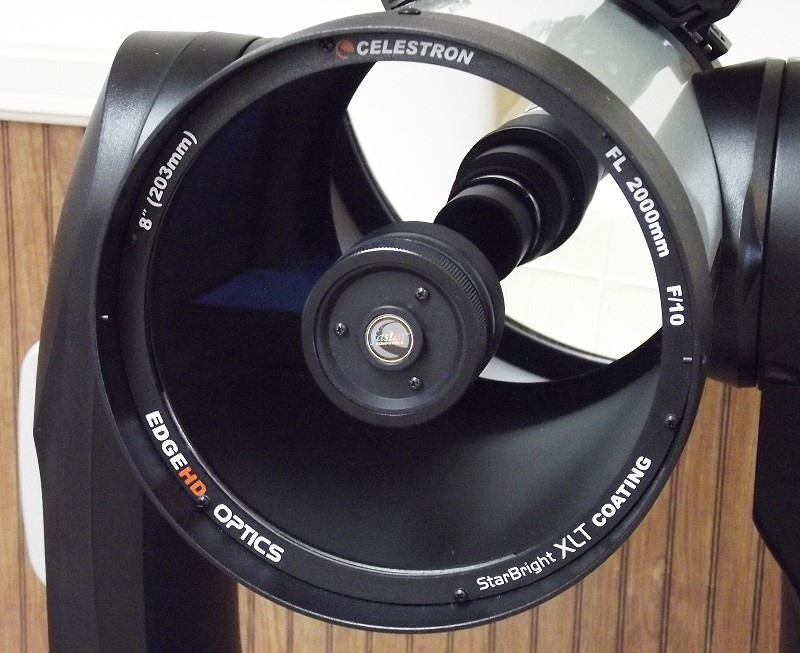
Corrector lens.
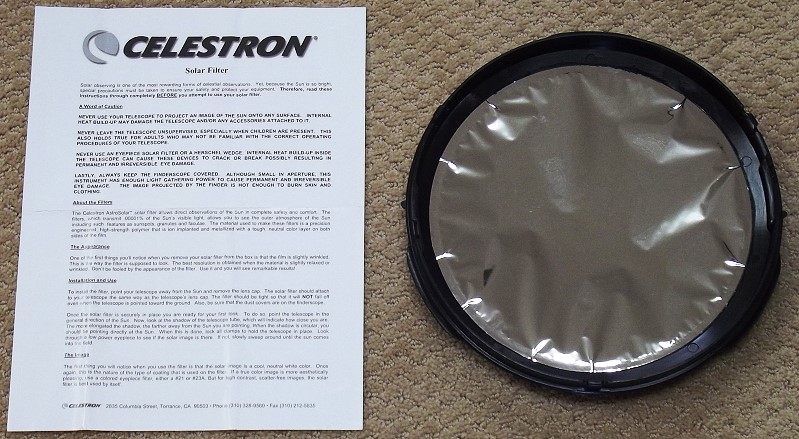
Celestron Baader solar filter.
After much deliberation, I decided that a higher-end instrument would be required
to do more than just casually peruse the heavens, so the CPC series was the definite
choice; it was just a matter of whether to spend the extra few hundred dollars for
the Deluxe HD model. I could not find a whole lot of particulars about the Deluxe
HD on forums, so I sent a note to Celestron asking if there is any difference between
the optics and/or the mount. The response was that the Deluxe HD has the coma-free
optics and removable secondary mirror for f2 photography, and that the drive system
is improved to facilitate professional level photography. So, I figured the additional
$400 was worth the price. The rest, as it is said, is history.
Right after paying for the telescope, I bought a Feathertouch SCT MicroFocuser
because it comes so highly recommended by users on forums. I made a short
video showing the focuser installation; it took less than 7 minutes from beginning
to end. Unfortunately, the skies have been cloudy every night since I got it and
therefore I have not been able to test it. Looking at terrestrial objects during
the daytime shows that it seems to be rock steady during focusing with the 10:1
knob. Even with the 1:1 knob and the original rubber knob, the robustness of the
two-arm fork mount and the much heavier mount base proves to be much steadier on
the CPC Deluxe 800 HD telescope than with the NexStar 8SE telescope. Considering
that the NexStar 8SE costs $1,199 and the CPC Deluxe 800 HD costs, $2,499, you should
expect a much sturdier and steadier instrument... and you definitely get it!
First light for my CPC Deluxe 800 HD was September 24, 2012.
Click on any of the images here for higher resolution versions.
The main feature is the incredibly robust and high quality CPC 800 Deluxe HD
telescope. I had an 8SE before this, and the comparison is like night and day. Whereas
the 8SE was very shaky because of its single support arm and getting a good alignment
was sometimes tricky, the CPC 800 Deluxe HD is solid as a rock and achieves an excellent
alignment every time with very little effort.
The tracking in alt-az mode is very precise and utterly sufficient for short
exposures like for planets, the moon and the sun, and for visual observing for any
length of time. However, long time exposures require operation in the equatorial
mode in order to prevent light trails due to the Earth's rotation. That is where
the heavy duty Pro Equatorial Wedge comes in handy. It easily mounts between the
tripod and the base of the standard alt-az dual fork mount. I have been amazed at
how long the telescope will track in both modes when a careful alignment is made.
A good quality
1.25" eyepiece and color filter set is included to provide very nice visual
observations of planets, nebulae, galaxies, and clusters. Eyepiece focal lengths
are 6 mm, 8 mm, 13 mm, 17 mm, 32 mm, and 40 mm. The
Pleiades just fit into the 40 mm field of view. It also has a 2x Barlow lens
and a
NexImage reducer lens.
I also added a sky glow filter and
Baader solar filter made by Celestron to fit this telescope.
The Baader, in covering the entire input aperture, is the only safe method of solar
observing since it prevents the possibility of heat build-up inside the tube. Seeing
sunspots real-time is very cool. BTW, finding a Baader filter that fits the CPC 800
telescope is very difficult.
The
Celestron NextImage 5 video camera (5 Mpixels) records excellent video
files for use with stacking software like the free
RegiStax software. It is meant
only for photographing very bright objects. You cannot do nebulae or dim clusters
or galaxies. For that, you will will need a good DSLR camera (not included).
The factory-supplied focuser is very good, but I wanted super-fine focusing ability
so I installed a
Feathertouch SCT MicroFocuser. It is a very highly acclaimed focuser. A video
of the installation process is included here (the manufacturer uses my video on
their website).
Two other niceties are the tripod vibration dampers and the dew shield (not heated).
Prior to using the dampers, vibration from cars passing by on the road about 50
feet from my observing location was noticeable. Using the dampers completely eliminated
the annoyance. The dew shield eliminates the nuisance of condensation building up
on the corrector lens at the front of the telescope.
A 20 mm illuminated reticle eyepiece
is a big help in getting a good alignment since it allows you to get your reference
object precisely in the center of the field.
An AC/DC converter comes with the telescope, but I also bought the 12V Power
Tank battery supply in order to avoid interruptions from line voltage dropouts.
The CPC Deluxe 800 HD will run for many hours on a charge.
Also included with the telescope is a serial computer interface for controlling
the mount remotely with the included NexRemote software.
Finally, although I never had an occasion to use it, I bought a
Bahtinov Mask for aiding in obtaining a sharp focus with a camera.
Even during the busiest times of my life I have endeavored to maintain some form
of model building activity. This website has been created to help me chronicle my journey
through a lifelong involvement in model aviation, which
all began in Mayo,
Maryland...
Copyright 1996 - 2026
All trademarks, copyrights,
patents, and other rights of ownership to images and text used on the Airplanes
and Rockets website are hereby acknowledged.