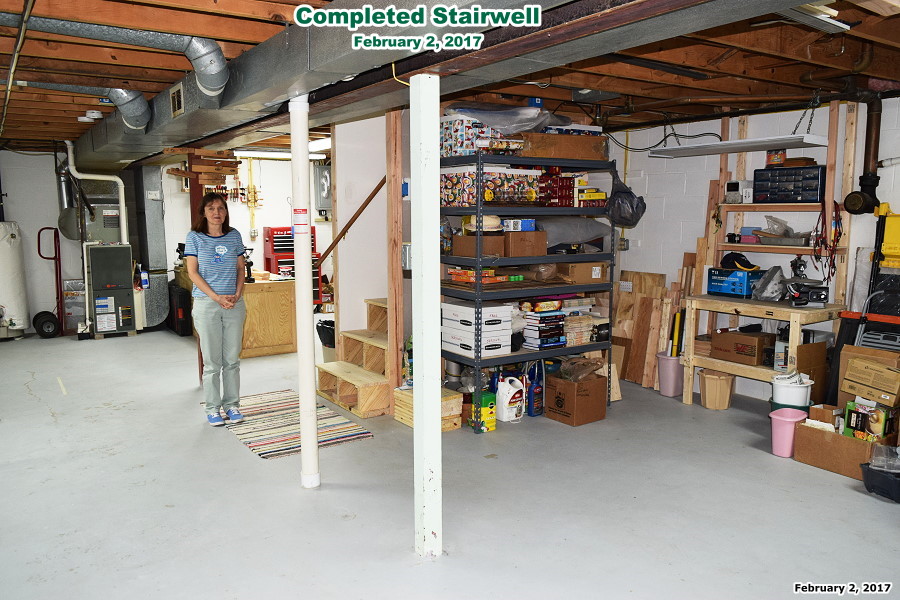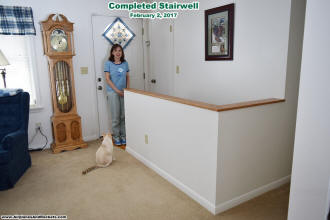
Completed Stairwell with oak shelf atop the half-wall.
Completed stairwell looking from the basement. The treads still need to be stained
and polyurethaned.

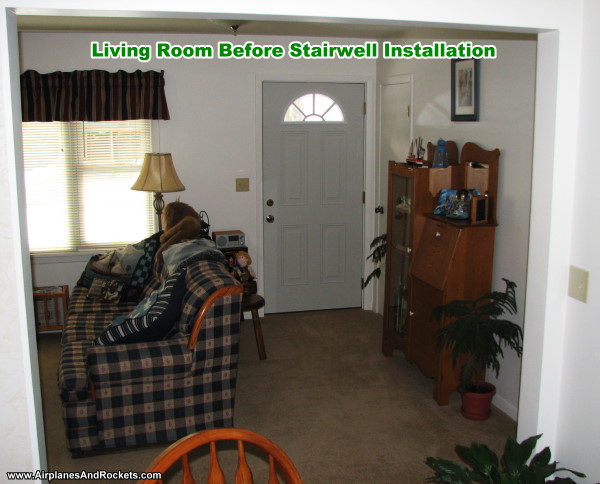
Living room area before stairwell.

Storage area to the right of the stairwell
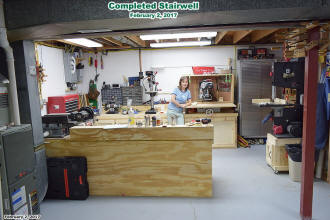
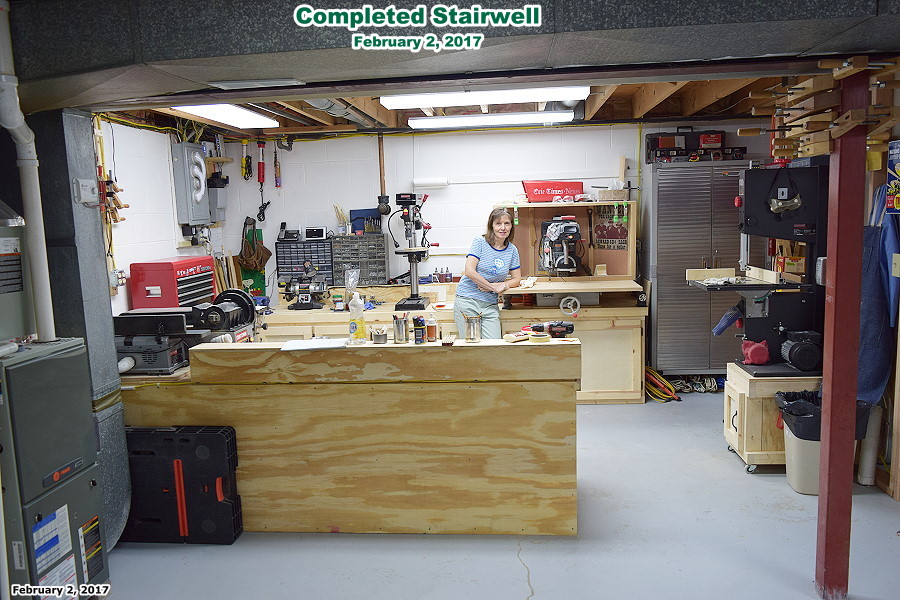
Workshop area to the left of the stairwell
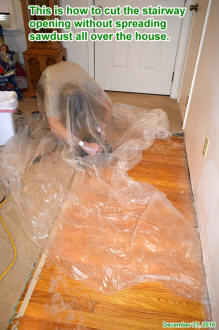
Here is how I contained the sawdust while cutting the perimeter of the stairwell
opening.

Melanie prying up the existing oak flooring.
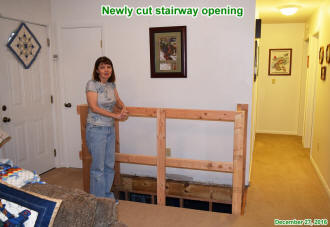
Temporary safety rail around stairwell opening.
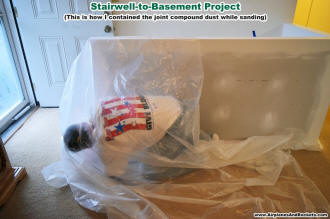
This is how I contained the joint compound dust whilst sanding the half-wall.
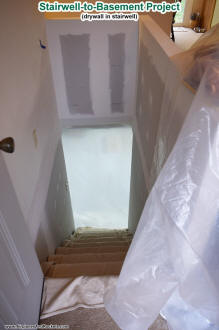
Unfinished drywall in stairwell.
Last December (2016) we decided to finally cut in a set of stairs to
the basement so that going through the garage would not be required (that project
will be documented someday). Our Erie house, built in the 1950s, has never had an inside access
to the basement. Going through the garage was not particularly a big inconvenience, but in the middle
of summer and winter the temperatures could be a bit uncomfortable for that long, 15 second trek from
the kitchen door to the basement door ;-) Still, having inside access seemed to be more 'normal.'
We are a mile from Lake Erie, about 100 feet above it, with well-drained, sandy soil. In the nine
years since we bought it there has never been a drop of water infiltration and no dampness on the walls,
even during the most ferocious rain downpours. In fact, the sump pump has never turned on. A small dehumidifier
maintains the entire basement at no greater than 60% humidity, and it only runs in the warmer months.
Because it is a very inhabitable environment, my workshop and the laundry area are down there, and it
is used for storage.
The main reason for the garage access, I assume, is because the house is rather small - only 920
square feet - so there is is not much room for stairs inside. This is a 3-bedroom, single bath layout
with a kitchen, living room, and small dining area off the kitchen. Many possible changes to accommodate
stairs have been considered over the years, with most of them requiring giving up the smallest bedroom
(8'x11'), but we didn't like the idea of turning this into a 2-bedroom house because the market value
would suffer. The living room area is 11'x18', with one end never really seeming like it was part of
the room because it was in the transition area between the front door, hallway, and dining room. We
finally settled on that space for the stairs.
The real challenge was finding and acceptable slope for the stairs that would allow them to comfortable
fit within the available space and not be so steep that it felt like climbing a ladder rather than stairs.
Standard stairs in new construction are at around a 37° rise/run, but the best I could do is around
47°. The additional 47° is noticeable, but not alarming, especially since the stairs from the garage
entrance are at 45°. The width is about 31", which is a tad wider than the bedroom doorways. Standard
width is 36".
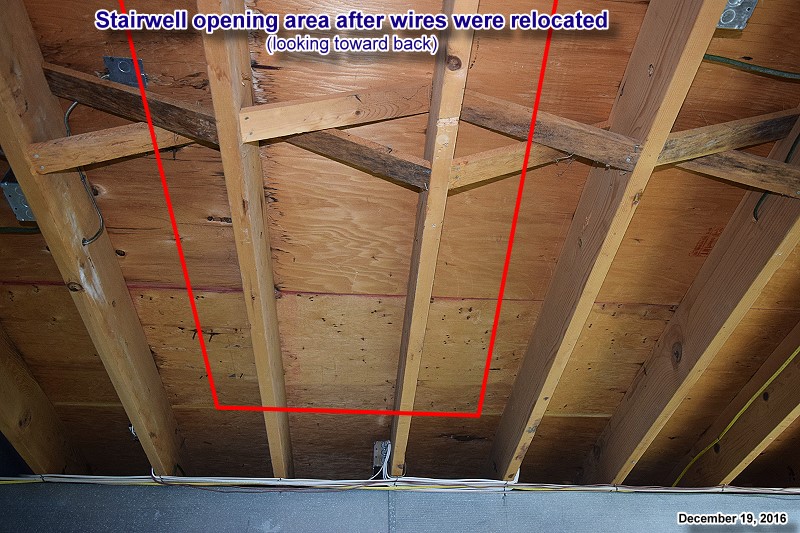
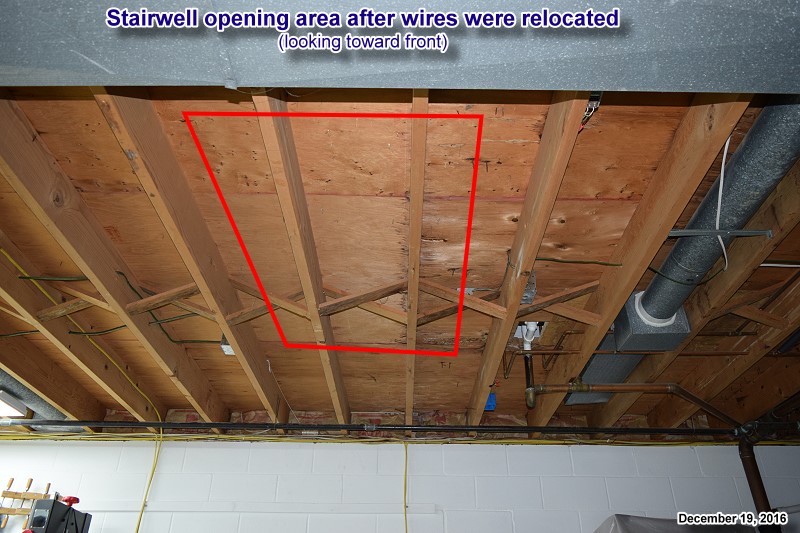
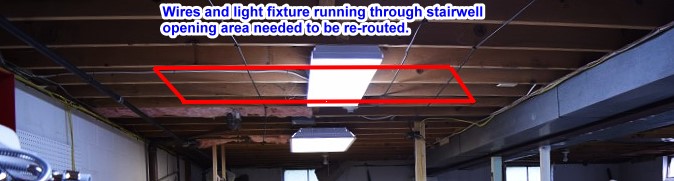
Part of the decision on where to locate the stairs was based on what lay underneath the floor; e.g.,
plumbing, electrical, and HVAC service. The area we selected had a fluorescent light fixture and half
a dozen wires under it. Those were easily relocated/rerouted. The stairwell opening was framed with
double 2x8s (per existing floor joists) running from the foundation to the central "I" beam. Trying
to get full-length 12-foot 2x8x in there would have been a nightmare - if not impossible - so instead
I used an 8' and a 4' for each joist and staggered the joints in the double scheme. Elmer's carpenter's
glue and plenty of screws were used to bond the joists together. That, combined with building 2x4 stud
walls, assures a structure that is much more solid than the original - even with a hole in the floor!
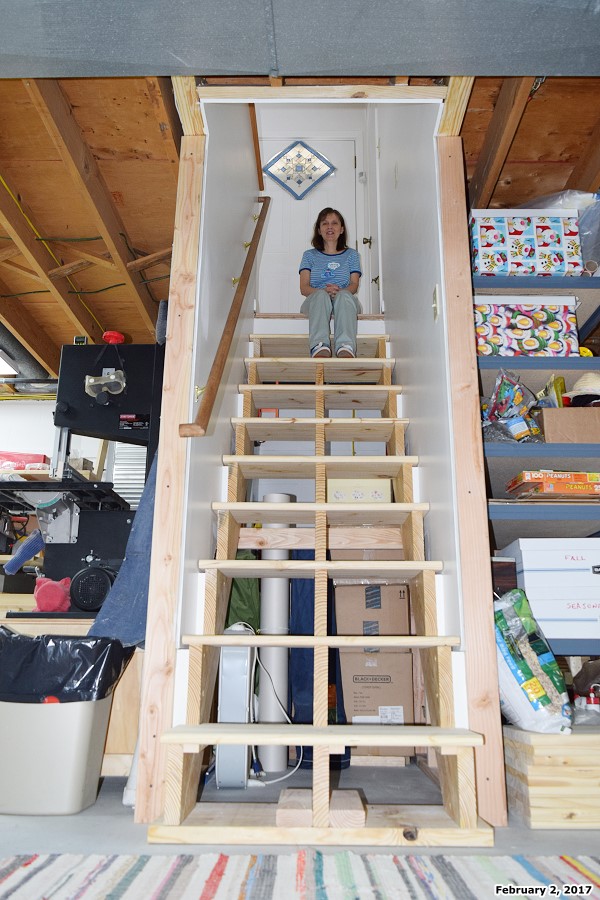
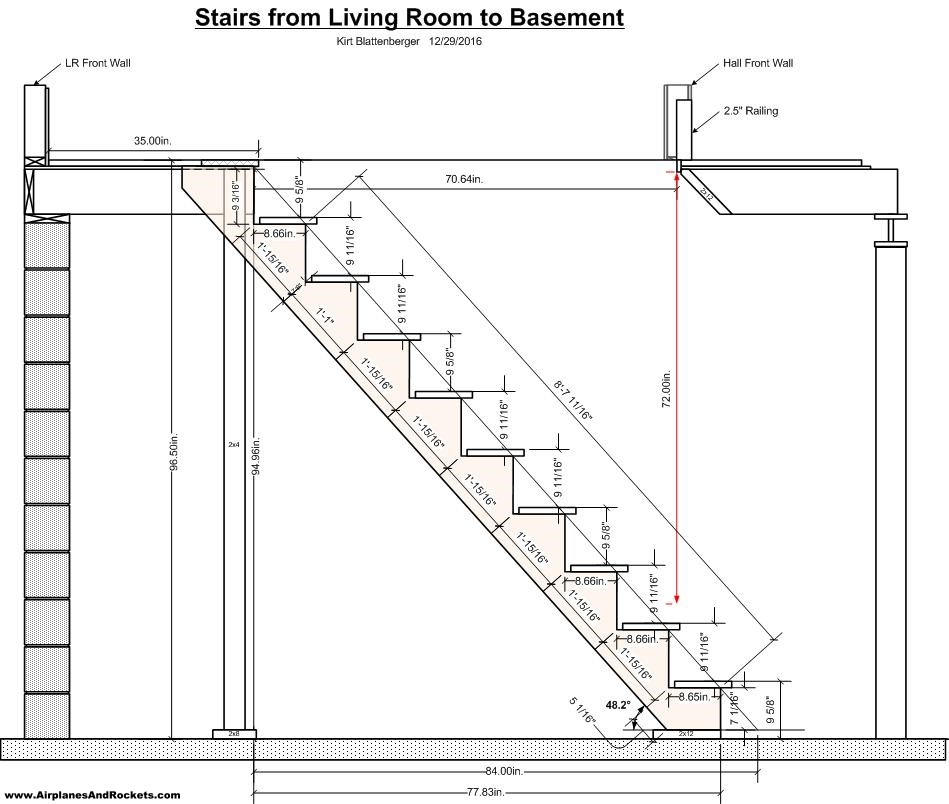
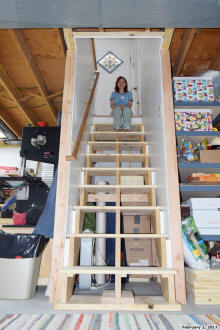
Three stair stringers were cut from 12'-long 2x12s. A layout for the stringers was drawn in Microsoft
Visio based on careful measurements of the basement floor and ceiling. They turned out to be a near
perfect fit, with only about 1/8" adjustment needed to get the treads level across the width. Because
the stair treads are narrower than the standard 11-1/4", I chose to retain the full depth and cut out
notches for the stringers. Doing so allow your foot to land on more surface while ascending the stairs,
but does nothing for descending. Oh well. it's better than nothing.
The house has oak flooring throughout, underneath the carpeting, so I had to cut through and
remove it from the stairwell area - no big deal. Some day we will rip out all the carpet and refinish
the hardwood floors. Wall components were positioned to facilitate a seamless transition from the upstairs
hallway to the new half-wall barrier, and extending the existing wall down the stairwell. It turned
out pretty well, if I do say so myself (and I do).
Not wanting to consume any more floor area than necessary, the half-wall was built from 2x3s with
1/2" drywall covering. Wood joints in the structure were glued with Gorilla polyurethane glue since
it is superior for end-grain joints. Plenty of long screws were used. Liquid Nail construction adhesive
on the drywall, along with screw attachment, made for an extremely rigid structure that is 1" narrower
than if 2x4s had been used.
One of the nastiest aspects of home improvement is the generation of dust everywhere, both from cutting
wood and sanding drywall joint compound. I always use plastic to help contain it. A crude, but very
effective, method I have used for years is to drape a sheet of plastic over me and my dust-making tool
(see photos). If that is not possible, like when sanding a full-height wall, I tape plastic to the ceiling
around the work area. It make a huge difference in the amount of dust that ends up all over the house!
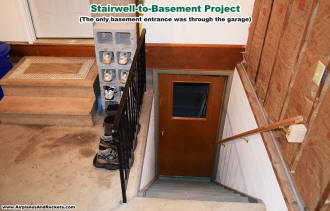
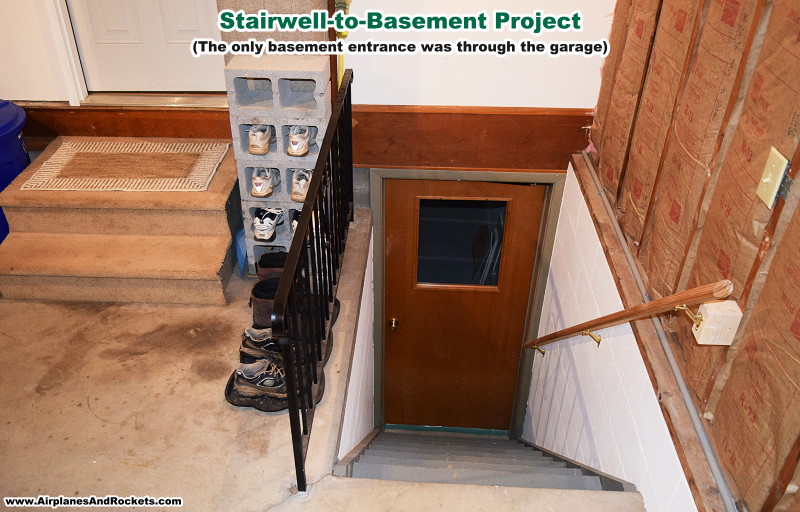
This entry through the garage was the only access to the basement from 1956 through
January 2017.

Stairwell plans drawn in Visio 2007.

This is where the stairs will be located. All of the electric wires need to be routed
around the area.

A view in the other direction.

Electric wires and light fixture originally in stairwell cutout area.
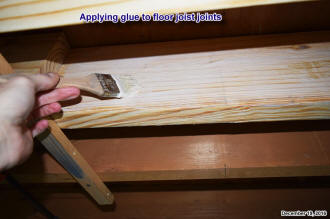
Elmer's carpenter's glue was applied to the double 2x8 floor joists for lasting strength.
Lots of screws were added as well.

Clamping the double 2x8 floor joists while the glue dried.
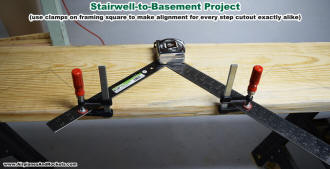
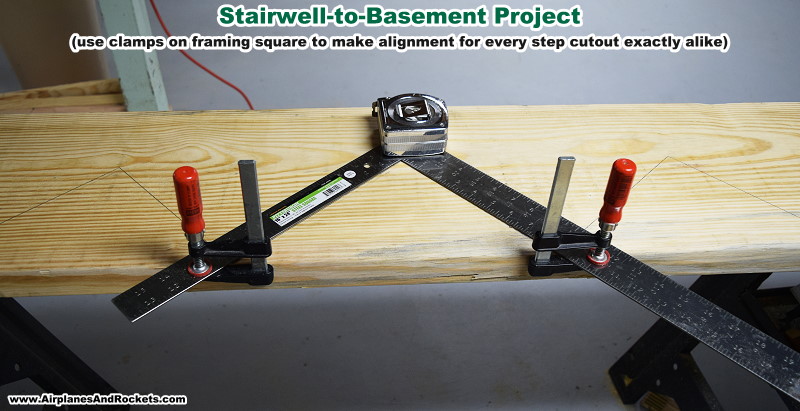
Use clamps attached to framing square to create template that guarantees every riser
and tread cut will be the same.

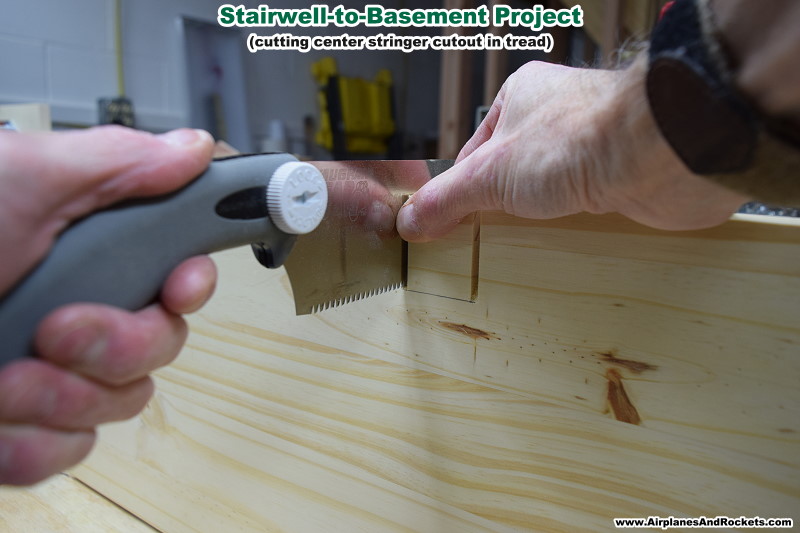
Using straight back saw to cut out center stringer notch in stair tread.

Using chisel to finish cutout in center stringer notch in stair tread.
Other Woodworking Tips & Projects:
Posted February 11, 2017
|