Craftsman radial arm saw used to cut beading pattern, border angle,
and rabbets.
 
Craftsman corner clamps used while gluing. 1/4" wooden dowels used
in corners for strength.
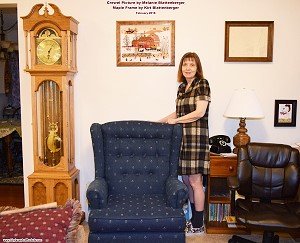
 After just 33 years, this crewel picture that
Melanie stitched is complete and has a custom frame. If memory serves correctly, we bought
the crewel kit at a Ben Franklin store in Severna Park, Maryland, in 1985 while living
in Arnold, Maryland. She started it shortly after getting it, and then it was put away
until last year, 2017, when she decided to complete the project. Most, if not all, of
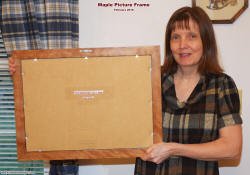
the needlework pictures Melanie has done over the years have been placed in custom frames
made by me. I've used pine, oak, teak, hickory, mahogany, and now maple for this frame.
The maple wood came from a 1950's-vintage typing school desk that we bought at a yard
sale. After just 33 years, this crewel picture that
Melanie stitched is complete and has a custom frame. If memory serves correctly, we bought
the crewel kit at a Ben Franklin store in Severna Park, Maryland, in 1985 while living
in Arnold, Maryland. She started it shortly after getting it, and then it was put away
until last year, 2017, when she decided to complete the project. Most, if not all, of
the needlework pictures Melanie has done over the years have been placed in custom frames
made by me. I've used pine, oak, teak, hickory, mahogany, and now maple for this frame.
The maple wood came from a 1950's-vintage typing school desk that we bought at a yard
sale.
 As you can see from the photos, my modest woodshop
is outfitted with primarily Craftsman tools. I bought my first Craftsman radial arm saw
sometime around 1983. It was on sale for something like $350, and included the leg base,
molding cutter set with 4 patterns, variable width dado blade, guard for the cutters,
and the hold-down clamps. The hold-down clamps are very nice to have and really makes
cuts along the backstop fence much safer. The other really nice feature of my newer radial
arm saw that the original did not have is an electrically-activated saw feed speed limiter
that prevents the spinning blade from digging into the wood and thrust the saw head forward. As you can see from the photos, my modest woodshop
is outfitted with primarily Craftsman tools. I bought my first Craftsman radial arm saw
sometime around 1983. It was on sale for something like $350, and included the leg base,
molding cutter set with 4 patterns, variable width dado blade, guard for the cutters,
and the hold-down clamps. The hold-down clamps are very nice to have and really makes
cuts along the backstop fence much safer. The other really nice feature of my newer radial
arm saw that the original did not have is an electrically-activated saw feed speed limiter
that prevents the spinning blade from digging into the wood and thrust the saw head forward.
A 3-bead shaper blade cut the main pattern, and then a 45° angle was cut on the
outside edge. Then, dado blades were used to cut the rabbet groove for the glass and
picture. After cutting and fitting the frame corners, holes were drilled for 1/4" wooden
dowels. Finally, the maple picture frame was glued and held in the Craftsman corner clamps.
Speaking of those corner clamps, I remember sitting on the floor at the original Sears
store in Parole Plaza and using a square to fine four that had truly square outside corners.
I was amazed at how many were off-square. Those corner clamps have been used on probably
25-30 frames over the decades, so it was worth taking time to get good ones.
The frame was sanded and a single coat of Minwax Special Walnut (#224) stain was rubbed
on with a cloth, then four coats of spray Minwax semigloss polyurethane were applied,
with 320-grit sanding between coats. An old piece of 1/8" glass was cut to fit the frame.
Triangle points are used to hold the back on. Another project done!
Posted February 25, 2018
Other Woodworking Tips & Projects:
|


